Guides
Christmas Mini Room Escape 3 – Walkthrough
****************************************
CHRISTMAS MINI ROOM ESCAPE 3 – WALKTHROUGH
****************************************
Finally, a new game by Neutral! They make the finest and best Escape Games ever. Logical escape, and very amazing graphics. Everyone just have to play this game. But, try to beat the game by your own at first. If you’re really stuck, use this Walkthrough :D
NOTE: In order to move forward into the Forest, just click the Yellow Arrow when you’re cursor is near the Middle of Screen. Or just point your Cursor at the end of the Path!
Walkthrough:
1. Move Left! Look near Bottom-Left side of the 2nd Tree from Left to Right. You can see a Snowman. Click to zoom in Snowman, and take COIN on the Bottom of his Belly/Stomach [You see the 4 Buttons in the middle, just click on the last one, on bottom], zoom out!
2. Move Left! Look on Middle-Right side of screen, and you’ll see a frozen puddle (Short amount of water, usually formed as a circle – frozen). Click to zoom in, and look at the 3rd Tree from Left to Right. If you look next to that tree, you’ll see a Chopped Tree [If you look closely, you’ll see that it has lighter colors than all the other trees on screen]. Click on that Cut Tree, to zoom in! From this view, look at the Tree on Right-Side. You’ll see a Snowman on it’s Bottom-part. Click to zoom in, take the STICK, and zoom out 3 Times!
3. Move Forward! Look near Bottom-Right of Game Screen, and click on the Stone, to lift it. Take the COIN from under! Look at Middle-Right side of Game Screen, and you’ll see a Log. Click to zoom in, and look near Bottom-Right of screen. Another Coin. Click to take COIN, and zoom out!
4. Move Forward! Look at the Top-Left side of the Left-Side Tree. You’ll see a Green Tail of a creature, sticking out. Use stick on that Green Tail, to make the … Snake fall down! Click on the Snake to zoom in, and look between it’s Tail & Bottom-Left of screen. You’ll see a Silver Coin. Click to take COIN, and zoom out!
5. Move Back 2 Times! Click on Frozen Puddle [Middle-Right of screen], to zoom in. Look at the Cut Tree, you can now see a cat! Click on the Cat [Near 3rd Tree from Left to Right], to zoom in. Give Cat the Coins you’ve got, and take the 1st CHICKEN. Move Back, and then go to the Cat again (The will be gone once you move back, so just click on the Cut Tree). The Cat will be Gone! Click on the Brown Mat [Below the Cut Tree], to remove it. Take the KEY, and zoom out 2 Times!
CHICKENS: 1/7
6. Move Forward! Click on the House [Left-Side], to zoom in. Use Key on Door to unlock house, click to open Door, and click inside to enter! Move Right 2 Times, and look at the Right-Side of the Door Opening. You’ll see something white, the only thing Glowing inside the House. Click on the Light Switch [White Glowing button], to turn the Lights ON. Don’t worry about you getting locked inside, we’ll escape soon!
7. Move Right! Open the 2 Doors on Left-Side of Orange Cupboard, and take TREE-SHAPED PIECE. Close the Doors of the Cupboard, and open the Middle Drawer, in the Middle of the Cupboard. Click inside once opened, to zoom in. Take the PEPPER, and zoom out!
8. Move Right! Click on the Orange Pillow, Left-Side of the Sofa, to lift it up. Take the CHRISTMAS STOCKING-SHAPED PIECE. Take the PIECE OF CAKE on Table, and Move Right [If you look on Bottom-Right side of Window, you’ll notice something White and cicle-shaped. Remember that]! Open the Right-Side Orange Door of the Cabinet, and take 2nd CHICKEN! You see the Dark Orange Door of the Cabinet, of Left-Side. Click right under it, to view under the Cabinet. Take the STAR-SHAPED PIECE, and zoom out!
CHICKENS: 2/7
9. Look at the Picture on Wall, and remember the Snowman. Look at the Snowman on Dark Orange Door, also remember it! Move Right 2 Times, and look at the Picture on Wall. Remember that Snowman as well, and Move Left. Place all the 3 Piece of Shapes [Stocking, Tree, Star], where they belong, and Move out of House!
10. Click at the Back-side of the House [Just move your Cursor on Left-Side of House, and click once the Cursor changes into a hand], to turn around! Take the PICK-AXE, and look at the Snowman. You remember him from one of the Pictures, remember the Dots on his Chest [BLUE = Top-Right & Top-Left, YELLOW = Middle, RED = Bottom] – and zoom out 2 times!
11. Use Pick-Axe on Ice Crystals on Bottom-Left of Screen, and take Key from inside. Move Back, and then Move Left! Use Pick-Axe 2 Times on Ice Crystals in Middle. Take the FROZEN CHICKEN from behind, and Move Left 2 Times! Click on the Snowman, at Bottom of 2nd Tree from Left to Right, to zoom in. You remember him from one of the Pictures on Wall. Note the Dots on his Chest [RED = Top, Bottom, Middle] – and zoom out!
12. Click on Frozen Puddle [Middle-Right side], to zoom in. Click on Cut Tree [Near 3rd Tree from Left to Right], to zoom in. Look at Bottom of Right-Side Tree, and click on the Snowman to zoom in. You remember the Snowman from the Dark Orange Door of the Cabinet. Note the Dots on his Chest [YELLOW = Top-Right, Top-Left – BLUE = Bottom-Right, Bottom-Left], and zoom out 3 Times!
13. Move Forward, and click on House to zoom in [Left-Side]! Click inside Door to enter … a Cat! Move Right, and click on Picture on Wall to zoom in. Click the Picture to move it! You remember the Dots from earlier on this Snowman, change the colors as you remember them, or follow me:
TOP DOT = Red [Click 1 Time]
MIDDLE DOT = Red [Click 1 Time]
BOTTOM DOT = Red [Click 1 Time]
The Grey Color = Nothing
Once Done, zoom out. Look at the Left-Side Dark Orange Door of Cabinet. Use Key on that Door of Cabinet, click to open, and click inside to zoom in. Change the Colors as you remember on the Snowman with the Blue Hat, or follow me:
TOP-LEFT DOT = Yellow [Click 3 Times]
TOP-RIGHT DOT = Yellow [Click 3 Times]
BOTTOM-LEFT DOT = Blue [Click 2 Times]
BOTTOM-RIGHT DOT = Blue [Click 2 Times]
The Grey Color = Nothing
Zoom out, and Move Right 2 Times! Click on Picture on Wall, and click Picture to move it. Change the Colors as you remember were on the Snowman with the Gloves, or follow me:
TOP-LEFT DOT = Blue [Click 2 Times]
TOP-RIGHT DOT = Blue [Click 2 Times]
MIDDLE DOT = Yellow [Click 3 Times]
BOTTOM DOT = Red [Click 1 Time]
The Grey Color = Nothing
Once you’re done, just zoom out, and a Secret Underground door will open!
14. Enter the Secret Underground Door, and Move Down! Move Right, and look at the Drawing on Wall. It will tell you that there is a Hidden Chicken on 4th Tree from Left to Right, on a place where there are 5 Trees, and 2 Rocks/Stones. Move Right 2 Times, take Fishing Rod, Move Right, and Move Up 2 Times to get out of Underground Place!
15. Move Left, and get out of House! Zoom out of Hosue View, and Move Back. Move Right, and you’ll be watching a place with 5 Trees and 2 Rocks/Stones. Use Stick on 4th Tree from Left to Right. A Chicken will Pop out everytime you use the Stick. Everytime a CHICKEN pops out, quickly click on it to get it [If you can’t get the Chicken, try a few more times or call your Family members of friends to help you :P]!
CHICKENS: 3/7
16. Move Left, and the Move Forward 2 Times! Click on Snake and Chicken, to zoom in [Left-Side]. Use Pepper on Snake. Once won’t do, so click on the Pepper (It’s not in your Inventory anymore, but on the Screen above the Snake) again, and zoom out. Take the CHICKEN on Right-Side, and Move Back 2 Times!
CHICKENS: 4/7
17. Click on Frozen Puddle [Middle-Right side], to zoom in! Use Pick-Axe 2 Times on Frozen Puddle, and use Fishing Rod on the part where you broke the Ice! You see the Red/Yellow part of the Fish Bait/Hook. You’ll notice that the Red/Yellow part moves after 1-2 seconds. Whenver the whole Red/Yellow part is under the water, quickly click on the Fishing Rod to fish up a Fish! Try this a few times if you can’t get it done. Once you’ve caught the FISH, click to take Fish, and zoom out!
18. Move Forward, and click on House to zoom in [Left-Side]! Click inside House to enter, and give Cat the Fish [Don’t put the Fish on Table, but give it to the Cat]. Now, Move Left 2 Times, and get out of the House. Click inside House to get inside, and note that the Cat is gone with the Fish! Move Left, and also notice that the Right-Side of the Cupboard is now open [It was locked before]. But only the Right-Side Door is open. Click on the Door, next to the one that is Open [The one with the Plates on Bottom-part], and take the Doughnut! Move Left, and get out of the House. Zoom out once!
19. Click on the Log [Middle-Right side], to zoom in! Move your Cursor over the Chicke on Cut Tree, and it will Move. Place the Piece of Cake, on top of the Cut Tree, and zoom out 2 Times. Move Forward, and zoom into the Log again [Middle-Right side]! The Chicken has eaten the Cake. Move your Cursor over the Chicken again to move it, place the Doughnut on top of Cut Tree, and zoom out 2 Times. Move Forward, and Zoom into the Log again[Middle-Right side]! The Chicken is Super-fat. Move your Cursor over the Chicken to let it run into the Log. It will get stuck, meaning that you can simply click on it to get it. Zoom out!
CHICKENS: 5/7
20. Move Back! Click on the Frozen Puddle to zoom in [Middle-Right side]. Wow, the Cat is Back! Click on the Cat from this View [Near the 3rd Tree from Left to Right]. Look how Happy the Cat is. Put the Frozen Chicken on the Fire, and take the CHICKEN once the Ice is melted. Look on Middle-Right side of screen, and you’ll notice a Match Box. Click to zoom in! Click to take MATCH BOX, and zoom out 2 Times!
CHICKENS: 6/7
21. Move Forward, and click on House, to zoom in [Left-Side]! Click inside House to enter. Move Left, and enter Secret Underground place. Move Down, and then Move Right 2 Times. Click on the Cave behind the Chest, to enter!
22. Click on the Match Box in your Inventory, to get some light. Click on the Paper, near Bottom-Left of Cave, and it says that you need a Star and 7 Chickens in order to fill the World with bright Light! Move Forward, and there is the last Chicken. Take the Key from the Chicken’s nest, and click on the Match Box in your Inventory, to deselect it and turn the Light off. Wait a few seconds, until the Chicken returns. Click to take the CHICKEN once it’s in its nest!
CHICKENS: 7/7
23. Click on Match Box in your Inventory, to get the Lights back on! Move Back 2 Times, and use the Key you just got on the Chest in front of the Cave [On Bottom]. Click the Chest to open it, take the Star from inside, and Move Left 2 Times!
24. Move Up the Stairs, and Move Left. Leave the House, and zoom out of the House View! Move Forward, and click on the Stone, in the Middle of the Screen. Put the Star in the Middle of the Stone, and 7 Circle-Stones will appear. Put each Chicke on each of the Stones!
25. Enjoy the Nice and very well done Ending. Once you see a Cake, and the text that says, “ESCAPE SUCCESS!” – don’t forget to click on the Arrow at Bottom of screen, for the Ending Text ;)
All I want to hear right now, is the feedback. I can’t believe that I actually used 1 and a half Hour to write this Walkthrough. I really, really hope this is helpful to everyone. I put all of my effot into this long walkthrough, so please let me hear your thougts, please :)
Type: Ultimate Extremely Extreme Detailed Detail-Walkthrough | 25-Steps [Ending]
Time Used: 1 Hour & 35 Minutes
Written By: Prid


The Sims 4 offers so many skills that it is conceivable not to learn them all.
If you want the best SIM, you can try to teach them every skill available. With such a short lifespan, cheats can help your SIM become the best.
You can use these tricks to boost a Sim’s talent to the appropriate level; you can even max out the skill, transforming it into an instant pro.

Also Read: Pokemon Go Mewtwo Location : Secret Hack Finally Revealed!
How To Enable Cheats
If you’ve used cheats before, you’re probably familiar with how to enable them. If not, we’ll go through the processes quickly. First, depending on your console, press the buttons listed below.
- PC – Ctrl + Shift + C
- Mac – Command + Shift + C
- Console (Xbox and PlayStation) – All 4 Shoulder Buttons
This will open a white box where you can put “testingcheats true”. A notice should appear indicating that cheats are enabled; after this appears, you are ready to go!
How To Use Skill Cheats
The skill cheat format is the same for all skills in the game; you only need to modify the skill in question. The basic cheat arrangement can be seen below.
- stats.set_skill_level [Skill] [Level]
Let us use video game skills as an example. If you wish to raise your Sim’s gaming talents to level ten, use the following hack. This immediately raises the skill to level 10, and you will receive all associated awards.
- stats.set_skill_level Major_Video Gaming 10
Also Read: LoL ARAM Tier List: Best Champions Ranked Players
Cheats For Acting In The Sims 4

Not every talent name is simple. Furthermore, there are several categories of skills, such as major and minor. The cheats for boosting each skill to its maximum level are listed below, organized by kind.
Major Skill Cheats
These are the normal abilities you consider, such as cooking or piano. “Major_” must appear before the skill name to specify the skill category.
- Charisma– stats.set_skill_level Major_Charisma 10
- Comedy– stats.set_skill_level Major_Comedy 10
- Cooking– stats.set_skill_level Major_HomestyleCooking 10
- Fishing– stats.set_skill_level Major_Fishing 10
- Gardening– stats.set_skill_level Major_Gardening 10
- Gourmet Cooking-stats.set_skill_level Major_GourmetCooking 10
- Guitar– stats.set_skill_level Major_Guitar 10
- Handiness– stats.set_skill_level Major_Handiness 10
- Logic– stats.set_skill_level Major_Logic 10
- Mischief– stats.set_skill_level Major_Mischief 10
- Mixology– stats.set_skill_level Major_Bartending 10
- Painting– stats.set_skill_level Major_Painting 10
- Piano– stats.set_skill_level Major_Piano 10
- Photography– stats.set_skill_level Major_Photography 10
- Programming– stats.set_skill_level Major_Programming 10
- Rocket Science– stats.set_skill_level Major_Rocket Science 10
- Video Gaming– stats.set_skill_level Major_Video Gaming 10
- Violin– stats.set_skill_level Major_Violin 10
- Writing– stats.set_skill_level Major_Writing 10
- Baking– stats.set_skill_level Major_Baking 10
- Wellness– stats.set_skill_level Major_Wellness 10
- DJ Mixing– stats.set_skill_level Major_DJ Mixing 10
- Singing– stats.set_skill_level Major_Singing 10
- Pipe Organ– stats.set_skill_level Major_PipeOrgan 10
- Parenting– stats.set_skill_level Major_Parenting 10
- Veterinarian– stats.set_skill_level Major_Vet 10
- Archeology– stats.set_skill_level Major_Archaelogy 10
- Flower Arranging– stats.set_skill_level Major_FlowerArranging 10
- Acting– stats.set_skill_level Major_Acting 10
- Research and Debate– stats.set_skill_level Major_ResearchDebate 10
- Knitting– stats.set_skill_level Major_Knitting 10
- Rock Climbing– stats.set_skill_level Major_Rock Climbing 10
Also Read: Granblue Fantasy: Tier List
Minor & Misc. Skill Cheats
These skills do not belong in the major group and appear to be rather different. Furthermore, some of these skills are above or below 10 levels, so you must adjust the number used.
- Medium– tats.set_skill_level Minor_Medium 5
- Cross-Stitching– stats.set_skill_level Skill_CrossStitch 5
- Entrepreneur– stats.set_skill_level Minor_Entrepreneur 5
- Juice Fizzing– stats.set_skill_level Minor_JuiceFizzing 5
- Media Production– stats.set_skill_level Minor_Media 5
- Bowling– stats.set_skill_level Skill_Bowling 5
- Dancing– stats.set_skill_level Minor_Dancing 5
- Pet Training-stats.set_skill_level Skill_Dog 5
Can You Lower A Skill?

You can also use these tricks to decrease a skill. Fortunately, they are treated the same. For example, if a Sim is at level 8 in the Video Game skill, you can apply the following cheat to get them back to level 4.
- stats.set_skill_level Major_Video Gaming 4
Also Read: Best DPS Tier List in Final Fantasy XIV
Final Thoughts
Your sims’ success will be determined by their ability to confidently and professionally walk into an acting gig. Instead of having your sims practice their acting skills in the mirror for hours, why not just use these cheats to skip the boring and have some fun?

So you’re one step closer to becoming the best trainer in the Pokemon Go league? Your next challenge is finding the mysterious Mewtwo and you’re struggling with it. Well by the end of this article that part of the problem is definitely getting solved.
Mewtwo is one of the legendary Pokemons – both in the game and the franchise. It is a psychic type pokemon which proves to be quite a challenge to many gamers in coveting it. And unlike other wild pokemon’s that you encounter on the go, finding a Mewtwo is quite the task.
But don’t worry, whether you’re just beginning your journey on Pokemon Go or you’re a seasoned traveler, in this article we will unleash all the hacks and routes by which you are definitely going to know the way to Pokemon Go’s Mewtwo’s Location.
How Many Types of Pokemon Go Mewtwo Exist?

Well, catching Mewtwo in Pokemon Go is definitely a bit of hard work and brains combined. Moreover, there is not one, but many types of Mewtwo that you could collect on Pokemon Go.
There are four versions of a Pokemon Mewtwo that you could collect. Yes, you heard that right, Pokemon Go has four variants of Mewtwo. So when you think of Pokemon Go Mewtwo Location – there are four locations, and four ways to find them.
Firstly, there is the normal Mewtwo, or the regular Mewtwo. These are found in raids and you need a similar and strong psychic type Pokemon to battle and capture one. Then there is the Shiny Mewtwo, that you also find in raids but they come rare.
There is also the Shadow Mewtwo. You need to work harder to find this rare type of Mewtwo Pokemon. To get a Shadow Mewtwo, you need to beat Team Go Rocket boss Giovanni. We will soon cover how you will be able to do this, so keep reading to find out.
And last but not the least, there is an Armored Mewtwo. Although to be fair, this Mewtwo type was exclusive to a 2019 Pokemon Go event. This Mewtwo is rarely seen in raids or other events; now on Pokemon Go. So while there is not a specific Pokemon Go Mewtwo Location for this kind, you don’t need to feel bad. The best bet to getting this Pokemon Mewtwo in your collection now is by trading with others on Pokemon Go.
Also Read: Pokémon Arceus Mobile
How to catch Pokemon Go Mewtwo?

So we have covered all bases on the different kinds of Pokemon Mewtwo you could find online on Pokemon Go. But how and where? What is the secret to Pokemon Go Mewtwo Location on the app?
Well, it might take some time and attempts in finding a Mewtwo on Pokemon Go, but the methods are fairly simple.
To find Regular Mewtwo in Pokemon Go there is one simple way. You need to find 5-star raid battles and defeat Mewtwo in those.
Firstly, you’ll need a Raid Pass to participate in a raid battle. Raid passes are found for free by spinning the Gym Photo Discs daily. And if you don’t want that, just purchase one in the game shop.
Also Read: Three Shiny Legendary Pokemon Up for Grab In UK
These high-difficulty encounters feature Mewtwo as the Raid Boss, requiring you to team up with other trainers to take it down. Keep an eye out for Raid Eggs appearing atop Gyms. A hatching Raid Egg with a silhouette featuring horns and a long tail most likely signifies a Mewtwo encounter. Make sure to have a high ranking psychic Pokemon such as Bug, Ghost or Dark to ensure a smooth win. Once you defeat Mewtwo in Raid Battles make sure you have Premier Balls to catch it. Also keep Golden Razz Berries on you, those make winning the battle a piece of cake.
Also remember that shiny mewtwo’s are a 1 in a 20 rare sight in raid battles, so keep your eyes open to finding one.
Shadow Mewtwo’s are a little tricker to find. They are usually hidden in Giovanni’s battle. Giovanni is Team Rocket Go’s boss and winning against him is the gate towards Pokemon Go Mewtwo’s Location to find a Shadow Mewtwo. Perform tasks where you need to battle grunts and catch Shadow Pokemons to get closer to battling with Boss Giovanni.
Also Read: What is Pokemon: Phoenix Rising?
What Pokemons Should You Use To Capture Mewtwo In Pokemon Go?
Mewtwo is a tough Pokemon to defeat in battles. It’s a coveted psychic Pokemon and thus to beat it, one has to use equally strong Psychic Pokemon moves. You can also use Charged Attacks to increase your chances of winning.
These are the Pokemon’s you could use in a Pokemon Go Battle for Mewtwo:
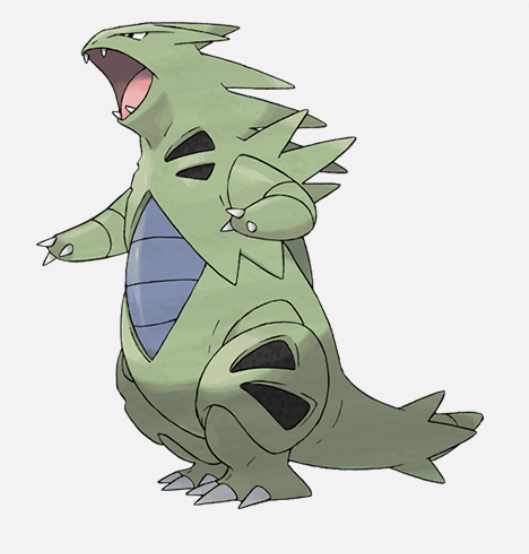
- Tyranitar: It’s a Rock or Dark Type Pokemon. Even though this is not a Psychic Pokemon, it can take enough hits from Psychic Moves. It’s charged Stone Edge Attack really packs a strong comeback against Mewtwo’s moves.
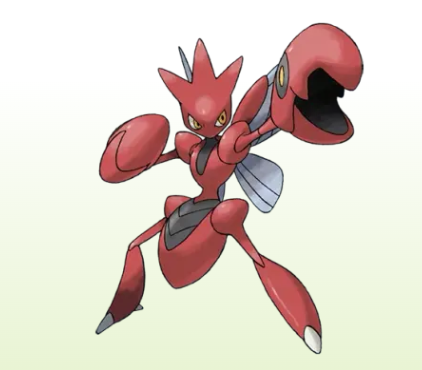
- Scizor: This is a Bug/Steel type Pokemon. This one can also withstand Psychic damage. Its special move is the X-Scissor Move that does heavy damage to Mewtwo.
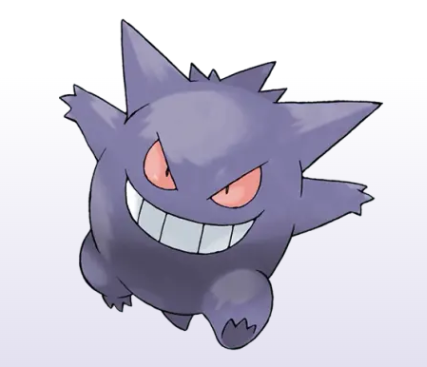
- Gengar: Gengar is a very popular Pokemon. It was one of the top Pokemon used by Team Rocket in the actual Pokemon anime to fight battles. Gengar is a Poison or Ghost type Pokemon. It takes no damage from Psychic moves and instead can hurt Mewtwo with the Shadow Ball Attack.
- Mewtwo: Yes, who said you can’t defeat your own kind? Mewtwo is itself a great fighter against another Mewtwo. Being a Psychic Pokemon, it absorbs the attacks well. Its own Psychic Attacks prove fatal against the competing Mewtwo.
Having the right kind of Poekmon with the smartest moves and attacks, will make sure that you capture a Mewtwo in Pokemon Go easily.
Pokemon Go Mewtwo Location: Secret iOS Hack!
Are you an iPhone or iOS device user playing Pokemon Go? Then smile, because you have the easiest hack to finding not only Mewtwo in Pokemon Go, but all other exclusive Pokemons too!
The iWhere iPhone Location Changer is the show changing app for Pokemon Go players with an iPhone or other apple device. This record breaking tool allows you to fake your GPS locations. What does it mean for you? This means that you can now enjoy playing the Pokemon Go game to the fullest without the hassle of changing locations by actual travel.
iWhere is compatible with all devices and has a lot of gaming modes to make your Pokemon Go experience better and smoother. The app was made for AR games like Pokemon Go.
Also Read: Is a Pokemon Wii U game in the works?
Conclusion
So now you know the different ways in which you can find Mewtwo on Pokemon Go. Even better, you now know that there is not only one kind of Mewtwo collect, but 3 more to discover. Finding a strong Pokemon like Mewtwo on Pokemon Go makes the gaming much better and easier. With a strong Psychic Pokemon like Mewtwo keep being victorious on all your adventures in Pokemon Go!

The CSGO walls command, often referred to as a wallhack, allows players to see through walls, giving them an immense tactical advantage. Though it’s important to use this feature responsibly, players can improve their strategy and game sense by understanding how it works.
Setting Up Your Game for Commands
Before you can use the walls command, you need to enable the developer console in CSGO. Here’s how to do it:
- Open CSGO and Go to Settings: Navigate to the game settings and find the ‘Enable Developer Console (~)’ option.
- Enable the Console: Toggle this option to ‘Yes.’
- Open the Console: Press the ~ key (tilde) to open the console while in-game.
Once the console is enabled, you can start entering various commands to change your gameplay experience.
Also Read: Enjoy4Fun: Your Ultimate Destination for Online Gaming
Activating the Walls Command in CSGO

To activate the walls command, follow these steps:
- Open the Developer Console: Press ~ to bring up the console.
- Enter the Command: Type sv_cheats 1 and press Enter. This enables cheat commands in the game.
- Activate the Walls Command: Type r_drawothermodels 2 and press Enter. This command will enable the wallhack, allowing you to see players through walls.
Understanding the Mechanics of the Walls Command
The r_drawothermodels 2 command alters the game’s rendering of player models, making them visible through walls. It essentially changes the way the game’s graphics engine processes certain elements, providing you with a clear view of all players regardless of obstacles.
Also Read: How to Change Language LoL: Quick Guide for 2024
Practical Applications of the Walls Command
Using the walls command can help in various ways:
- Map Knowledge: It allows you to learn enemy positions and movements, improving your map awareness.
- Strategic Planning: By knowing enemy locations, you can plan your movements and strategies more effectively.
- Training: Use it in private matches to practice spotting enemies and understanding common hiding spots.
Advanced Tips for Using the Walls Command
To maximize the benefits of the walls command, consider combining it with other useful commands:
- Wireframe Mode: Use mat_wireframe 1 to see a wireframe view of the map and players.
- No Clip Mode: Enable noclip to move freely through the map and study enemy positions.
Customizing these commands can provide a more comprehensive understanding of enemy tactics and improve your gameplay.
Also Read: Top 10 Fortnite Dropper Codes for Epic Challenges
Ethical Considerations and Fair Play

While the walls command is a powerful tool, it’s crucial to use it ethically. Using wallhacks in competitive matches is against the rules and can result in severe penalties, including bans. Always use such commands in private or offline matches to avoid disrupting fair play and maintaining the integrity of the game.
Conclusion
Gaining skill with the CSGO walls command can greatly increase your knowledge of the game and your abilities. By turning on the developer console and applying commands sensibly, you can learn a great deal about the strategies and behaviors of your opponents. Remember to use these tools ethically to ensure a fair and enjoyable gaming experience for everyone. Happy gaming!
-
 Guides4 years ago
6 Proven Ways to Get more Instagram Likes on your Business Account
-
 Mainstream9 years ago
BioWare: Mass Effect 4 to Benefit From Dropping Last-Gen, Will Not Share Template With Dragon Age: Inquisition
-
 Casual8 months ago
8 Ways to Fix Over-Extrusion and Under-Extrusion in 3D Printing
-
 Guides5 months ago
Explore 15 Most Popular Poki Games
-
 Guides1 year ago
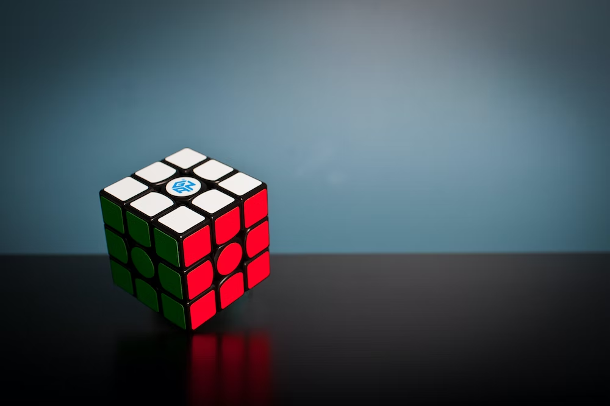
Gan Rubik’s Cube vs. Traditional Rubik’s Cube: Key Differences and Advantages
-
 Uncategorized3 years ago
Tips To Compose a Technical Essay
-
 iOS Games1 year ago
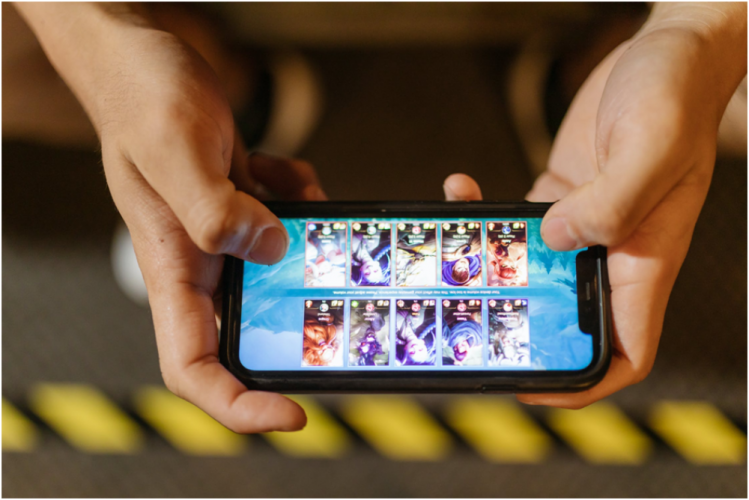
The Benefits of Mobile Apps for Gaming: How They Enhance the Gaming Experience
-
 Mainstream11 years ago
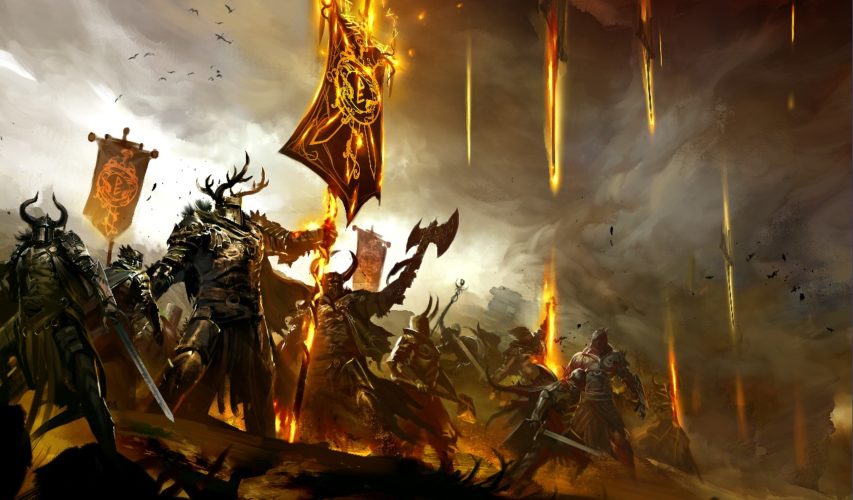
Guild Wars 2: The eSports Dream and the sPvP Tragedy
Bart
December 22, 2009 at 9:46 am
Amazing walkthough dude! Without youre help I doubt I would ever finish a friggin game lol.
Keep up the great work!
Prid
December 22, 2009 at 3:34 pm
@Bart: Thank you so much!
People like you, who compliments my walkthroughs. You are the people that keeps me writing more and more walkthroughs. I am glad that you read my walkthroughs :D
Prid
Beckydi
December 23, 2009 at 4:24 pm
excellent walkthrough!!! very easy to understand…………..thank you
Josefina
February 11, 2010 at 1:56 am
Incredible!!! We couldn´t have made it without your help.
It was very clear and easy to understand!!!!
We followed the walkthrough step by step until we reached the end.
THANKS A MILLION!!!!!
Josefina
fashion
April 3, 2011 at 12:02 am
hello salla koota kamina
carly
June 19, 2011 at 6:50 am
i put the fish on the table and cant get it back! what now?