Guides
Escape the Bathroom Walkthrough
 The fourth title in the “An Escape Series” created by Shawn Tanner is Escape the Bathroom, a fast and interesting game I’m preparing a full walkthrough for right now. So if got stuck somewhere or you simply want to complete the game in a few minutes, the Escape the Bathroom walkthrough here will tell you how!
Full Escape the Bathroom guide:
1. Move one screen to the right and click on the third blue tile from the left. Pick up wrench.
1. Click on the drawer and pick up baking soda.
2. Go one screen back and pick up the plunger near the toilet.
3. Click the toilet, click the plunger and click the toilet seat.
4. Click on the toilet reservoir and use the plunger’s head on the flush valve.
5. Go back one screen and click on the yellow line to the right of the toilet. Use the wrench to turn it on.
6. Go back one screen, click the toilet reservoir and the flush button. The reservoir fills up again.
7. Go back one screen and click on the toilet seat. Pick up the key.
8. Go back and click on the mirror. Use the wood stick with mirror and pick up the mirror shard. Then use the key on the lock and open it. Pick up the toothbrush and the razor.
9. Go back, and click on the sink. Turn it on and press the red button then take the baking soda and use it with the water, the use the toothbrush with the water.
10. Go back and left twice. Go up and use the stick with the square in the upper left corner. Take the hair drier.
11. Go back and use razor with the scribblings on the wall. Use mirror with the numbers and go back.
12. Click the blue energy cell and use toothbrush with it. Use hair drier on it then connect the two cables.
13. Go back and one screen to the right. Click on the gadget near the bath and type the code on the wall (45801) and press enter. Use wrench on the yellow button then go back.
14. Click the bath and turn the water on then use hairdryer with water.
15. Go left twice, then click on the door. You escaped!
Any problems with the Escape the Bathroom walkthrough? Let us know in the comments below!

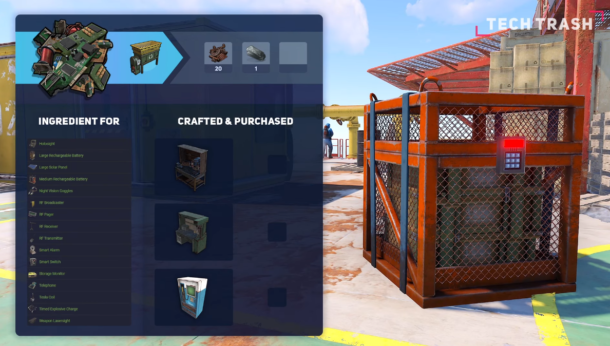
Tech waste in RUST falls into the category of raw materials, which are necessary to produce high-quality products and obtain valuable products through recycling. stolen from high-end boxes and discarded by scientists. Initially it appears to be a quick scrap yard, but later it becomes important for large rechargeable batteries, timed explosives and other electrical components Tech waste recovery use results in more debris and better quality metal particles. They are derived from things like CCTV Cameras and Targeting Computers and are a staple in end-game component boxes, but can also be reused at the start of the game for instant disposal.
Survival in the harsh and unforgiving world of Rust relies on common sense, adaptability, and strategic decision-making. Of the many challenges players face, finding scraps stands out as the most important endeavor. Scrap acts as currency for Rust, needed to build advanced equipment, trade with other players, and unlock technological advancements. In this comprehensive guide, we explore a variety of scrap acquisition methods, from gambling and PvP battles to trading, recycling and scrapping, empowering players to pick up a hard to get right through it and win.
1. Scavenging: The Path to Prosperity
Starting a dust tour reveals a safe and efficient way to collect scraps in Rust’s unforgiving territory. Players can collect scraps and reusable items by roaming various lands, rolling barrels and crates, and braving dangerous relics. This mode requires nothing but time, and gives players the freedom to explore the vast world, participate in PvP encounters, and collect damage in a variety of ways Whether solo or in a team, players can ensure survival and success in the harsh terrain of Rust.
Also Read: Tunwin365.com: Unleashing The Power Of Online Gaming
2. Recycling: Turning Trash into Treasure
Within the intricate fabric of the living Rust landscape, recycling stands out as a beacon of reliability and efficiency, providing players with a viable option acquire debris by carefully salvaging various materials and supplies from recycling centers scattered across the broad map, where each salvaged item comes from is not wasteful not only the valuable items It also means that they can be opened, all have proven to be minimally dangerous, thus providing players with a consistent and reliable source of damage as careful management and maintaining a strong financial footing in the face of ever-evolving challenges and the adversities of the game.
3. Trading: Forge Alliances, Secure Prosperity
The dynamic economics of player-to-player trading in a server environment appears as a profitable way to purchase needed items through popular scrap This process involves multi-faceted transactions about, from the use of offline vending machines for automated transactions to complex in-game transactions Despite the presence of external threats such as soft attacks, where the exchange of surplus goods consists of demand for goods or expenditure of value, this form of bargaining creates a sense of community and solidarity among players, we form alliances and foster relationships that it can develop into a sustainable partnership, ultimately for the good of each other Supporting and enabling the flexibility of all involved is the ever-changing dynamics of the Rust living landscape.
Also Read: A One Piece Game Fruit Tier List [Complete Guide]
4. PvP and Raiding: High Risk, High Reward
Venturing into the realm of player-to-player warfare and raiding enemy bases provides an incredible opportunity for scrap, albeit intense engagement against high-risk opponents will charge or venture into their protected area holds the promise of finding valuable scraps Remains de Eve Despite the inherent dangers that lie among these endeavors, the joy of its PvP sessions and based campaigns are unmatched, with players sharpening their combat prowess and seizing opportunities to loot valuable loot and items through the dangerous, adrenaline-fueled landscape of Rust so It is advanced.
5. Gambling: Risk and Reward
Although generally considered the most dangerous and uncertain option, gambling in the Rust offers a lucrative return on investment A casino that houses a pirate camp or the park in the middle of the swamp dangerously calls players their hard-earned goods for the tempting promise of lucrative returns Despite flaws, the casino provides players an exciting opportunity to test their luck, and can reap significant rewards With only a low stake required to play initially, players can undertake this adrenaline-fueled adventure, where there is a chance that they will the spoils are great and the great wealth is amassed awaits them, happiness must smile upon them.
Also Read: 10 Best BGMI Player in India 2024
Conclusion
In conclusion, being successful in the realm of scrap acquisition under Rust requires identifying expectations, flexibility and unwavering goals that encompass a variety of strategic strategies, including gambling, PVP tournaments including participation, facilitating trade deals, recycling, etc. Starting with exploration campaigns, the land allows players to tailor their efforts to get things right to get through the difficulties of an unforgiving Rust. Careful planning and expert engagement with these strategies will enable players to optimize their collection strategies, thereby not only surviving but truly succeeding in close competition with the relentless difficulties and challenges that define the world of Rust.
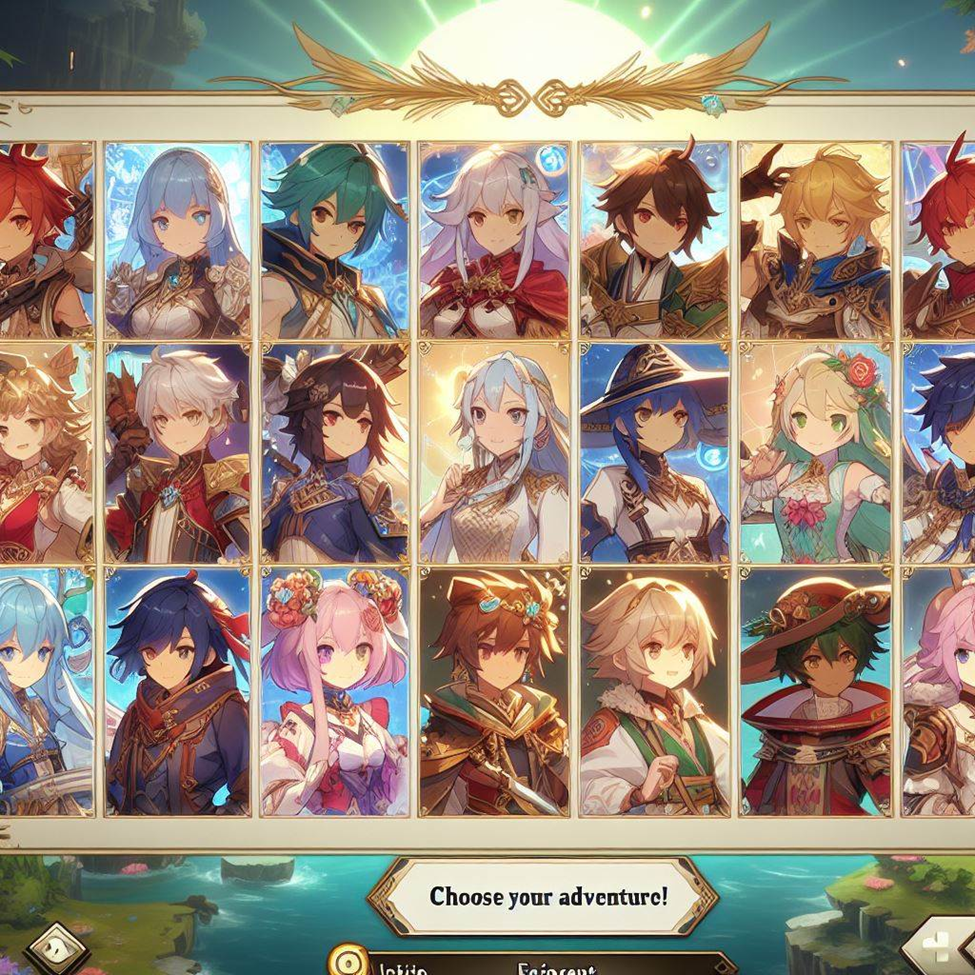
GI is a gacha RPG in which the player independently assembles his own squad of four heroes with the ability to switch between them and goes in search of adventure alone or in the company of friends, but for this you need to level up the adventure level.
Genshin Impact has a cross-platform system – this means that you can play on a PC, phone and tablet with the ability to freely switch. This will help you collect occuli and other resources, but you can always simplify your gameplay and gain adventure ranks using Genshin Impact by professional service Skycoach.
Adventure Ranks
There are no levels in Genshin, but there are ranks – this is the range of your successes in quests and hunts, which open up new gameplay opportunities for you.
You need to constantly progress in adventure levels, at least until you overcome important milestones, after which most of the content will become available to you.
You need to constantly progress in adventure levels, at least until you overcome important milestones, after which most of the content will become available to you.
Follow the quest system to get boosted in Genshin Impact and get to travel level 12, which will unlock daily quests and speed up your character’s further progress.
At level 14, your heroes who are not part of the main squad can be sent on an expedition and over time they will return with resources and food.
At level 16, a multiplayer mode will open for you, in which you can complete quests and destroy monsters in the company of friends, gathering a squad of up to 4 players.
The rating of world loot will increase by 20 and 25 – this means that experience from monsters and the overall chance and value of rewards will be increased.
All rewards can be obtained from the secretary of the travelers guild – Katerina.
Finding her is not difficult, go to Mondstadt and look for her in the eastern part of the map near the exit to the bridge from the city.
Try to complete the storyline as quickly as possible and focus on getting adventure level 25, it will help you quickly collect valuable items that will be useful to you for a long period of time.
The role of oculi in the system of leveling up your character
Oculi are a special accumulative resource that is used as a gift for the statue of the seven archons, which will increase the characteristics you need for the currently selected hero.
For the presented oculi, you can increase your level of endurance, receive travel points, which are equivalent to game levels, exchange for source stones, or one of three seals – geo, electro, or anemo. It is most profitable to change them for seals, or increase your stamina, which will increase your survival.
Adventure experience is of course important to you, but you shouldn’t exchange them for such valuable resources as oculi – you will have many ways to increase your level. It’s better to focus on seals, which are found in limited quantities on game maps, or source stones, which are much more difficult to obtain.
Look for oculi throughout the Genshin Impact area.
There will be a limited number of them, and it is advisable for you to collect them all to significantly strengthen your hero. When you pass by an oculus, you will notice it on the mini-map and receive an audio and visual alert and can collect it.
You will have many chances to collect most of the resources while leveling up and traveling, and interactive maps with their exact locations will help you collect the missing oculi. Also, with the help of cards, you can immediately concentrate your efforts on collecting all the oculi and maximally strengthen your hero to continue boosting in the GI.
Types of oculi
There are three types of oculi in the Genshin territories, and they are distributed in three different territories, and finding them should motivate players to explore the entire island.
- You will begin your collection with Anemocules, of which 66 can be found in the territory of Mondstadt. This is the starting large location where you will spend most of the game time, and you will find most of the oculi naturally.
- Look for Geocules – in the lands of Li Yue, there will already be 133 of them, and although you will find many of them during your travels, some of them will be hidden in hard-to-reach places, and it is better to immediately view them on the interactive map if you want to collect geocules Firstly.
- The last type of resource is Electrocules – and you will find them in Inazuma. But the search will take even longer, because there will be 181 of them scattered around.
You should know that collecting oculi is a good idea for one-time strengthening of your hero and collecting resources, but some of them will not be immediately available and will open only after exploring the zone, or completing a series of quests.
Two ways to make your eye search easier
In Genshin Impact there is a special device called the Echo Stone, it helps to detect the desired type of oculi and for each type there is its own separate stone.
Stones are created using alchemy, but to get this opportunity you need to open a drawing, which is obtained by increasing the reputation of the region. Usually this is the second level and is obtained by completing quests and leveling up in the territory.
Keep in mind that the stone is used to detect the oculi around you and is destroyed after that.
If possible, create a large supply of echo stones, but only use them when necessary, or when you don’t understand exactly where the oculus is located.
In other cases, try using an interactive map to roughly determine the location and then search for them visually.
Activate teleportation points
While gaining travel levels, boosting in GI and exploring territories, you will often have to return to those zones in which you have already been before, and in order not to waste a lot of time moving around, open teleportation points.
Look for small pillars, which will then become teleportation points, which you can activate at any time using the M key, which opens the world map and all zones available for fast travel.
Take the time to find all the teleportation points, especially in locations where you spend too much time finding them and opening them. This is especially true for mountains and swampy locations.

How to strengthen your character
Your level and character strength is calculated by the overall leveling of different heroes, the level of adventures, parameters and characteristics, the strength of weapons and eyeballs, which you already know about.
First of all, you need to form a combat squad of heroes.
You will be able to choose an adventurer who brings more experience, attacking and auxiliary heroes. Each hero can be upgraded using adventure levels, quests and constellations.
Constellations will be obtained when you receive the same heroes, which will allow you to enhance their potential and go through the ascension stage.
At the beginning of your gameplay, try to focus your Genshin boosting on one character that has the potential to level up for yourself and other potential heroes.
Don’t upgrade your weapons at the first stage – it doesn’t make sense, because at the beginning you need to get level 25. The fact is that at levels 20 and 25 you will have a chance to knock out a weapon of the best category, and it is better to improve and pump it up by going through the ascension stage and spending resources. All other weapons will quickly become obsolete and irrelevant, so they are not worth your time.
Collect artifacts – these are important items for which your heroes have 5 slots, which need to be filled. You can increase the strength and endurance parameters, and fill the remaining slots with random parameters and select them according to your requests. If there is not enough health, then endurance, and if attacks, then strength.
You will find artifacts as quest rewards and loot chests, obtained from dungeons and sometimes from NPCs. Remember that NPCs will have the lowest quality items.
You should not pay your attention to increasing the level of artifacts in the first stages, because their value will not be as high as the 3rd level star items, and first get them and then invest them in your artifacts for hero development.
When you assemble your combat squad, focus on the main attacking carry hero, and the rest will help him with healing and strengthening. Start with a hero with travel priority and gradually change it to attack and defense. Constantly collect and update your collections of heroes with the help of prayers until you have assembled the optimal composition of heroes for you.
The article was prepared and written by Skycoach.gg to help newcomers to Genshin Impact.
In Survivor.io, you’ll be facing off against other players on a small, shrinking battlefield. It’s a two-player battle royale, so you’ll need to think strategically and use your EVO skills to outsmart your opponents. The game’s depth comes from its diverse arsenal, with each weapon having its own unique attributes and tactics. From the M249, which is a powerful and versatile weapon, to the Katana, which is a stealthy and deadly weapon.
You’ll also need to choose the right weapon for your playstyle and situation. EVO skills add even more complexity, with abilities like Quick Hands, which reloads quickly, and Medic, which heals quickly. If you’re looking to improve your gameplay, check out our Survivor.io tier list for tips on which weapons and skills are most effective. By mastering the game’s weapon management, you can increase your chances of surviving and winning.
Understanding the Tier List
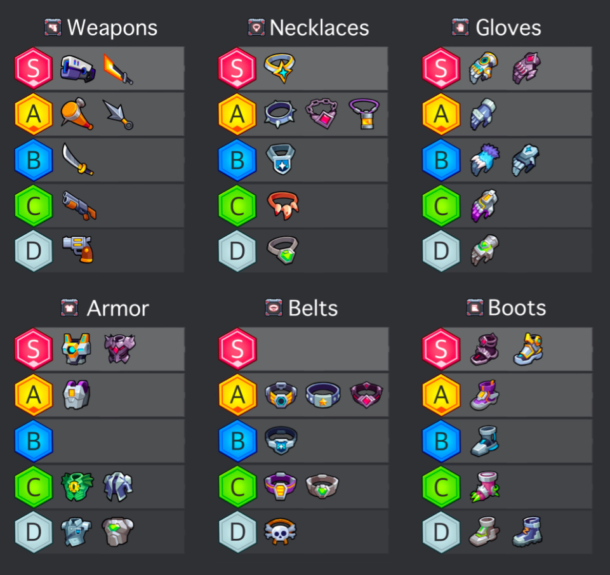
S-Tier Weapons and Skills
These are the foremost effective and flexible weapons and abilities in Survivor.io. They can turn the tide of fight in your favour on the off chance that is utilised correctly.
1.M249 – This light machine weapon gloats tall harm and a huge magazine capacity, making it perfect for maintained firefights.
2.AWP – The AWP could be an expert marksman rifle with unmatched harm and run. Landing a shot with this weapon can dispose of an adversary instantly.
3.Vector – The Vector’s quick rate of fire and decent damage make it dangerous in close-quarters combat.
Katana – The Katana may be a scuffle weapon with extraordinary extend and harm, making it an imposing choice for stealthy players.
Also Read: Explore 15 Most Popular Poki Games
Mastering Weapons
1.Sword of Clutter (Level 0)
The Sword of Clutter may be an effective weapon that tackles vitality from the universe. It increases assault and aptitude harm, making it an imposing choice in combat.
2.Void Control (Level 0)
The Void Control is another top-tier weapon that discharges dark gaps to strike adversaries. It offers expanded assault and is exceedingly successful in extended combat.
3.The Lightchaser (Level 0)
Manifested from Eternal Crystals’ control, The Lightchaser may be a gigantic damage-dealing weapon that’s relentless within the hands of a talented survivor.
4.Kunai (Level 1)
The Kunai could be a flexible weapon that can be utilised for both near and extended combat. It offers not too bad harm and auto-aim functionality.
5.Baseball Bat (Level 1)
The Baseball Bat, particularly when changed into Lucille, may be a great early-game weapon that can thump back adversaries with its crushing attacks.
6.Katana (Level 2)
While not exceptional, the Katana could be a strong choice for slicing adversaries with its blade.
7.Shotgun (Level 3)
The Shotgun, when changed into Gatling, gets to be a machine weapon with brief to mid-range capabilities. Be that as it may, its point can be challenging.
8.Revolver (Level 3)
The Pistol offers not too bad harm but endures from destitute extent and need of auto-aim.
Also Read: Top 10 Best Payday 2 Mods to Download
Mastering EVO Skills
1.Destroyer (Level 0)
A capable EVO ability that increments assault and ability harm, making it a destroying choice in combat.
2.Divine Destroyer (Level 0)
Similar to Destroyer but with healing capabilities, making it a flexible choice for survivability.
3.Thunderball Control Cell/Supercell (Level 0)
Releases thunderballs to strike foes, advertising tall harm output.
4.Quantum Ball (Level 0)
Summons a quantum ball to harm foes, giving a one of a kind assault strategy.
5.Inferno Bomb (Level 1)
Creates a bomb that detonates and incurs harm on adjacent enemies.
6.Fuel Barrel (Level 1)
Summons a fuel barrel that detonates, managing harm to enemies in the area.
7.Defender (Level 1)
Increases defence and provides protection against foe attacks.
8.Whistling Bolt (Level 1)
Shoots a shrieking arrow that damages adversaries and can be utilised deliberately for distraction.
9.Sharkmaw Weapon (Level 2)
Transforms the shotgun into a sharkmaw weapon, advertising expanded harm output.
10.Thunderbolt Bomb (Level 2)
Creates a bomb that discharges thunderbolts, damaging enemies in the vicinity.
11.Death Ray/Matrix (Level 2)
Summons a passing beam or network to harm foes, giving a capable assault option.
12.Caltrops (Tier 2)
Scatters caltrops on the ground, harming adversaries that step on them.
13.Magnetic Rebounder (Level 2)
Transforms the boomerang into an attractive rebounder, giving a special assault mechanism.
14.Medi-Drone (Level 3)
Summons a medi-drone that can recuperate the player, giving fundamental bolster in combat.
15.Moon Halo Cut (Level 3)
Performs a moon halo slice that harms foes in a wide area.
16.Pressure Forcefield (Level 3)
Creates a forcefield that secures the player from adversary assaults.
Also Read: How Tall is Torbjorn: Overwatch 2 Characters Heights & Ages
A-Tier Weapons and Skills
These are strong choices that can be profoundly compelling within the right hands.
AK-47 – A dependable ambush rifle with great harm and sensible recoil.
SPAS-12 – This shotgun encompasses a tall harm yield at near run, culminating for ambushes.
Double Barrel Shotgun – Another effective shotgun alternative that can rapidly alacrity foes at near range.
Quick Hands – This aptitude permits you to reload weapons quicker, giving you an edge in drawn out engagements.
B-Tier Weapons and Skills
While not as capable as S or A level, weapons and aptitudes can still be viable when utilised strategically.
M416 – A flexible attack rifle with adjusted stats, appropriate for different combat scenarios.
MP5 – A strong submachine weapon with great precision and direct damage.
Medic – This ability permits you to mend quicker, expanding your survivability in serious situations.
Also Read: Is CSGO Down? Stay on Top with Real-Time Server Updates
Tips for Acing Weapons and Skills

Practice with Diverse Weapons
Try with different weapons to get their qualities and weaknesses.
1.Aim for Headshots: Headshots bargain more harm and can dispose of adversaries faster.
2.Use Cover Shrewdly: Utilise cover to maintain a strategic distance from taking superfluous harm and to set up ambushes.
3.Manage Your Ammunition: Keep track of your ammo and reload deliberately to dodge running out within the centre of a fight.
By facing the weapons and aptitudes in Survivor.io, you’ll increase your chances of surviving and developing triumphant in this serious fight royale diversion. Try with diverse procedures, adjust to the ever-changing war zone, and most critically, have fun!
Also Read: How Old is Mitsuri: Every Main Characters Age, Birthday & Height
Conclusion
In Survivor.io, facing the weapons and EVO aptitudes is vital for survival and victory. Understanding the level list makes a difference when you make educated choices, guaranteeing you select the foremost compelling instruments for your playstyle. The level list categorizes weapons and abilities based on their control and utility, making a difference when you priorities what to utilize in several circumstances.
By choosing the most excellent weapons, just like the Sword of Clutter or Void Control, you’ll bargain critical harm and pick up an advantage over adversaries. Additionally, acing EVO abilities such as Destroyer or Divine Destroyer can enormously improve your combat capabilities and survivability.
Ultimately, the key to triumph in Survivor.io lies in adjusting your procedure to the weapons and abilities at your transfer. By understanding the level list, choosing shrewdly, you’ll be able to increase your chances of surviving the strong fights and rising victorious.
-
 Guides4 years ago
6 Proven Ways to Get more Instagram Likes on your Business Account
-
 Mainstream9 years ago
BioWare: Mass Effect 4 to Benefit From Dropping Last-Gen, Will Not Share Template With Dragon Age: Inquisition
-
Mainstream15 years ago
IGN Misses the Point With Football Manager 2009 Review, Removes It
-
 Guides2 months ago
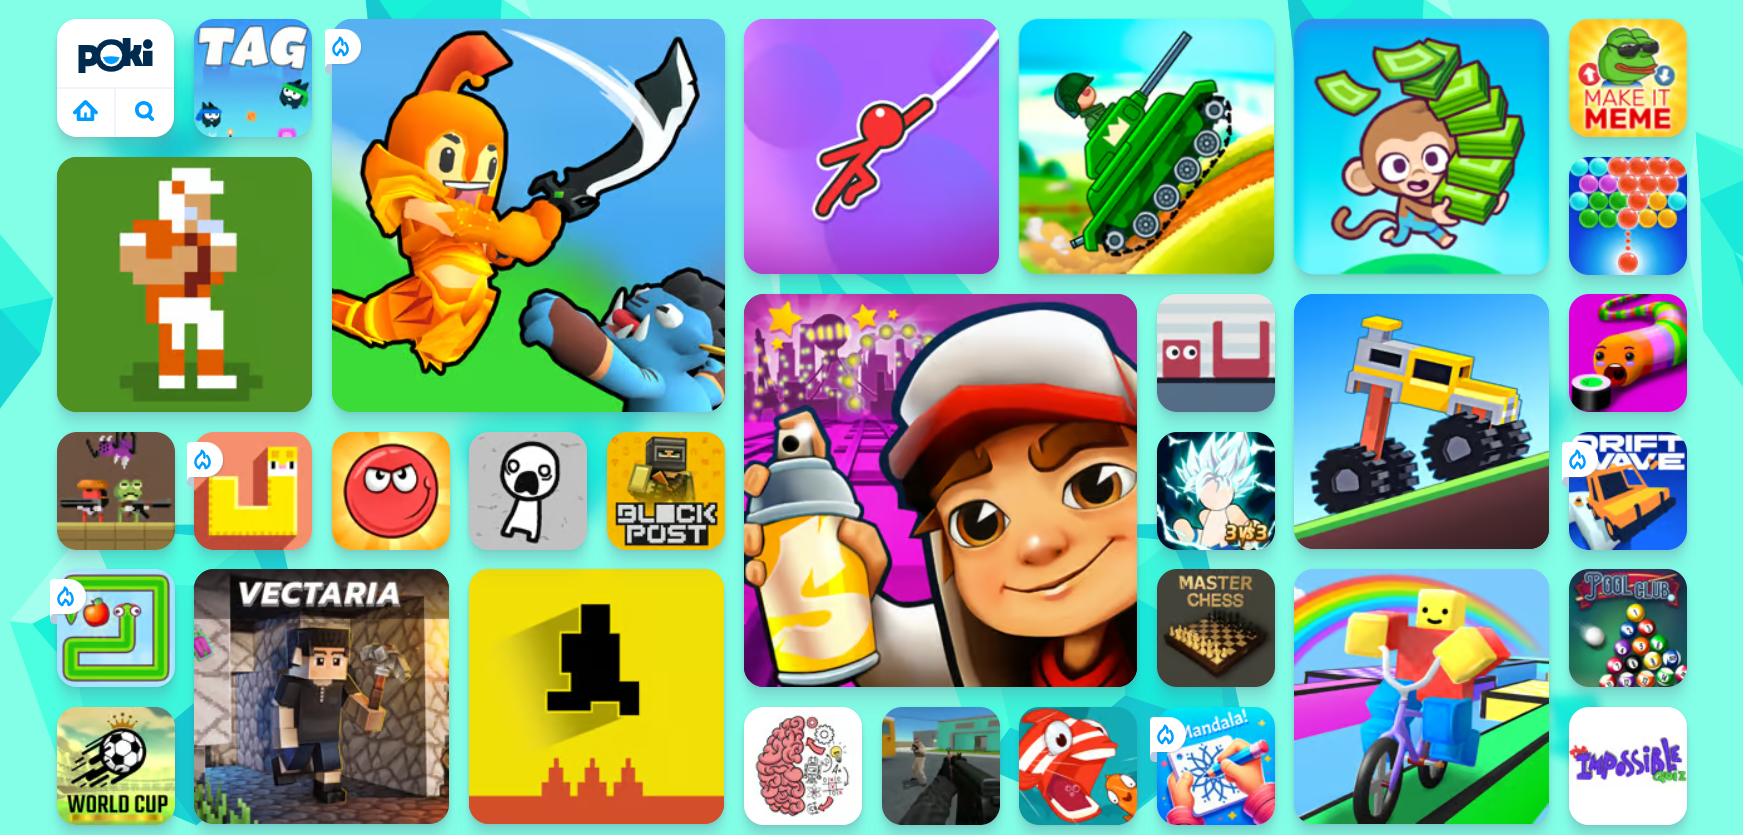
Explore 15 Most Popular Poki Games
-
 Guides1 year ago
Gan Rubik’s Cube vs. Traditional Rubik’s Cube: Key Differences and Advantages
-
 Casual5 months ago
8 Ways to Fix Over-Extrusion and Under-Extrusion in 3D Printing
-
 iOS Games11 years ago
Emoji Pop Answers: Level 12 – 350 to 389 Cheats
-
 Mainstream11 years ago
New Assets Found for Half Life Episode 4
michael
June 11, 2009 at 3:18 pm
what do you mean use the razor with the scribblings on the wall. i tried it but nothing happened
sam
June 11, 2009 at 4:05 pm
He measn the big grey spot on the wall opposite the mirror
Simpa
June 12, 2009 at 5:19 pm
FIrst click the grey spot then use the razor
alyssa
June 15, 2009 at 12:26 am
what do you mean use the mirror with the numbers? i tried both numbers nothing happend.
Whitney
June 15, 2009 at 3:53 am
i can’t get the hair-dryer… how do i get it…
Whitney
June 15, 2009 at 3:54 am
what do you mean…. Go up and use the stick with the square in the upper left corner.
Jess
August 8, 2010 at 3:08 pm
look up to the light and in the corner u’ll see a little gap. you use the stick from the plunger to move the slab out the way, then you’ve got the hairdryer
stephanie
June 15, 2009 at 6:26 pm
im having the same problem what square?
louise
June 16, 2009 at 12:59 am
you have to die to get away ?!
livvy
April 4, 2010 at 2:56 pm
no you dont
Joe
June 16, 2009 at 1:01 am
Yes I Know.. Stupid Init. !
Calin
June 16, 2009 at 8:14 am
@Whitney and Steph: I’m talking about the gritstone or crockery or whatever that material is :) Simply click there and it will move away, just try! And good luck!
Jimmi
June 16, 2009 at 11:39 pm
how do you plug the sink?
Stevie
June 17, 2009 at 6:09 pm
on top of the tap is a lever to plug the sink
u dont die all u do throw the hairdryer in without touching it so all u do is shut off the power
Stevie
June 17, 2009 at 6:10 pm
2 minutes 23 seconds
lydia
June 17, 2009 at 7:08 pm
you are not dying to get away the hairdryer in the water knocks out the electric lazers on the door…
kate
June 17, 2009 at 7:52 pm
i’m having the same problem as Whitney and stephanie i can’t do the square thingy
bailey
August 23, 2013 at 7:32 pm
instead of clicking on the pole first use the mouse go up and click in the top left corner then use the pole or stick
lalw
June 18, 2009 at 10:59 pm
done it in 1 minute and 36 sec’s i’m pro ;)
JWU
June 20, 2009 at 11:03 am
24:37 …. :S … The thing that took me almost all of the time to figure out was the code … didnt use anything else from the walkthrough. Thanks though
Kayla
June 25, 2009 at 3:16 am
Lol At first i didnt understand what you meant by: “10. Go back and left twice. Go up and use the stick with the square in the upper left corner. Take the hair drier.” But then I accidently clicked up and then I got it. My final time (1st time playing AND 1st with walkthrough) 4:35! Not shabby but i think if i played again I would do alot better. Thanks for all your help…next time be a BIT more clear… :D
brooklyn
June 29, 2009 at 4:36 pm
ok, so i finished first time in 5 minutes and 6 sec. i get it and what you needed to do, but (question for anyone) how did you get the code to open the thing next to the bathtub? i tried without the walkthrough after the first time i did it, looked around, and there must be some way you figure out the code…………. sorry if i confused you……………….. lol
Jess
August 8, 2010 at 3:12 pm
all i know is that the code is 45801. that’ll help ya
harryg321
July 1, 2009 at 9:20 pm
For the code, look at the numbers on the wall that you scraped away, then use the mirror shard to the right of them
Treefort
July 2, 2009 at 9:32 pm
1min59sec
ScaryMary
July 13, 2009 at 9:47 pm
i know this is STUPID but.. i cant find the wrench:S
Sarah Alexa
July 17, 2009 at 3:50 am
When you say use the mirror with the numbers… what do you mean?? I have no earthly idea what you mean!!
uhh
July 20, 2009 at 2:48 am
the square for the hairbrush is on the cieling. you have to go up, not go back.
use the stick to hit the loose cieling piece a couple of times and the hairdryer falls out
lebe
July 26, 2009 at 10:19 pm
this isn’t very good on the clarity of explanation.
it’s right but many people cannot inhance the meaning
of it. =[[[[[
me
August 1, 2009 at 7:39 pm
ha! i finished in eight mins nines seconds!!! beat that!!!
Jessica
August 5, 2009 at 5:58 pm
7 min 23 sec first time. the square with the hairdryer was the hardest until i actually figured out hte you have to click up! These things need to be slightly more specific sometimes. It was fun.
lizzie
August 28, 2009 at 6:43 pm
hi um ki finished the game but i didnt need u get the toothbrush anyone else managed 2 do this…i did it widout cheating!!
cassidy
October 5, 2009 at 10:13 pm
I don’t get the part the razor and the hairdryer and the scribblings on the wall with the mirror and the numbers
Ii helped, but then I had to quit because I didn’t understand the walkthrough.
Mallory
December 5, 2009 at 10:37 pm
I cant get the blow dryer out from under the freaking tile i have tired every damn tile and it wont work!
sam
December 7, 2009 at 9:25 pm
16 minutes 57 seconds
missdee
December 27, 2009 at 4:24 am
how do i get the key??
pulo
January 3, 2010 at 12:37 am
I cannot escape still – it wont let me – i’ve done everything and im not gonna exit without fineshing the game!!
DJ Moore
January 3, 2010 at 11:14 am
Finished in 26:11… I effin’ rock!
Jaman
January 8, 2010 at 10:04 am
When it says go up and take the hair dryer it means go up to the ceiling and move the tile, took me a while to work that one out
pappynome
January 14, 2010 at 3:35 am
he that one kid that id it in 2 min. and 23 seconds he SUCKS i got 2 min. and 21 seconds YOU SUCK./././
ashbash
January 14, 2010 at 7:53 am
How do you use the baking soda with the water it doesn’t want to pour or whatever -_-
pappynome
January 15, 2010 at 12:18 am
im back my new record is 1 min. and 54 seconds YOU SUCK
Sarah
January 17, 2010 at 2:28 am
ok i followed the instuctions. and when it got to the hair dyer thing :( i tried every single square but it’s not there
WHAT THE HECK PEOPLES
lol but really where is it?
EMMA XO
January 25, 2010 at 2:57 pm
dunno no one really thoght bout that haw stipid lol xx
luke911
March 15, 2010 at 10:36 pm
instructions are exteremly clear! done in 1:09! haha! whoever cant do it is stupid!
max
June 15, 2010 at 10:09 pm
on one of the walls there’s some gray paint (that if looked at for a while looks like an arrow pointing down) and its under the floor tiles it took me a while to find it too, good luck
rebelrenegade1
June 16, 2010 at 9:09 pm
What he means is click on the numbers until you are up close to the numbers and then grab your mirror shard and place it right beside the numbers there and you should see the mirror reflection of the 103. The backwards 3 will make the 453 look like 45801
Gilly
June 23, 2010 at 10:01 pm
oops wrong button anyone know what floss is for lol
Gilly
June 23, 2010 at 10:02 pm
cuz the cord wont reach duh
kaylince yukii
June 29, 2010 at 9:49 pm
next time in your walkthroughs, be less brief and more explanatory. dont say ‘use’.
goerdrer
August 1, 2010 at 12:52 am
14:13 beat that!!!!
mage man
August 27, 2010 at 7:02 pm
mrs goerdrer i beat tahat 6:57
BUBBLES
April 5, 2011 at 4:36 am
THAT WAS really really really fun!!!! and i got 6:35 :)
Luna
May 7, 2011 at 12:52 am
which scribbling?????????????????????
ProMaster
June 9, 2011 at 2:58 pm
I finished in 1 min 9 sec. YEAY ME! :D
dithdthidi
June 19, 2011 at 7:17 pm
the tiles are in a checkered pattern… one blue tile is misfit .its under that one
Jing Han
July 3, 2011 at 3:33 pm
What do you mean by Go up and use the stick in the upper left corner? Plz reply;)
Dev
October 6, 2011 at 11:17 am
Use the stick from the plunger and click the top left of the screen and the half opened pannel, get the stick and continuesly click till it opens. Hairdryer.
Chris
July 21, 2011 at 12:57 pm
No yur really not :)
TITSQUIDGY
September 16, 2011 at 10:58 am
CHICKEN!!!!!!!!!!!!!!!!!!!!
Dev
October 6, 2011 at 11:16 am
Yeahh!!! 2.47
Step In Tub
December 11, 2011 at 10:42 pm
Hello There. I found your blog using msn. This is a really well written article. I’ll be sure to bookmark it and come back to read extra of your useful info. Thank you for the post. I’ll definitely comeback.