Uncategorized
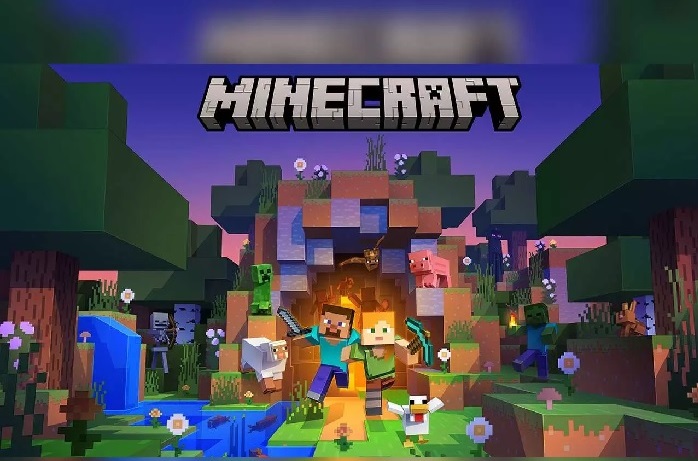
How to Set Up Your Minecraft Private Server
Minecraft is becoming slowly one of the most popular PC games of recent times and there are millions of people who enjoy playing the indie game. So for every fan of the Minecraft game, it is really important to know how to set up a private server or connect to local servers for smooth gameplay experiences. In this article, as the title suggests, I will help you with everything you need to know on how to set up your Minecraft private server!
First of all, there are some special server files that allow you to create a private server in Minecraft and you might not have them. You can download them from here. When you extract the files, make sure that you put them in a folder named Minecraft Server, in your Minecraft install directory.
After extracting the files, run the file Start server.bat (wait until it unpacks some new files, then close the window)
Now you can start editing the server properties of your Minecraft game by editing the new files in the folder. Edit the files with notepad:
1. server.properties file:
– verify-names=true (this should be left untouched)
– admin-slot=true (this should be left untouched)
– port=25565 (this should be left untouched unless you know what you are doing)
– public=false (change this to TRUE if you want a public server)
– server-name=Your Server Name
– max-players=16 (maximum number of players)
– max-connections=3
– motd=Welcome to my Server (or any other message)
– grow-trees=true (change to False for no trees)
Now, you must be wondering what to do to connect to your Minecraft Server? It’s simple: select the multiplayer option in the game, type your IP address (you can find it here) and add the port 25565 (or another one, if you changed this in the server properties).
Now, in order for other players to connect to your Private Minecraft server, they have to load the following address in their address bar (without the brackets):
http://www.minecraft.net/play.jsp?server=(your IP address)&port=(the server port, in our case 25565)
And now you’re done! Enjoy the game!


Do you live in the Canadian coastal town of Dartmouth in Nova Scotia? You may feel lucky to live in a place that offers a vacation-like vibe even during busy weekdays. Although it’s a beautiful destination, you cannot ignore its Atlantic climate, which exposes you and your home to heavy rain, strong winds, salt air, and freeze–thaw cycles. You can dress up or down according to the weather, but how do you protect your home from these harsh elements? Vinyl siding is often considered the best choice. Since, it is a cost-effictive and low maintenance solution, it has gained a lot of popularity over the years. However, choosing the right siding installation company is essential.
Some companies offer vinyl siding services Dartmouth. Make sure you assess their experience and expertise. Professionals take all the necessary steps during siding installation, ensuring your home’s structural integrity is protected for years to come. Every decision during installation counts; it can be as small as the choice of fasteners. A trained professional knows that only corrosion-resistant nails are reliable. These can be made of galvanized steel or aluminum. They also select the correct sizes. Typically, a nail’s head can be 5/16 in., the shank a minimum of 1/8 in., and it should be driven 1 1/4 in. deep into different nailable substrates.
This level of attention to detail demonstrates their expertise. At the same time, you can rely on them to take the necessary precautions during installation and avoid fastening mistakes that could compromise your siding.
Precautions taken when fastening vinyl siding

Vinyl siding installers know how to use screws, staples, and nails. They take care of the starter strip, in other words, the spacing between the vinyl and the fastener head, and other crucial factors. Since vinyl expands and contracts with the changing weather, the experts also look into this matter. Their preparation goes beyond basic fastening. They first install various accessories, such as window flashing, J-channels, trims, and corner posts. If a nail slot is misaligned, they can use a nail slot punch to create proper space for the fastener. When using staples, they are careful to consider factors such as wind resistance limitations to ensure the siding remains secure and durable.
Common mistakes made during vinyl siding installation
Any misstep can affect the vinyl siding installation. Professionals cannot overlook anything that could compromise their work. For example, fasteners cannot be tightened too much, as this will prevent vinyl siding panels from moving with weather changes. As a result, panels can deform or become damaged. Improper fastener spacing can affect siding’s stability, durability, and wind resistance. Additionally, using staples without proper verification can be problematic, as it may violate local building codes, particularly when staples are used instead of screws or nails.
Vinyl siding installation requires precision and a careful approach. Fasteners and other small components must be carefully selected. You don’t need to worry about these aspects much if you hire the right people. They will carefully choose all the materials based on their advantages, limitations, and properties. You can trust their skills and experience. They will ensure that the siding is installed correctly and performs as intended. For guidance, click Artisanroofing.ca.

PC gaming has evolved into far more than just playing games—it’s become a vibrant digital ecosystem encompassing communities, competitive esports, content creation, and technological innovation. Modern PC gaming represents a convergence of cutting-edge hardware, social interaction, and immersive experiences that continue to push the boundaries of interactive entertainment.
The purpose of this guide is straightforward: to help both new and experienced gamers build better gaming setups, improve their system performance, and stay updated with the latest trends shaping the industry. Whether you’re assembling your first gaming PC or looking to optimize your existing rig, this comprehensive resource will provide the knowledge and insights you need to elevate your gaming experience.
1. The Evolution of PC Gaming & How Eurogamersonline.com Shapes It
The journey of PC gaming has been nothing short of revolutionary. From the early days of pixel-based games with limited colors and simple mechanics, we’ve progressed to today’s high-fidelity, photorealistic worlds that blur the line between virtual and reality. Games now feature complex physics engines, dynamic weather systems, and environments so detailed they rival the real world.
Perhaps even more significant than the graphical evolution is the fundamental shift in how we play. Gaming has transformed from a predominantly solo activity into a global social phenomenon. Multiplayer experiences, online communities, and shared gaming moments have become central to the PC gaming experience. Players now collaborate across continents, form lasting friendships, and participate in massive online worlds with thousands of simultaneous participants.
Eurogamersonline.com plays a crucial role in this modern gaming landscape by bridging the gap between gamers, industry experts, and developers. The platform offers comprehensive guides that demystify complex topics, community features that connect like-minded players, and timely coverage of modern gaming trends including cloud gaming, AI integration, and emerging technologies. By serving as both an educational resource and a community hub, Eurogamersonline.com helps gamers navigate the ever-changing world of PC gaming with confidence.
2. Building the Perfect PC Gaming Setup
2.1 Core Hardware Components
Building a capable gaming PC requires understanding the essential components that work together to deliver smooth, immersive experiences.
CPU (Processor) – The processor serves as your system’s brain, executing game logic and managing background tasks. Modern gaming demands multi-core CPUs that can handle parallel processing efficiently. While older games relied primarily on single-core performance, today’s titles take full advantage of 6, 8, or even 16 cores. Investing in a modern CPU ensures your system can handle not just current games, but upcoming titles as well.
GPU (Graphics Card) – Your graphics card is the heart of gaming performance. Modern GPUs do far more than render frames—they support advanced features like real-time ray tracing for realistic lighting and reflections, AI-powered upscaling technologies, and complex shader effects. The GPU market offers options ranging from budget-friendly cards for 1080p gaming to powerhouse models capable of driving 4K displays at high refresh rates.
RAM – Memory requirements have steadily increased over the years. While 8GB was once adequate, 16GB or more is now recommended for smooth gameplay in modern titles. Sufficient RAM prevents stuttering, allows for faster asset loading, and enables comfortable multitasking between games and other applications like Discord or streaming software.
Storage – Solid State Drives (SSDs) have become essential for modern gaming. The benefits extend beyond faster boot times—SSDs dramatically reduce game loading screens, enable quick-travel features in open-world games, and minimize texture pop-in. Many recent titles specifically recommend or require SSDs to deliver the intended experience. NVMe drives offer even faster performance than traditional SATA SSDs, though both represent massive improvements over mechanical hard drives.
Cooling System & PSU – These often-overlooked components are critical for system stability and longevity. Adequate cooling prevents thermal throttling that can reduce performance during extended gaming sessions. A quality power supply unit ensures stable power delivery to all components, protects against electrical issues, and provides headroom for future upgrades. Investing in reliable cooling and power solutions safeguards your entire system investment.
2.2 Peripherals & Accessories for Competitive / Comfortable Play
The components inside your PC are only part of the equation. Your peripherals directly influence both your performance and comfort during gameplay.
Keyboard – Mechanical keyboards have become the gold standard for gaming, offering responsive, tactile feedback that enhances both typing and gaming experiences. Different mechanical switch types cater to various preferences, from clicky and tactile to smooth and linear. Programmable keys allow you to execute complex in-game actions with single keystrokes, providing a competitive advantage.
Mouse – Gaming mice feature high-DPI sensors that track movement with precision, low-latency connections that eliminate input delay, and ergonomic designs that reduce hand fatigue. For first-person shooters and competitive games, a quality mouse is absolutely essential. The difference between a budget mouse and a proper gaming mouse becomes immediately apparent when precise aiming matters.
Monitor – High refresh rate displays, typically 144Hz or higher, deliver dramatically smoother visuals compared to traditional 60Hz screens. The difference is particularly noticeable in fast-paced games where every frame matters. Modern gaming monitors also feature technologies like G-Sync or FreeSync that eliminate screen tearing, creating a seamless visual experience.
Headset / Audio – Quality audio provides immersive soundscapes that enhance the gaming experience and offer competitive advantages. Spatial sound allows you to pinpoint enemy positions in shooters, hear approaching threats in survival games, and fully appreciate the atmospheric design of story-driven titles. Whether you choose a dedicated gaming headset or high-quality headphones with a separate microphone, good audio is an investment in both immersion and performance.
Customization – Modern gaming setups embrace personalization through RGB lighting that creates ambiance, macro keys that streamline gameplay, and ergonomic considerations like adjustable desks and supportive gaming chairs. Comfort during long gaming sessions isn’t luxury—it’s essential for maintaining focus and preventing physical strain.
2.3 Software & Optimization Best Practices
Even the most powerful hardware won’t perform optimally without proper software maintenance and optimization.
Keep drivers updated – Graphics drivers in particular receive regular updates that improve game performance, add support for new titles, and fix bugs. Similarly, chipset and peripheral drivers ensure all components communicate efficiently. Many manufacturers offer utilities that automate driver updates, making this process painless.
Use OS/game modes to optimize performance – Windows Game Mode, for example, prioritizes system resources for your active game. Many games also include built-in optimization tools that automatically configure graphics settings based on your hardware. Graphics software from NVIDIA and AMD provide game-specific optimizations and performance overlays.
Regular maintenance – Physical and digital maintenance keeps your system running smoothly. Clean dust from intake fans and heatsinks regularly to maintain optimal cooling. Monitor temperatures using software utilities to catch potential issues early. Run benchmark tests periodically to ensure you’re getting expected performance levels. These simple practices prevent many common issues before they impact your gaming.
Backup saves/data before major updates – Game updates, driver installations, and OS upgrades occasionally cause issues. Backing up save files and important data protects against the rare but frustrating possibility of data loss. Cloud save features offered by platforms like Steam provide automatic protection, but local backups offer additional security.
2.4 Comfort, Aesthetics & Sustainability Considerations
A truly great gaming setup balances performance with comfort, visual appeal, and responsible practices.
Desk / chair posture, cable management – Ergonomic furniture prevents long-term health issues. Your monitor should be at eye level, your chair should support your lower back, and your desk height should allow your arms to rest comfortably. Clean cable management isn’t just aesthetic—it improves airflow, prevents accidental disconnections, and makes maintenance easier.
Lighting / ambient setup for focus – Proper lighting reduces eye strain during extended sessions. Bias lighting behind monitors, ambient room lighting, and even RGB lighting can create an environment conducive to focused gaming. Some gamers prefer darker environments for immersion, while others find moderate lighting reduces fatigue.
Energy-efficient components & eco-friendly habits – Modern components offer impressive efficiency, but responsible usage matters too. Switching off unnecessary RGB lighting when not needed reduces power consumption. Properly recycling old hardware keeps electronic waste out of landfills. Enabling power-saving features when gaming performance isn’t critical helps reduce your environmental footprint without sacrificing your experience when it matters.
3. Community, Esports & Social Side of PC Gaming
PC gaming has always had a social dimension, but modern platforms have elevated community interaction to new heights.
Eurogamersonline.com fosters vibrant communities through dedicated forums where gamers discuss strategies, troubleshoot technical issues, and share experiences. The platform facilitates discussions about hardware recommendations, modding tips, and game discoveries. These community features transform gaming from a solitary hobby into a shared passion where knowledge flows freely and friendships form naturally.
The rise of esports has been meteoric, transforming competitive gaming into a global phenomenon with professional tournaments, substantial prize pools, and millions of viewers. Platforms like Eurogamersonline.com connect fans with players through coverage of major tournaments, player spotlights, team news, and competitive scene analysis. Whether you’re an aspiring competitor or an enthusiastic spectator, the esports ecosystem offers endless engagement opportunities.
The benefits of community involvement extend beyond entertainment. Learning from experienced players accelerates your improvement. Collaborating on projects like mods or community events enriches the gaming experience. Discovering new games, hardware recommendations, and optimization techniques through community sharing keeps you informed. Staying updated on industry trends, upcoming releases, and technical developments becomes effortless when you’re connected to an active gaming community.
4. Future Trends Driving PC Gaming (As Highlighted by Eurogamersonline.com)
The PC gaming landscape continues evolving at a remarkable pace, with several key trends reshaping what’s possible.
AI & Machine Learning – Artificial intelligence is revolutionizing game design through dynamic game worlds that respond intelligently to player actions, adaptive difficulty systems that maintain optimal challenge levels, and personalized experiences that cater to individual play styles. AI-powered technologies like DLSS already enhance performance by intelligently upscaling graphics, and future applications promise even more dramatic improvements in both visual quality and gameplay depth.
Cloud Gaming & Cross-Platform Integration – Cloud gaming services eliminate the need for expensive hardware by streaming games from remote servers to virtually any device. This technology enables gaming on tablets, laptops, or even smartphones with the quality previously requiring dedicated gaming PCs. Cross-platform integration breaks down barriers between PC, console, and mobile gaming, allowing friends to play together regardless of their chosen platform. This flexibility represents a fundamental shift in how and where gaming happens.
VR / AR and Immersive Gaming – Virtual reality and augmented reality continue pushing the boundaries of immersion. Modern VR headsets offer increasingly affordable entry points into fully immersive gaming worlds. Motion-tracking setups enable physical interaction with virtual environments. As the technology matures, standalone VR systems and mixed reality experiences promise to make immersive gaming more accessible and compelling than ever.
What do these trends mean for the average gamer? Greater accessibility allows more people to experience high-quality gaming regardless of their hardware budget. Better experiences emerge from technologies that enhance both visual quality and gameplay innovation. Lower barriers to entry mean you don’t necessarily need a top-tier gaming PC to enjoy modern titles. However, adapting to these trends requires staying informed and understanding how to leverage new technologies effectively.
5. Why Eurogamersonline.com Stands Out Among Competitors / What Makes It Unique
In a crowded field of gaming websites and platforms, Eurogamersonline.com distinguishes itself through several key strengths.
The platform combines technical guides with community insights and real feedback from actual players. Rather than simply listing hardware specifications, Eurogamersonline.com provides context about how components perform in real-world gaming scenarios. This practical approach helps gamers make informed decisions based on genuine experiences rather than marketing claims.
Inclusivity defines the platform’s approach—content caters equally to beginners taking their first steps into PC gaming, hobbyists seeking to optimize their experience, and competitive gamers pursuing every possible advantage. This broad appeal creates a welcoming environment where questions are encouraged and knowledge is freely shared.
The balanced approach sets Eurogamersonline.com apart. The platform addresses power and performance without losing sight of education and accessibility. Coverage includes both current gaming realities and future-oriented content exploring emerging technologies like cloud gaming, AI integration, and VR experiences. This comprehensive perspective helps gamers understand not just what works today, but what’s coming tomorrow.
6. Tips to Enhance Your PC Gaming Experience (From the Article’s Suggestions)
Drawing from the insights throughout this guide, several key practices will elevate your gaming experience.
Maintain and optimize – Regular maintenance prevents problems before they impact your gaming. Clean hardware removes dust that impedes cooling. Updated drivers ensure optimal performance and compatibility. Monitoring system performance helps you identify bottlenecks and opportunities for improvement. These ongoing practices keep your system running at peak performance.
Customize for comfort and long-term use – Your gaming environment profoundly affects your experience. Invest in ergonomic furniture that supports healthy posture during extended sessions. Configure lighting to reduce eye strain. Choose peripherals that feel comfortable and responsive in your hands. These comfort-focused improvements enhance both your enjoyment and your long-term physical wellbeing.
Stay involved with community – Engagement with gaming communities enriches your experience immeasurably. Participate in forums to learn from others and share your own discoveries. Explore modding scenes to extend your favorite games in new directions. Share experiences and recommendations with fellow gamers. Learn from the collective knowledge of the community. This involvement transforms gaming from a consumer activity into an active, participatory hobby.
Try to embrace new gaming trends – Technologies like cloud gaming, VR/AR, and modern GPU features open new possibilities worth exploring. However, balance enthusiasm with practicality. Not every trend will suit every gamer, and cost considerations matter. Experiment with new technologies when opportunities arise, but build your setup around what genuinely enhances your personal gaming experience rather than chasing every innovation.
7. Conclusion + Final Thoughts
Modern PC gaming represents far more than powerful hardware and impressive graphics—it’s a rich ecosystem encompassing community, continuous innovation, and perpetual learning. The technical aspects of gaming rigs and performance optimization matter, but they’re merely the foundation for the truly meaningful elements: the friendships formed, the experiences shared, and the memories created.
Whether you’re a newcomer building your first gaming PC or a veteran upgrading an existing setup, the principles remain constant. Build smart setups that balance performance with practicality. Stay curious about emerging technologies and trends. Engage with communities to share knowledge and experiences. Most importantly, enjoy gaming responsibly—maintaining healthy habits, balancing gaming with other life activities, and approaching this hobby with perspective.
The outlook for PC gaming is extraordinarily bright. Evolving technologies like AI, cloud gaming, and VR promise to make gaming more accessible, more immersive, and more versatile than ever before. Hardware continues advancing at a remarkable pace, new game designs push creative boundaries, and the global gaming community grows stronger each year. Whatever your interests within gaming—competitive esports, story-driven adventures, creative building games, or social experiences—the PC gaming ecosystem offers limitless possibilities for engagement and enjoyment.
8. FAQs / Key Takeaways
What hardware specs are good for gaming in 2025?
A solid mid-range gaming PC in 2025 should include at least a 6-core modern processor, 16GB of RAM, a current-generation mid-tier graphics card, and an SSD for your operating system and frequently played games. This configuration handles most games at 1080p or 1440p with high settings. Higher-end builds with 8+ core CPUs, 32GB RAM, and flagship GPUs enable 4K gaming and future-proofing.
Is a high-end GPU always necessary?
Not at all. While flagship graphics cards offer the best performance, mid-range GPUs provide excellent gaming experiences at lower resolutions and settings. Many gamers find that mid-tier cards offer the best value, delivering solid performance without breaking the budget. Your target resolution and desired settings should guide your GPU choice more than the desire for the absolute best.
Can I get a decent gaming experience with a mid-range setup + cloud gaming?
Absolutely. A modest local setup paired with cloud gaming services provides remarkable flexibility. You can play less demanding titles or older games locally while streaming cutting-edge AAA games through cloud services. This hybrid approach maximizes value, allowing you to enjoy a broad gaming library without constant hardware upgrades. However, reliable high-speed internet is essential for optimal cloud gaming performance.
How important is community and social interaction in gaming?
Community has become central to modern gaming experiences. Beyond the obvious social benefits of playing with friends, gaming communities provide learning opportunities, troubleshooting help, game recommendations, and a sense of belonging. Many gamers find that community involvement enhances their enjoyment as much as the games themselves. Whether you’re seeking competitive teammates, creative collaborators, or simply people who share your interests, gaming communities offer valuable connections.
What future gaming trends should I be ready for?
Keep an eye on AI integration that personalizes gaming experiences, cloud gaming that separates games from hardware requirements, cross-platform play that unites gaming communities across devices, VR/AR technologies that redefine immersion, and continued graphics innovations that push visual boundaries. You don’t need to adopt every trend immediately, but awareness helps you make informed decisions about when and how to integrate new technologies into your gaming setup.
Uncategorized
Beyond Compliance: How Local Law 152 Gas Inspections Enhance Building Safety and Liability Protection

Local Law 152, enacted by the New York City Council in 2016, was introduced as part of a broader initiative to improve gas safety across the city’s vast and aging building stock. While the law mandates periodic inspections of gas piping systems, its impact goes far beyond regulatory compliance. It represents a cultural shift in how property owners, managers, and tenants view building safety. By institutionalizing routine inspections, Local Law 152 has become a cornerstone of proactive risk management, helping to prevent accidents, protect lives, and shield stakeholders from legal and financial exposure.
Understanding the Scope and Intent of Local Law 152

At its core, Local Law 152 requires buildings in New York City—excluding those classified under Occupancy Group R-3, such as one- and two-family homes—to undergo gas piping inspections every four years. These inspections must be conducted by a Licensed Master Plumber or a qualified individual under their supervision. The law applies to exposed gas piping systems from the point of entry into the building up to tenant spaces, including mechanical rooms and public areas. The intent is to identify leaks, corrosion, illegal connections, and other defects that could compromise safety.
The law’s staggered inspection schedule, organized by community district, ensures that inspections are distributed evenly across the city. This approach not only makes compliance more manageable but also allows for targeted oversight based on geographic risk factors. The requirement to submit inspection reports and retain certifications adds a layer of accountability, ensuring that issues are documented and addressed promptly.
Enhancing Building Safety Through Early Detection
One of the most significant benefits of Local Law 152 is its role in early detection of gas-related hazards. Gas leaks, if left undetected, can lead to explosions, fires, and carbon monoxide poisoning. By mandating regular inspections, the law ensures that potential issues are identified before they escalate. Licensed professionals use specialized equipment to test for leaks and assess the condition of piping systems. This proactive approach reduces the likelihood of emergencies and enhances the overall safety of the building.
Moreover, the law encourages property owners to adopt a culture of maintenance rather than repair. Instead of waiting for a problem to manifest, owners are incentivized to monitor and maintain their systems continuously. This shift not only improves safety but also extends the lifespan of infrastructure, reducing long-term costs and disruptions.
Liability Protection for Property Owners and Managers
Beyond safety, Local Law 152 offers substantial liability protection for property owners and managers. In the event of a gas-related incident, having a documented history of compliance can serve as a critical defense against legal claims. Inspection reports and certifications demonstrate due diligence and a commitment to tenant safety. This documentation can be invaluable in litigation, insurance claims, and regulatory investigations.
Failure to comply with the law, on the other hand, can expose owners to significant risks. Non-compliance may result in violations, fines, and increased scrutiny from regulatory bodies. In severe cases, it can lead to criminal charges or civil lawsuits, especially if negligence is proven. By adhering to Local Law 152, owners not only fulfill their legal obligations but also protect themselves from reputational and financial harm.
Building Trust with Tenants and Stakeholders
Compliance with Local Law 152 also fosters trust between property owners and tenants. In a city where safety is a top concern, tenants are increasingly aware of building standards and regulations. Knowing that a building undergoes regular gas inspections provides peace of mind and enhances tenant satisfaction. It signals that the owner values safety and is committed to maintaining a secure living environment.
This trust extends to other stakeholders as well, including investors, lenders, and insurers. Buildings that comply with Local Law 152 are viewed as lower-risk assets, which can influence financing terms, insurance premiums, and property valuations. In a competitive real estate market, compliance becomes a strategic advantage, differentiating responsible owners from those who cut corners.
Integrating Technology and Best Practices
As the industry evolves, many property owners are integrating technology to streamline compliance and enhance monitoring. Digital platforms now allow for automated scheduling, documentation, and reporting of inspections. Some buildings are even adopting smart sensors to detect gas leaks in real time, providing an additional layer of protection. These innovations complement the requirements of Local Law 152 and position buildings for future regulatory developments.
Best practices also include training staff on gas safety protocols, maintaining clear communication with tenants, and conducting internal audits between mandated inspections. By embedding these practices into daily operations, owners can ensure continuous compliance and readiness for inspections.
Conclusion: A Holistic Approach to Safety and Responsibility
Local Law 152 is more than a regulatory requirement—it is a framework for responsible building management. By mandating regular gas inspections, the law enhances safety, reduces risk, and protects property owners from liability. Its benefits extend to tenants, stakeholders, and the broader community, creating a safer and more resilient urban environment. As New York City continues to modernize its infrastructure, laws like Local Law 152 will play a pivotal role in shaping a culture of vigilance, accountability, and care. Compliance is just the beginning; the real value lies in the commitment to safety that it represents. Transform your home with expert craftsmanship and innovative design solutions from Zicklincontracting.com, where every renovation begins with your vision.
-
 Guides6 years ago
6 Proven Ways to Get more Instagram Likes on your Business Account
-
Mainstream11 years ago
BioWare: Mass Effect 4 to Benefit From Dropping Last-Gen, Will Not Share Template With Dragon Age: Inquisition
-
 Mainstream7 years ago
How to Buy Property & Safe Houses in GTA 5 (Grand Theft Auto 5)
-

 Guides2 years ago
Free Fire vs PUBG: Comparing Graphics, Gameplay, and More
-

 Guides1 year ago
50+ Free Fire ID and Passwords Login List (Giveaway) 2025
-
 Casual3 years ago
8 Ways to Fix Over-Extrusion and Under-Extrusion in 3D Printing
-

 Other2 years ago
Ajjubhai UID: Free Fire Details & Earnings
-

 Features2 years ago
Exploring Valorant eSports Stats: Unveiling the Metrics Behind Competitive Excellence