Video Games
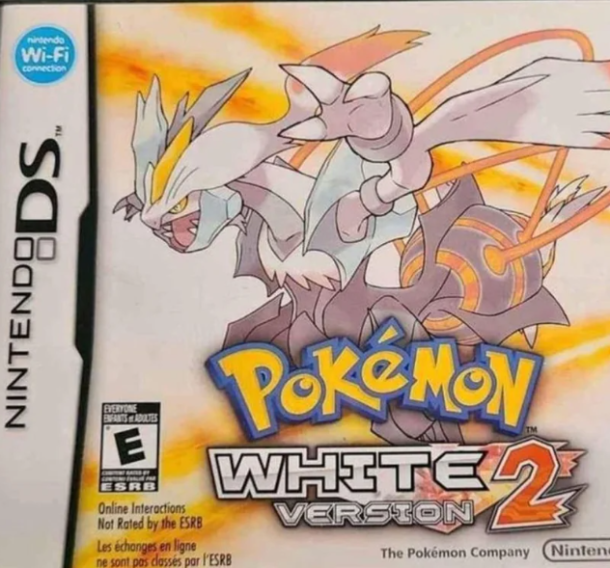
Pokémon White 2 Cheat Code: Cheat Code Secrets
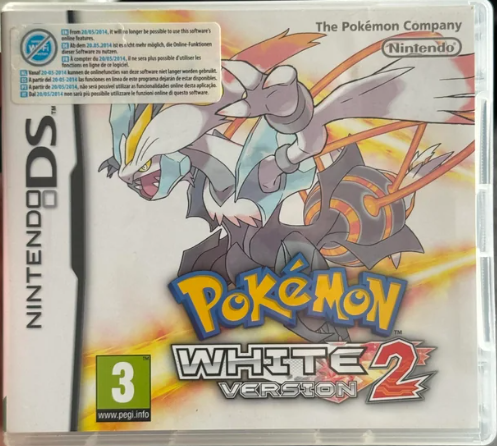
Pokemon White 2, an integral part of the Pokemon franchise, is celebrated for its engaging gameplay, immersive storyline, and the sheer joy of capturing and battling with Pokemon.
While playing the game traditionally is an enjoyable experience, some trainers seek to infuse their adventures with a dash of magic through cheat codes. No judgments here!

In this comprehensive article, we’ll delve into the world of Pokemon White 2 cheat codes, unlocking a treasure trove of hidden secrets.
The Appeal of Cheat Codes in Pokemon White 2
Cheat codes have been an integral part of gaming culture for decades, adding a layer of excitement, facilitating progress, or simply transforming the gaming experience. Some common motivations behind using cheat codes in Pokémon White 2 include:
1. Rare Pokemon Acquisition: Cheat codes can give you access to rare and legendary Pokémon that are usually elusive during standard gameplay.
2. Enhanced Gameplay: Certain cheat codes can bolster your adventure by providing an infinite supply of items, experience points, or in-game currency.
3. Customization: Cheat codes can be the brushstrokes on the canvas of your Pokémon White 2 world, altering the appearance of your character or Pokémon.
4. Skip Tedious Elements: They can assist in circumventing repetitive or time-consuming segments, allowing you to focus on the most exhilarating aspects of the game.
5. Exploration of Hidden Content: Cheat codes can unveil concealed areas, events, and features that would otherwise remain undiscovered.
Also Read: Pokémon Arceus Mobile
Pokémon White 2 Cheat Codes and Secrets
Let’s look at the Pokemon White 2 cheat codes and unveil the hidden secrets they conceal:
1. Rare Candy Extravaganza
Code: 9223B5FA 00002101
Rare Candies are coveted items that instantly elevate your Pokemon’s level. This cheat code gifts you an endless supply of Rare Candies, catapulting your team’s strength to new heights in the blink of an eye.
2. The Master Ball Bonanza
Code: 9223B5FA 00003101
Master Balls are the pièce de résistance of Poké Balls, ensuring a flawless catch rate. With this cheat, you can amass an inexhaustible reserve of Master Balls, rendering the capture of even the most elusive Pokemon a cakewalk.
3. Infinite Wealth
Code: 022670DA 000F423F
Currency is the lifeblood of your Pokemon adventure, enabling you to purchase items, heal your Pokemon, and more. This cheat lavishes you with boundless in-game wealth, freeing you to shop without financial constraints.
4. Shiny Pokemon Galore
Code: 5219C2BC 7820D203
Shiny Pokemon, the crown jewels of any collection, are incredibly rare and sought after. This cheat enhances the odds of encountering Shiny Pokemon in the wild, ensuring your collection gleams with brilliance.
5. Instant Egg Hatch
Code: 52247D8C 582000C0
Hatching Pokemon eggs can be a test of patience, but this cheat simplifies the process by ensuring your eggs hatch instantly.
Also Read: 10 Reasons You (Still) Need to get Pokemon X or Y
6. Time Extension in the Safari Zone
Code: 3202461F 00B0
The Safari Zone in Pokemon White 2 imposes time constraints on your visits. This cheat extends your time, allowing more opportunities to catch wild Pokemon.
7. Legendary Wild Pokemon Encounters
Code: F3A9A86D 4E2629B4
This cheat unlocks the possibility of encountering wild Legendary Pokemon in various locations throughout the game.
8. Walk Through Walls
Code: D3000000 02395D8C
52121D90 43A06000
94000130 FDFF0000
52121D90 02396000
D2000000 00000000
Break free from the confines of physical boundaries and explore new horizons with this cheat as your character effortlessly traverses through walls.
9. All TMs and HMs
Code: 94000130 FFFB0000
022347CC 03E70032
022347D0 03E70032
022347D4 03E70032
D2000000 00000000
Acquire all Technical Machines (TMs) and Hidden Machines (HMs) in the game, endowing your Pokemon with an array of powerful moves.
10. Instant Badge Collection
Code: 94000130 FFFB0000
12250010 000001E0
D2000000 00000000
This cheat code helps to unlock the doors to previously restricted areas by instantly collecting all Gym Badges in the game.
11. Wild Pokemon Modifier
Code: D0415174 1C25A144
A60233E7 7D2D8388
39E3F4E0 4130F579
AE44A5A6 06D16963
F2502F3D 3D23E160
This cheat provides the opportunity to encounter specific wild Pokemon by manipulating the code values, ensuring a personalized Pokemon safari.
12. Day Care Egg Acceleration
Code: 12029318 00002001
1202931A 00002000
Eliminate the waiting game by ensuring eggs are placed in the Day Care hatch instantaneously, no longer dependent on steps.
Also Read: Pokkén Tournament DX and Pokémon Ultra Sun & Ultra Moon Coming Later this Year
13. Max Stat Boost
Code: 1206E7AE 0000F09F
Elevate your Pokemon’s stats to the pinnacle of perfection, making them an indomitable force in battles.
14. Random Encounter Reprieve
Code: 5201D2B8 E5801000
0201D2BC EA000001
0201D2C0 E5800000
D2000000 00000000
Bid farewell to random encounters and explore the world at your own pace.
15. Shiny Wild Pokémon
Code: 521A96D8 72A4B237
62101D40 00000000
B2101D40 00000000
0000B5D4 000000A4
0000B5D8 00000000
D2000000 00000000
Amplify your chances of encountering Shiny Pokemon in the wild, infusing your adventure with a touch of shimmering brilliance.
These Pokémon White 2 cheat codes enrich your journey with countless opportunities for customization and exploration. Use them judiciously to enhance your gaming experience, all while cherishing the essence of the Pokémon world and the unique bonds you form with your Pokémon. Happy gaming!


Gaming’s next chapter is almost here, with 2026 shaping up to be a landmark year for new releases. From cinematic adventures to competitive online titles, the games on the horizon promise innovation and excitement.
“The number of video game firms in Canada more than doubled in a decade, rising from 775 in 2013 to 1,628 in 2022. This increase was driven by Canadian-owned firms, primarily engaged in video game design and small firms with fewer than five employees. Revenue in the video game industry rose from $2 billion to $7 billion from 2013 to 2022″ (statcan.gc.ca, 2025).
As the gaming world looks ahead to 2026, anticipation is building for titles that could redefine gameplay, storytelling and player engagement. Developers are pushing boundaries with immersive worlds, refined mechanics and cross-platform play that connects millions. Whether you’re into narrative-driven epics or competitive online experiences, 2026 is shaping up to be one of the most thrilling years in recent memory.
Next-Generation Franchises Poised to Shape 2026
Some of the most anticipated titles of 2026 come from established franchises or franchises evolving into new directions. Games like Primary, a fast-paced platformer with intense puzzle elements, as seen in Unigamesity coverage, demonstrate how indie charm can still break through in a world filled with high-budget titles.
Another standout is Battle Arena, a competitive multiplayer experience that fosters social engagement and strategic collaboration. Such titles promise to blend classical mechanics with innovative design, appealing to long-time gamers and newcomers alike. Next-gen franchises will likely combine deep narrative arcs with engaging multiplayer components, making them integral to the gaming landscape of 2026.
Fans are watching how studios will expand universes and bring fresh energy to beloved characters, ensuring a wide variety of experiences across genres.
Technological Breakthroughs Driving Gameplay Evolution
2026 promises major technological leaps that could transform player interaction. Advances in AI, procedural world generation and adaptive difficulty will make games feel more alive and responsive. Streaming technologies are also set to improve, reducing load times and increasing accessibility across devices.
For example, browser and online experiences are increasingly seamless, with Unigamesity highlighting that many games now load instantly without downloads, a trend that could extend to larger titles by 2026. Enhanced physics engines, real-time ray tracing and haptic feedback integration are also expected to push immersion to new heights. These innovations mean worlds will feel more dynamic, battles more visceral and stories more impactful.
Narrative-Focused Titles Redefining Player Expectations
Storytelling remains a core strength of video games and 2026 is expected to deliver several powerful narrative experiences. Games like Ancient Quest, noted for transporting players through mythic landscapes with rich world-building, show how interactive storytelling can emotionally resonate with players.
Similarly, Island Explorer combines survival elements within a narrative framework that rewards exploration and player choice. These kinds of titles often blur the line between interactive fiction and traditional gaming, encouraging deep emotional engagement and replayability.
Expect developers to experiment with branching narratives, moral choice systems, and characters that grow with players, not just plot devices to move the action forward. Narrative evolution will be a hallmark of games that define 2026.
How Live-Service and Cross-Platform Games Will Dominate
Live-service models and cross-platform play are now staples in modern gaming and they show no signs of slowing down. Competitive online experiences like Team Fortress, which emphasise coordination among distinct roles and cooperative gameplay, are a great example of how multiplayer titles build vibrant communities.
These games constantly evolve through seasonal content, community challenges and ongoing updates, keeping players engaged long after the initial release. Cross-platform play also ensures friends can connect regardless of their device, lowering barriers and uniting communities worldwide.
Games like Crystal Connect, with its engaging jewel-matching puzzles and complex patterns, show that even simple mechanics can be elevated through innovative design and artistic flair. Meanwhile, Empire Builder, a strategic civilisation game, demonstrates how thoughtful gameplay can offer depth and long-term replay value.
In 2026, commentators expect more titles to embrace this model, building environments that reward long-term play, encourage social interaction and regularly introduce fresh content to keep fans invested.
The Broader Digital Economy
2026 is not just about the games themselves; it’s about the ecosystem surrounding them. Gaming continues to intersect with other digital entertainment sectors and even licensed platforms like top rated Canadian online casinos illustrate how interactive content spans beyond traditional games into online wagering and skill-based challenges. Independent reviewers have tested and evaluated hundreds of Canadian online casinos to bring you the best expert insights, exclusive bonuses and top real money games, offering players a broader view of digital play and entertainment.
This cross-industry influence means improvements in payment systems, security, social connectivity and streaming tech benefit gamers and online entertainment consumers alike. The growing synergy between gaming, esports and digital platforms points to a richer ecosystem in 2026.
2026 is shaping up to be a landmark year in gaming history. From narrative-driven epics to innovative multiplayer worlds, the titles on the horizon promise to reshape expectations and broaden what games can be. Technological leaps, creative storytelling, and cross-platform engagement will define the year, making it an exciting time for gamers of all types.
Whether you’re drawn to strategic conquests, cooperative arenas, or immersive single-player journeys, the games emerging in 2026 will offer something unforgettable. As developers push boundaries and players embrace new experiences, this year will likely stand out as one of the most influential in modern gaming.


Long before consoles, cartridges, and online matches, a glowing green dot on an oscilloscope captivated visitors at a New York lab. In 1958, Tennis for Two turned nuclear research equipment into a quirky sports game, and many historians now see it as the first true video game created purely for fun.
A laboratory experiment that became a game
In the late 1950s, American physicist Willian Higinbotham worked at Brookhaven National Laboratory, a research center focused on nuclear science and particle physics. Each year, the lab held an open day to show taxpayers what their money was funding, but the static displays of instruments and charts were not exactly crowd-pleasers. Higinbotham needed something more dynamic to catch visitors’ attention.
He realized that Brookhaven’s Donner Model 30 analog computer was able to calculate ballistic trajectories, including the effect of gravity and wind resistance. If it could track the path of a shell, he thought, why not the arc of a tennis ball? In just a few hours, he sketched the design for a simple tennis simulation, and technician Robert V. Dvorak helped him build it over the following weeks.
The “screen” was an oscilloscope, a round cathode-ray tube normally used to visualize electrical signals. On in, the court appeared as a horizontal line with a short vertical line representing the net. A bright point of light was the ball. Two custom aluminum controllers sat on the table, each with a knob to set the hitting angle and a button to strike. Press the button at the right moment, and the dot sails over the net.
When Tennis for Two debuted on 18 October 1958, it was an instant hit. People lined up to play, and high-school students in particular had to be dragged away from the oscilloscope. The following year, Higinbotham showed an improved version, featuring a larger display and even different gravity settings so players could try a match “on the Moon” or “on Jupiter.”
Forgotten pioneer and the debate over “first video game”
After the 1959 open day, the game was dismantled so its components could be reused. For nearly two decades, Tennis for Two vanished from public memory while other experiments and commercial projects pushed video games forward. It resurfaced in the late 1970s, when Higinbotham was called to testify in patent lawsuits involving Magnavox and game-console pioneer Ralph Baer. Lawyers argued that his 1958 project counted as prior art, and suddenly this obscure lab demo was being talked about as the first video game.
Whether it truly is the “first” depends on how you define a video game. Earlier creations include the 1947 cathode-ray tube amusement device, the 1950 Bertie the Brain tic-tac-toe machine, and 1952’s OXO on the EDSAC computer, all of which experimented with electronic play in different ways. What sets Tennis for Two apart is that it ran on a computer, used a screen for graphics, and, crucially, was designed purely to entertain visitors rather than to showcase a machine or support research.
Furthermore, even if you don’t consider Tennis for Two the first ever game, it could be considered the starting point of a trend: sports games. Since its release, we’ve seen sports games in any platform, console, or even game genre imaginable. For example, Jackpot City Casino, among their themed slot games, has a few dedicated to different sports: basketball, golf, cricket, soccer… Higinbotham’s idea has influenced gaming forever.
Higinbotham himself never tried to patent the game and later said he would rather be remembered for his work against nuclear proliferation than for a “simple” diversion with an oscilloscope. However, the general public remembers his creation.. and he isn’t really shy about it. Brookhaven has built working replicas, museums around the world display reconstructions, and modern indie developers recreate its minimalist, side-on rallies for the web.

Gaming on The gGo
We take it for granted that our smartphones and tablets are more than just communication devices, but it is not so long ago that gaming enthusiasts had no option but to own a portable gaming machine if they wanted to play on the go. While some people still choose to have a specialist handheld console, it is incredible just how many games can be played in apps on our phones. Here we look at some of the top gaming apps that can be downloaded onto your iPhone and be on hand, in your pocket, wherever you go.
A Serious Approach to Fun
Apple is taking gaming seriously; its new “Games” App serves as a central hub for iPad, Mac, and iPhone, combining Apple Arcade titles, App Store games, and multiplayer experiences. It has put the social back into gaming. The company says it is emphasizing “Play Together” moments, so that players can see trending games among their contacts. The app is pre-installed on all iOS 18.5 devices, so mobile gaming comes standard, not as an add-on.
Back From the Cold
After a five-year standoff between Epic Games and Apple, Fortnite Blitz Royal has made a return to the platform. A legal feud over in-app payments has been resolved, and Fortnite officially returned to iPhones in May 2025. The game is created in mobile-first mode to ensure high-speed, “pick-up-and-play” action. Rather than complicated mechanics, it focuses on delivering intensity without complexity, making it perfect for casual gaming.
Blitz Royale is a 32-player, no-building battle on a mini Fortnite map. Each play zone lasts around five to six minutes, and you can play in solo or duo mode. There are also four and six-player squad game modes.
Casino Classics
One significant breakthrough for gaming enthusiasts has been the availability of mobile casino games. Online slots are particularly popular, but there are apps for every type of casino game, allowing players to have a flutter wherever they are. Players can check out some of the latest casino apps in the App Store or by visiting a comparison review site like Casino.org. Rather than just plumping for a big-name casino, it is worth looking at their recommendations to find some hidden treasures.
Casino apps offer players faster speeds and sharper graphics compared to mobile browser versions of games. Streamlined navigation makes it easy for players to sign up and make deposits. However, they usually have a more limited range of games than the leading casino site. According to expert Martin Blackhouse of Casino.org, the top Canadian casino apps include Lizaro, Jackpot City, and Stake.
Perennial Favourites
While we tend to assume that the latest and most innovative titles are all the rage, it is worth remembering that some of the most enduring games remain the most popular. When we play in casual mode, we usually don’t want anything too challenging, so playing something familiar has special appeal.
This means that some of the top iOS apps for gaming enthusiasts include titles like Subway Surfers that just stand up to the test of time. Its simple yet compelling gameplay features easy-to-learn swipe controls for ducking, dodging, and jumping. The aim is to avoid obstacles and oncoming trains. As play progresses, speed and difficulty increase, making it hard to master. It has all the feeling of a classic scrolling platform game from yesterday, but with up-to-date appeal and contemporary graphics.
Quizzers and word games
While we tend to think of mobile gaming as action games, many people play much gentler variations. Crosswords and quizzes are incredibly popular, and a standout app is NYT Games, the home of Wordle. Free to play and wonderfully compulsive, the game only takes a few minutes to play but is sociable and challenging. All the player has to do is guess the five-letter word within six words. Sounds easy enough, but some dastardly options make getting the correct answer far from simple. Wordle’s popularity stems from people sharing and comparing their scores. There are even league tables and weekly competitions available.
The NYT apps offer plenty of other free games, including a quick daily crossword and a Connections wall where players have to group random words together. A subscription opens up even more opportunities, but for many people, the free games are just enough to wake up their grey matter.
Explore for Yourself
Whatever type of gaming appeals to you, you can guarantee that there will be an app for it. All you have to do is take a look around and try out some of those on offer. If you download something and feel it is not for you, don’t forget to offload it so it doesn’t take up storage space. Also, check about in-app purchases before you start playing so you do not get any nasty surprises. Gaming, after all, is supposed to be fun.
-
 Guides6 years ago
6 Proven Ways to Get more Instagram Likes on your Business Account
-
Mainstream11 years ago
BioWare: Mass Effect 4 to Benefit From Dropping Last-Gen, Will Not Share Template With Dragon Age: Inquisition
-
 Mainstream7 years ago
How to Buy Property & Safe Houses in GTA 5 (Grand Theft Auto 5)
-

 Guides1 year ago
Free Fire vs PUBG: Comparing Graphics, Gameplay, and More
-

 Guides1 year ago
50+ Free Fire ID and Passwords Login List (Giveaway) 2025
-
 Casual2 years ago
8 Ways to Fix Over-Extrusion and Under-Extrusion in 3D Printing
-

 Other2 years ago
Ajjubhai UID: Free Fire Details & Earnings
-
 Mainstream13 years ago
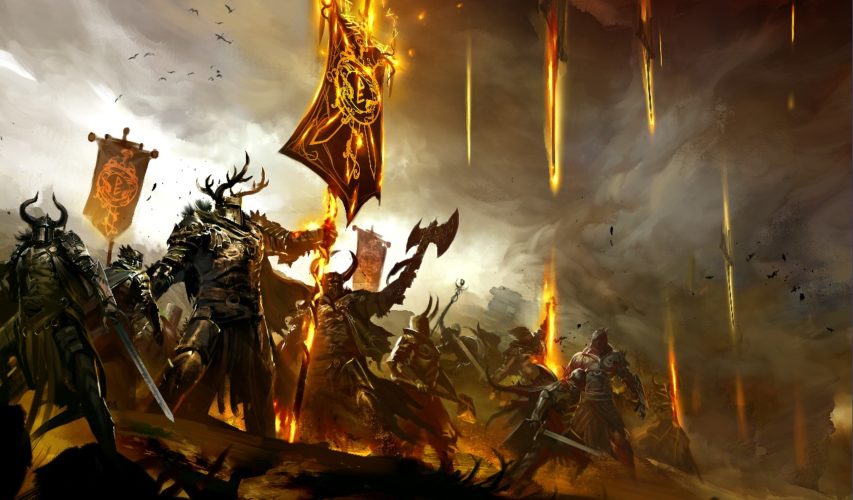
Guild Wars 2: The eSports Dream and the sPvP Tragedy