Uncategorized
Guide to King’s Bounty Legions Interface
Hello everybody and welcome to the first episode of the complete King’s Bounty: Legions guide: the guide to King’s Bounty Legions interface! I know that for starters, the user interface might be completely overwhelming, so I have decided to create this guide in order to let you know what each button does and help you navigate your way through the fantasy world of the title without any problems!
Let’s start with the first screen that you will see when you log in to the game, the world map screen. Most of the things that are available on this screen are also available in the expanded city screen that we’ll talk more about below. Now let’s see what each of these icons is useful for in King’s Bounty: Legions:
 1. Your experience and level indicator
2. Your leadership indicator (more leadership allows you to recruit more troops)
3. Your coins (money)
4. Facebook credits for purchasing special items and goodies
5. Your stamina (energy) and remaining time until you get one extra energy
6. The Royal Shop icon where you can purchase premium items
7. The flag that indicates the position of your hero (leader)
8. Locations you can travel to
9. Army management tab (you can open it by pressing the shortcut key A on your keyboard)
10. Spellbook (shortcut key: B)
11. Quest Journal (shortcut key: J)
12. Inventory (shortcut key: I)
13. Gifts
14. City Mode / Map Mode depending on your location (Shortcut key: N)
15. Toggle Full Screen Mode
Now, if you click the City Mode button, you will be taken to your location where there are a few new icons for you to use:
 1. The list of NPCs (non playable characters) that you can interact with. If a character has a question mark, it has a quest for you, if there is an exclamation mark, there is a reward you must collect. You can always talk to these characters, even after completing tasks and quests.
2. The Regular shop where you can buy extra troops for your army management screen as well as potions and items. IMPORTANT: Each location offers DIFFERENT troops and items, so you might wish to remember what each one offers!
3. Patrol: Start the Patrol mode (while you are not playing)
4. The Battle Button (Shortcut: Space). More about it below.
5. Global messages: you can see here all of the latest happenings in the game.
Now let’s see a few things about the Battle menu (after pressing the Battle Button). There are two tabs you can select: the Monsters tab where you can start fights for completing missions (battles against the AI):
 And there is also the PvP menu which can be accessed there and you can start looking for a real opponent to fight against here:
 Now, if you head into the battle, things might seem again overwhelming since the screen offers you even more information:
 1. The level of your hero and the opposing hero
2. That greyed out pattern shows how far the active troop can move. You are not obliged to move all the hexagons and you can take just one step (or more, if possible) and then perform an action.
3. The active troop is shown here.
4. The special actions a troop can perform. Have in mind that special actions have cool-down times (a specific number of turns must be completed before it can be used again).
5. The spells you can use in combat
6. Denfend button. Your troop will skip turn and gain a defensive bonus.
7. Wait button. Wait and see what the opponent does, then move your troop.
8. Spellbook
9. Withdraw from battle
Further more, you can find out a lot of interesting and important details about the troops in battle if you right click any troop:
 1. Icons show in this order, from left to right: when the indicated troop will activate, type of troop and alignment
2. Details about the troop you have clicked on.
And that would be it. It might seem that it’s very difficult to know everything about the King’s Bounty Legions interface, but it’s not really that complicated once you get used to it!


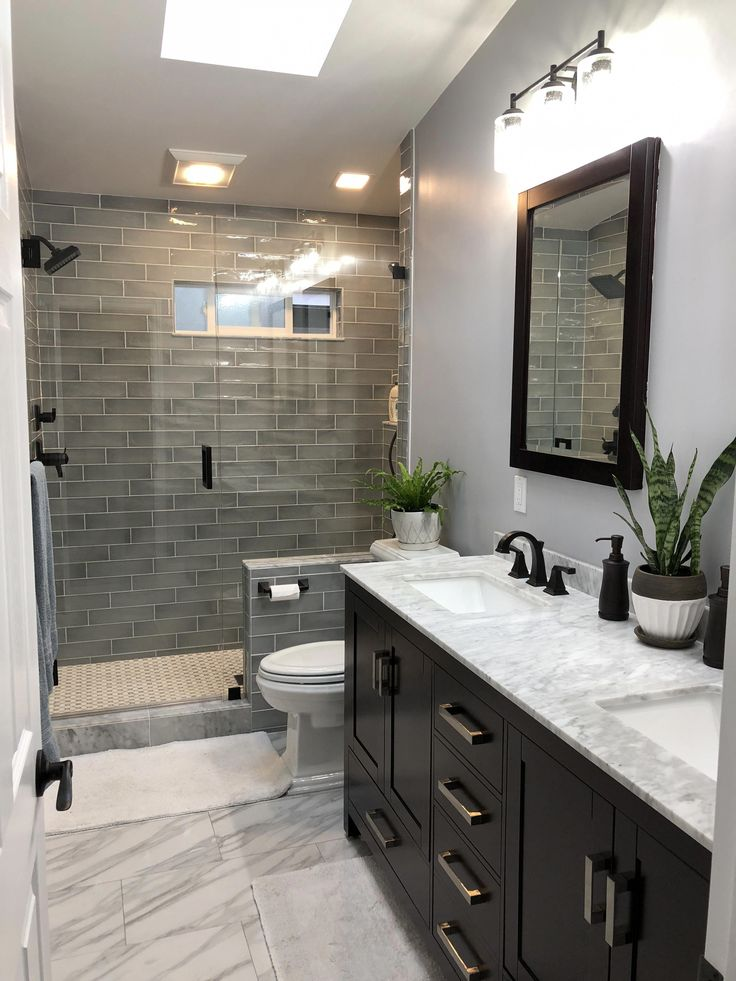
A bathroom remodel can enhance functionality, boost aesthetics, and increase home value. However, without careful planning, common mistakes can lead to wasted time, unnecessary expenses, and disappointing results. Understanding these pitfalls and learning how to avoid them ensures a smooth renovation process, delivering the ideal bathroom space you envision.
Neglecting a Comprehensive Plan
One of the biggest mistakes homeowners make is starting a remodel without a clear plan. Jumping into renovations without a well-defined budget, layout, and material selection can lead to costly delays and changes mid-project.
How to Avoid It:
Before starting, create a detailed remodeling plan outlining design preferences, must-have features, budget constraints, and a realistic timeline. Consulting professionals for guidance can help refine your vision and ensure a structured approach.
Ignoring Proper Ventilation
Bathrooms experience high humidity levels, and inadequate ventilation can result in mold growth, peeling paint, and moisture damage to walls and flooring. Many homeowners overlook the importance of proper airflow during a remodel.
How to Avoid It:
Install a high-quality exhaust fan to remove excess moisture, preventing condensation and mildew buildup. Ensure air circulation by placing vents strategically to maintain a fresh and dry bathroom environment.
Choosing the Wrong Materials
Selecting the wrong materials can lead to durability issues, premature wear, and maintenance headaches. Wood-based cabinets may warp due to moisture exposure, and porous flooring materials can absorb water, leading to damage over time.
How to Avoid It:
Opt for water-resistant materials suited for bathroom conditions. Porcelain or ceramic tiles, moisture-resistant paints, and sealed countertops withstand humidity while providing longevity and aesthetic appeal.
Overlooking Storage Solutions
A well-designed bathroom requires practical storage to keep toiletries, towels, and essentials organized. Many remodels prioritize aesthetics but fail to incorporate sufficient storage, leading to cluttered spaces.
How to Avoid It:
Include smart storage options such as recessed shelves, wall-mounted cabinets, and drawer organizers. Floating vanities with built-in compartments provide both style and functionality without occupying excess space.
Ignoring Lighting Needs
Poor lighting can make a bathroom feel dull and impractical. Insufficient illumination around mirrors and workspaces affects visibility, while relying solely on overhead fixtures can create harsh shadows.
How to Avoid It:
Layered lighting enhances ambiance and usability. Install vanity lights for even facial illumination, recessed lights for a balanced glow, and dimmable fixtures for customizable brightness levels.
Misjudging Plumbing Layout
Rearranging plumbing without careful assessment can lead to costly complications. Many homeowners attempt to relocate sinks, showers, or toilets without understanding structural limitations, resulting in unexpected expenses.
How to Avoid It:
Consult a plumber before making major layout adjustments. Keeping plumbing elements in their original locations minimizes complexity, reducing labor and material costs.
Overspending on Unnecessary Upgrades
It’s easy to get carried away with luxury fixtures and designer finishes, but unnecessary splurges can push a remodel over budget. Over-customization may also reduce future resale appeal.
How to Avoid It:
Prioritize essential upgrades that improve functionality and durability. Invest in quality faucets, efficient water-saving fixtures, and well-built vanities while balancing aesthetics with practicality.
Skipping Professional Help When Needed
While DIY renovations save money, certain tasks require expert handling. Improper electrical work, faulty plumbing installations, and incorrect tiling can lead to costly fixes later.
How to Avoid It:
Hire professionals like bathroom contractor for complex tasks like wiring, plumbing, and waterproofing to ensure safety and long-term efficiency. Balancing DIY efforts with expert assistance prevents mistakes and maintains high-quality results.
Conclusion
Avoiding common bathroom remodeling mistakes ensures a successful and stress-free renovation. By focusing on proper planning, material selection, lighting, ventilation, and professional expertise where necessary, homeowners can achieve a stylish, functional, and durable bathroom that meets both present and future needs. For expert renovation and waterproofing solutions in New York, trust Zicklincontracting.com to deliver quality craftsmanship and reliable service.

Star Wars: Galaxy of Heroes (SWGOH), a long-running mobile RPG by EA Capital Games, has consistently evolved to keep its dedicated player base engaged. With a wide range of game modes, characters from across the Star Wars universe, and a competitive arena and guild system, it’s no wonder the game has maintained its popularity for years. In 2023, the developers introduced a new feature that significantly shifted the in-game economy and player strategy: the SWGOH Webstore. This addition has quickly been recognized as a game-changer for both casual and competitive players.
What is the SWGOH Webstore?

The SWGOH Webstore is an external online storefront created specifically for SWGOH players. Unlike the in-game store, which is accessed within the mobile app, the Webstore is accessed through a web browser. Its primary purpose is to offer players additional options for obtaining characters, gear, credits, crystals, and other valuable resources. What sets it apart is the exclusive deals and login rewards available only through this platform. The Webstore boasts a streamlined user interface that is easy to navigate and offers a seamless extension of the in-game experience.
This move reflects a growing trend in mobile games where developers provide a separate e-commerce experience to encourage more direct transactions—often with fewer platform fees and more promotional flexibility.
Benefits of Using the SWGOH Webstore

One of the standout features of the SWGOH Webstore is its exclusive deals and promotions. Players regularly find web-only bundles that aren’t available in the in-game store. These often include discounted gear packs, shard bundles for hard-to-farm characters, and even early access items tied to upcoming events. This exclusivity provides a significant incentive for players to check the store daily.
Another major benefit is the daily login rewards. Simply visiting the Webstore every day can yield extra crystals, energy, and other valuable items. These bonuses stack with in-game daily rewards, offering a double benefit for consistent players and helping accelerate progression.
Additionally, the Webstore supports more flexible payment options, allowing users to complete purchases with a variety of methods that might not be supported within the mobile app. It also enables cross-platform accessibility, meaning players can browse and make purchases from a desktop or tablet in addition to their phone.
These Are the Best Star Wars Rogue One Toys & Action Figures You MUST Own!
How to Access and Use the SWGOH Webstore

Accessing the Webstore is straightforward. Players must log in using the same EA, Google, or Apple account linked to their SWGOH game profile. Once authenticated, the Webstore syncs with their game data, allowing all purchases and rewards to transfer directly into the game.
The site features a clean layout that categorizes offers by type: crystals, gear, character shards, and event packs. A dedicated section displays the free daily login item, which players can claim in a single click. For those making purchases, the checkout process is smooth and secure, often faster than in-game microtransactions.
Impact on Gameplay and Progression
The introduction of the Webstore has had a noticeable impact on gameplay. Players now have more tools to advance quickly, whether through extra gear to complete relic upgrades or crystal bundles that support more refreshes in hard battles. Web-exclusive offers often align with major game events like Galactic Challenges, Conquest, or marquee character releases, allowing players to be more competitive without excessive spending.
For free-to-play (F2P) or budget-conscious players, the Webstore offers new opportunities. The daily freebies, along with occasional deep discounts, mean that even players who spend little or nothing can benefit simply by engaging consistently.
Nintendo: The Wii U Name Isn’t The Problem, Lack Of Software Is
Community Reception and Feedback
The SWGOH community has largely responded positively to the Webstore. On forums such as Reddit and Discord, many players have praised the extra rewards and welcomed the additional value provided. The login bonuses and frequent promotions were particularly well received, especially in comparison to the traditionally slow grind of the SWGOH economy.
However, some concerns have been raised. A few players feel that certain Webstore-exclusive deals might give paying players too much of an advantage, potentially widening the gap between whales and F2P players. Others worry about the trend toward monetization outside of the app stores, questioning whether it will lead to more aggressive sales tactics.
Overall, though, the consensus is that the Webstore offers meaningful benefits that enhance the player experience without significantly disrupting game balance.
Tips for Maximizing the Webstore’s Value
To get the most from the SWGOH Webstore, players should make it a habit to check in daily for free rewards, even if they don’t plan to buy anything. Keeping an eye on limited-time bundles—especially during events like Double Drops, Territory Battles, or new character releases—can help optimize purchases.
It’s also a smart strategy to align purchases with in-game goals. For example, if a player is pushing to unlock a new Galactic Legend, buying shard bundles or gear packs that directly support that path is more valuable than random upgrades.
Lastly, tracking Webstore offers through community sources (e.g., Reddit megathreads or YouTube updates) can help identify the best-value deals and avoid less impactful ones.
How to Fix Batman: Arkham Asylum Crashes and Freezes
Conclusion
The SWGOH Webstore has emerged as a powerful new tool in the Star Wars: Galaxy of Heroes ecosystem. By offering exclusive rewards, better deals, and improved convenience, it reshapes how players interact with the game’s economy. Whether you’re a casual player looking for a few extra crystals or a competitive veteran optimizing your roster, the Webstore has something to offer.
As Capital Games continues to update and refine the Webstore, its role in SWGOH’s future looks increasingly central. For players looking to gain an edge or simply enjoy more value from their gameplay, the SWGOH Webstore is well worth a daily visit.
In today’s fast-paced digital era, the worlds of gaming and software are evolving at lightning speed. From high-definition graphics upgrades in popular games to critical bug fixes in productivity apps, updates are constantly rolling out to improve functionality, security, and user experience. For gamers, modders, and tech enthusiasts, staying on top of these updates is not just helpful—it’s essential. This is where Gaming Updates LCFModGeeks comes into play, serving as a reliable, community-driven hub for everything related to gaming and software updates.
Why Staying Updated Matters in Gaming and Software

Gaming isn’t just a pastime anymore; it’s a rapidly advancing ecosystem powered by continuous improvements. Whether it’s a new weapon system in a battle royale game or a critical security patch in system software, staying updated means staying competitive, safe, and optimized. Miss an update, and you could face lags, glitches, or even the inability to play with others online.
Outdated software can expose users to security vulnerabilities, compatibility issues, and reduced performance. For modders and gamers alike, missing an update might mean broken mods or corrupted save files. That’s why real-time access to reliable news and technical insights is more valuable than ever.
What is Gaming Updates LCFModGeeks?
Gaming Updates LCFModGeeks is a dedicated platform designed to bridge the gap between tech advancements and user awareness. It delivers timely, accurate, and detailed information on the latest game patches, modding trends, software upgrades, and everything in between. What makes it stand out is its strong focus on community—content is curated by tech-savvy gamers and software users who understand the nuances of both modding and mainstream use.
Whether you’re a casual player looking for updates on your favorite games or a software enthusiast exploring new tools, Gaming Updates LCFModGeeks is tailored to meet your needs.
Key Features of Gaming Updates LCFModGeeks

Real-Time Game News and Patch Details
At the heart of Gaming Updates LCFModGeeks is its commitment to keeping gamers in the loop. The platform provides real-time updates on popular titles such as Minecraft, Skyrim, Fortnite, and GTA V. But it doesn’t stop at just telling you an update has occurred—it explains what has changed, how it affects gameplay, and how to ensure your mods remain compatible.
Software and Security Alerts
Beyond gaming, the site also covers software updates across productivity, utility, and system tools. You’ll find news about critical security patches, performance tweaks, and feature releases that can significantly improve how you use your devices. Whether it’s an upgrade to your note-taking app or a new browser version, Gaming Updates LCFModGeeks keeps you informed and secure.
Community-Modding Support
Modding is an integral part of the modern gaming experience. From new character skins to expansive story mods, the possibilities are endless. Gaming Updates LCFModGeeks supports the modding community with tutorials, compatibility updates, and mod showcases. Beginners can learn how to get started, while experienced modders can explore advanced customization techniques and community contributions.
How Gaming Updates LCFModGeeks Enhances Your Experience
What makes Gaming Updates LCFModGeeks more than just a news site is its in-depth approach. Rather than simply reporting updates, the platform breaks down what they mean and offers practical advice for adapting. Encountering errors during installation? Facing mod conflicts after a game patch? LCFModGeeks provides clear, actionable guidance to resolve such issues quickly.
This knowledge-first model empowers users to navigate changes confidently and get the most out of their gaming and software tools.
What Sets Gaming Updates LCFModGeeks Apart?
A few key elements distinguish Gaming Updates LCFModGeeks from the crowd:
- Community-first content that is curated by real users with hands-on experience.
- Dual focus on both gaming and software updates, making it a one-stop resource.
- Consistent and detailed reporting with an emphasis on clarity and usability.
These strengths make it particularly valuable for users who don’t just want to stay updated—they want to understand the updates deeply.
Real Impact – Testimonials from the LCFModGeeks Community
Regular users of Gaming Updates LCFModGeeks often report significant improvements in their gaming and software experiences. From avoiding mod crashes to discovering powerful new tools, the site has proven itself as a practical and reliable guide.
One user shared how LCFModGeeks helped them navigate a major patch in Elden Ring that broke several community mods, saving hours of frustration. Another mentioned how a timely update alert helped secure their device from a software vulnerability before it was widely reported.
Navigating Gaming Updates LCFModGeeks
The platform is built with user experience in mind. Whether you’re on a desktop or mobile device, Gaming Updates LCFModGeeks features a clean interface, categorized sections, and intuitive navigation. From filtering updates by game title to browsing mod guides or patch notes, it’s designed to help you find what you need quickly and efficiently.
Conclusion
In a world where technology evolves by the minute, staying updated isn’t just smart—it’s vital. Whether you’re chasing the latest boss fight mechanics, keeping your modded game stable, or securing your software environment, Gaming Updates LCFModGeeks offers the insights and tools you need to stay one step ahead. Make it your go-to source, and experience the difference staying informed can make.
-
 Guides5 years ago
6 Proven Ways to Get more Instagram Likes on your Business Account
-
 Mainstream10 years ago
BioWare: Mass Effect 4 to Benefit From Dropping Last-Gen, Will Not Share Template With Dragon Age: Inquisition
-
 Mainstream6 years ago
How to Buy Property & Safe Houses in GTA 5 (Grand Theft Auto 5)
-
 Casual2 years ago
8 Ways to Fix Over-Extrusion and Under-Extrusion in 3D Printing
-
 Mainstream12 years ago
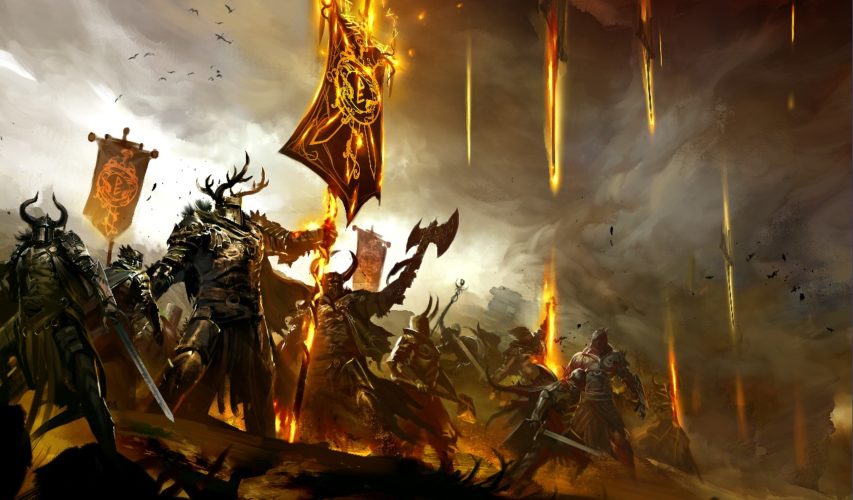
Guild Wars 2: The eSports Dream and the sPvP Tragedy
-

 Guides10 months ago
Free Fire vs PUBG: Comparing Graphics, Gameplay, and More
-
 iOS Games2 years ago
The Best Basketball Games for IOS
-
 Gaming News1 year ago
Swiping, Tapping, and Tilting: How Mobile Games Are Played Today