Guides
Diablo IV Ashava Guide

Ashava is a challenging figure to defeat in Sanctuary, so wanderers must know everything to beat her quickly before she can spread her poisonous influence.
Diablo IV has finally introduced the formidable challenge of World Bosses to the world of Sanctuary. Players should be prepared for a thrilling encounter with Ashava the Pestilent, one of the many first World Bosses to grace the realm. This comprehensive guide will give gamers the essential knowledge and strategies to defeat this hulking demon to easily get farm Diablo IV gold.
The World Bosses of Diablo IV emerge within the vast open world of Sanctuary. Ashava the Pestilent, a fearsome demon, materializes on a fixed schedule, offering a collective challenge that demands a united front. Our guide empowers you with the insights required to navigate the patterns and exploit the weaknesses of Ashava. Assemble a formidable group, and let us journey to conquer this imposing adversary. Prepare yourself for an unforgettable encounter as we unveil the secrets to triumph over Ashava the Pestilent in Diablo IV.
Ashava the Pestilent
Ashava is a massive, serpentine creature with two giant forearm blades that can cut through stone and flesh. She is also able to coat the ground with a deadly poison. Her scales are more potent than plate mail, and she is hell-bent on ripping through all who interrupt her quest to bathe Sanctuary in poisonous bile. Ashava can be found in the Fractured Peaks region of Sanctuary. She is a mighty creature and should only be challenged by experienced players with powerful Diablo IV items.
Ashava Spawn Timer and Location
Ashava the Pestilent emerges within the world of Diablo IV in a recurring cycle, reappearing every 6-8 hours. Gamers can anticipate her arrival by watching the notification 30 minutes before she spawns. Utilizing the in-game map can help track her precise location. As wanderers navigate the game world, they can observe the icon floating above the Crucible found in the Fractured Peaks region on the minimap, indicating the remaining time until Ashava’s fearsome presence manifests again.
The battle against Ashava will start as soon as it emerges from a putrid pool in the center of the arena. The game then expands your camera view to accommodate the boss’s size, attack range, and mechanics. Engage in combat once the boss settles into its animation.
Ashava Skills and How to Counter Them
Double Swipe
- This attack is telegraphed by Ashava dipping into a low stance and rearing up. Once you see this animation, start running away from her.
- The first swipe is a 360-degree attack, so you must get as far away from her as possible.
- The second swipe is a 180-degree attack, so you must ensure you are not in front of her when she makes this attack.
Leap
- This attack is telegraphed by Ashava rearing up on her hind legs and then leaping into the air.
- You can avoid this attack by moving to the side or behind her.
- If you cannot avoid this attack, you can try to dodge it using a movement ability.
Ground Pound
- This attack is telegraphed by Ashava stomping the ground.
- The ground pound itself does not deal any damage, but the swipe that follows it does.
- It would help if you moved away from her when she stomped the ground to avoid this attack.
Acid Spit
- This attack is telegraphed by Ashava opening her mouth and spitting out a cloud of acid.
- The acid blobs deal damage over time, so you need to avoid standing in them.
- You can prevent the acid blobs by moving away from them or using a movement ability to dodge them.
Bite
- This attack is a melee attack that deals damage in a cone in front of Ashava.
- You need to stay out of her melee range to avoid this attack.
- If you cannot avoid this attack, you can try to dodge it using a movement ability.
Overall Tips
- Ashava’s attacks are all telegraphed, so you have plenty of time to react.
- It is essential to be aware of your surroundings and position yourself to avoid her attacks.
- If you are playing in a group, you can help each other to avoid her attacks.
- It is a good idea to stack Poison Resistance for this fight.
Ashava Phases and Stagger Meter
When facing off against the monstrous Ashava, players should be aware that the boss will have several phases, which can be tracked by monitoring the HP bar. Each stage is indicated by an arrow marker pointing downward. Depleting Ashava’s health will be towards the completion of each phase, wherein the markers will point upward and be greyed out.
The phases in this boss fight do not signify any significant changes aside from Ashava using more attacks and becoming more lethal. All her previous moves will also pack in more punch, so players should be mindful of her pounds and swipe. Fortunately, finishing a stage will also make Ashava drop Health Potions that can be used to regenerate lost HP.
Another bar that players should be monitoring is Stagger. This meter is hard to miss because it appears as a thin, light blue line under the HP. This bar is generated whenever parties in the boss fight to use Crowd-Control abilities. After filling up the meter, Ashava will become Staggered and unable to move for several seconds, at which points players can deal unmitigated damage. Here is the list of all attacks that count as Crowd-Controls:
- Slow
- Chill
- Daze
- Stun
- Freeze
- Immobilize
- Taunt
- Knock Down
Tips for Conquering Ashava
- Ensure Adequate Level: To maximize your chances of success, it is crucial to face Ashava when you are sufficiently leveled. Avoid engaging if you are under-leveled, as your health and damage output may need to be improved. Likely, you would only contribute a little to the group effort if you are below the recommended Item Level. The ideal minimum level for fighting Ashava is 50, although going beyond this threshold is advisable if you need more confidence in your skills.
- Assemble a Suitable Group: Before commencing the battle, assess the presence of fellow adventurers in the area. If you notice multiple under-leveled players, consider leaving and returning to The Crucible. Each time you reenter, you load into a different instance, allowing you to find a group of players at the appropriate level. This strategic approach ensures a smoother and more enjoyable experience for everyone involved.
- Employ Poison-Resistant Gear: Ashava’s arsenal includes devastating poison attacks that can swiftly drain your health. Equip yourself with gear offering poison resistance to mitigate the impact of these deadly toxins. Look for gear and potions, and utilize shrines that provide poison resistance, as they can significantly enhance your survivability during the battle.
- Utilize Crowd Control Abilities: To mitigate the threats of Ashava’s formidable attacks, employ crowd control abilities. Stuns, roots, slows, and similar skills will help keep Ashava at bay by contributing to her stagger meter. Once she is stunned, wanderers gain precious moments to heal and deal damage. Utilizing effective crowd control tactics will significantly tip the odds in your favor.
- Maintain Patience and Perseverance: Ashava presents a formidable challenge, and success may take time. It is essential to remain patient and not become discouraged if you do not defeat her on your initial attempts. Continue practicing, refining your strategies, and honing your skills. With persistence, you will eventually conquer Ashava and claim victory.
Diablo IV Ashava Rewards
You and your team will receive many valuable rewards upon prevailing against the formidable Ashava the Pestilent in the Fractured Peaks. These prizes range from essential Diablo IV gold to necessary enhancing materials. Your triumphant conquest shall grant you:
- Gold and XP: The spoils you receive will be tailored to your level, providing you with a fair amount of gold and experience points.
- Legendary and Unique Items: Ashava presents an opportunity to obtain the most full and exclusive gear in the game. Prepare to acquire Legendary and Unique items renowned for their unparalleled power and scarcity.
- Scattered Prisms: Unearth the elusive Scattered Prisms, a rare crafting material capable of granting sockets to your weapons, enhancing their potential.
- Grand Cache: Following your initial victory against Ashava each week, a Grand Cache shall be bestowed upon you. This treasured cache guarantees a Legendary item, an undeniable testament to your conquest.
- Ashava Mount Trophy: Achieving victory over Ashava at World Tier 1 or higher will earn you the esteemed Ashava Mount Trophy. This cosmetic adornment lets you personalize your character’s mount, showcasing your triumph in all its glory. (It should be noted that this loot was only available during the Server Slam Event and can no longer be acquired.)
World Boss Loot Limit
Unfortunately, players can only receive the particular loot cache once a week after defeating a world boss. While you can beat up Ashava multiple times, you can only get the essential rewards once. Wanderers will have to wait for the weekly reset to get loots again.
Don’t Miss Your Chance to Get Rewards from Ashava
As one of the only few world bosses in Diablo IV, players should ensure they can take down Ashava at least once a week to get all the essential loot. Even if you already have the gear you need, you still need the socket crafting materials the cache provides. Make sure to check the timer and the minimap to take down Ashava.
Guides
Lync Conf Game Mods: Ultimate Guide for Gamers in 2026
Game mods have become an essential part of modern gaming culture. Short for “modifications,” mods are user-created additions or changes to video games that can transform everything from graphics to gameplay mechanics. They breathe new life into older titles, fix issues developers never addressed, and sometimes create entirely new experiences from existing games.
LyncConf has emerged as a leading platform in the modding world, serving as a central hub where gamers can discover, download, and manage high-quality mods safely. Unlike scattered forums or risky download sites, LyncConf organizes thousands of mods, verifies their safety, and connects talented mod creators with millions of players looking to enhance their gaming experience.
What Are Lync Conf Game Mods?
Lync Conf game mods are modifications to video games that alter or expand various aspects of gameplay, performance, visuals, or features. These can range from simple tweaks like changing a character’s outfit to massive overhauls that introduce entirely new storylines, worlds, or game mechanics.
LyncConf plays a unique role in the modding ecosystem. Rather than just hosting files, it acts as a trusted curator and organizer. The platform verifies mods for safety, checks compatibility across game versions, and provides detailed descriptions so players know exactly what they’re installing. This bridges the gap between creative mod developers and gamers who want reliable, quality content without the headache of searching through countless unreliable sources.
The evolution of game mods has been remarkable. What started in the 1990s as simple texture swaps and level edits has grown into sophisticated projects. Today’s mods include complete game conversions, professional-quality voice acting, complex scripting, and graphics that rival or exceed the original game’s production values. Some popular mods have even inspired official game features or spawned entirely new games.
FIFA 13 Career Mode Guide: Best Young Players
Why Gamers Choose LyncConf Mods
Gamers flock to LyncConf for several compelling reasons that set it apart from other modding sources.
The platform’s curation process ensures quality control. Every mod undergoes verification checks for malware, compatibility issues, and stability. This means you can download with confidence, knowing you won’t accidentally install something that crashes your game or compromises your computer’s security.
The benefits of using LyncConf mods are extensive. Visual enhancements can transform outdated graphics into stunning modern visuals with improved textures, lighting, and weather effects. Gameplay mods add new missions, quests, weapons, characters, and entire storylines that extend a game’s lifespan by hundreds of hours. Interface customization options let you tailor menus, HUDs, and controls to your personal preferences. Performance optimization mods can make games run smoother on older hardware or push newer systems to their limits.
Comparing modded games to their vanilla (unmodded) versions reveals stark differences. A vanilla game offers the developer’s original vision, which can be excellent but eventually becomes familiar and limiting. Modded games, however, offer nearly unlimited variety. You can adjust difficulty levels precisely to your skill, add quality-of-life improvements the developers never considered, fix bugs that were never patched, and keep the game feeling fresh years after release. Many gamers find that mods turn good games into great ones and keep them playing titles they might have otherwise abandoned.
Offline to Online: Engaging Games that Offer the Best of Both Modes
Top LyncConf Mods for Popular Games (2026)
Visual & Graphics Enhancements
Graphics mods remain among the most popular downloads on LyncConf. These transformations can make older games look modern or push new releases to photorealistic levels.
High-definition texture packs replace low-resolution game assets with crisp, detailed alternatives. Imagine playing a game from 2015 but with textures that look like they were made yesterday. Everything from character faces to building walls to natural landscapes gets the upgrade treatment.
Realistic weather and lighting improvements add atmospheric depth that dramatically changes how games feel. Dynamic shadows that shift with time of day, volumetric fog that rolls through valleys, rain that actually looks wet rather than like falling lines—these details create immersion that vanilla games often lack.
Popular examples include Fallout 4 ENB mods that transform the post-apocalyptic wasteland with cinematic color grading and lighting. Skyrim weather systems like “Vivid Weathers” make each climate region feel distinct and alive. Cyberpunk 2077 receives 4K enhancement packs that sharpen every neon sign and rain-slicked street in Night City, making an already beautiful game absolutely stunning.
Gameplay Overhauls
While graphics get attention, gameplay mods often provide the most lasting value by fundamentally changing how games play.
Mechanics overhaul mods reimagine core systems. Combat might become more tactical and challenging, with enemies that dodge, flank, and coordinate attacks. Crafting systems might expand to include hundreds of new recipes. Survival elements could add hunger, thirst, and temperature management to games that never had them.
New weapon types, armor sets, and equipment vastly expand player options. Rather than choosing from 20 weapons, you might have 200, each with unique properties, upgrade paths, and visual designs. This variety keeps gameplay fresh through multiple playthroughs.
Smarter AI transforms how games challenge you. Enemies that learn from your tactics, allies that actually help effectively, and NPCs with more realistic behaviors make game worlds feel alive rather than scripted.
Balanced progression systems fix common issues where games become too easy or grindy. These mods adjust experience curves, loot drops, and difficulty scaling so you’re always appropriately challenged without frustration.
Top 10 Sports Games To Play On PC and Consoles
Editor’s Picks — Most Downloaded Mods
Based on LyncConf’s 2025 download statistics, here are the community favorites:
The Witcher 3: HD Reworked Project (graphics overhaul with 12 million+ downloads)
Skyrim Special Edition: Legacy of the Dragonborn (museum and collection mod with massive content additions)
Fallout 4: Sim Settlements 2 (transforms settlement building with autonomous NPC-driven towns)
Minecraft: Create Mod (adds industrial machinery and complex engineering systems)
Stardew Valley: Stardew Valley Expanded (doubles game content with new locations, characters, and storylines)
Grand Theft Auto V: NaturalVision Evolved (photorealistic graphics transformation)
Dark Souls III: Cinders (complete gameplay overhaul with new classes, spells, and balanced difficulty)
How to Install Lync Conf Game Mods Safely
Installing mods might seem intimidating at first, but following proper steps ensures a smooth, problem-free experience.
Choosing the Right Mod Manager
Mod managers are essential tools that organize your mods, handle installation, and prevent conflicts. Don’t try to install mods manually by dropping files into game folders—that path leads to chaos.
Vortex is beginner-friendly with an intuitive interface. It automates most processes and works with numerous games. It’s the best starting point for newcomers to modding.
Mod Organizer 2 (MO2) offers advanced features for experienced users. It creates virtual file systems so mods never actually overwrite game files, making it easier to troubleshoot issues and switch between mod setups.
CurseForge specializes in games like Minecraft and World of Warcraft, with streamlined one-click installations for supported titles.
Choose based on your experience level and which games you’re modding. Most serious modders eventually use different managers for different games.
Harmonicode Gaming: Revolutionizing Performance and Player Experience
Installation Steps
Step 1: Download and Install Your Mod Manager
Visit the mod manager’s official website, download the installer, and follow the setup wizard. Most managers will automatically detect your installed games.
Step 2: Create a Mod Profile
Profiles let you maintain different mod setups. You might have a “vanilla plus” profile with just graphics improvements and a “full overhaul” profile with gameplay changes. This prevents conflicts and lets you switch between experiences easily.
Step 3: Download Mods from LyncConf
Browse LyncConf’s catalog, read mod descriptions carefully, and check the “Requirements” section. Click the download button, which will typically offer a “Download with Mod Manager” option that automatically adds the mod to your manager.
Step 4: Check Dependencies and Compatibility
Many mods require other mods to function. Your mod manager usually highlights missing dependencies. Install these first, then activate your desired mod. Also check the mod’s compatibility notes—some mods conflict with others and shouldn’t be used together.
Step 5: Arrange Load Order
Load order determines which mods take priority when multiple mods change the same game elements. Your mod manager provides tools to arrange this, and many have automatic sorting features.
Step 6: Launch and Test
Start your game through the mod manager (not the normal game launcher). Test that everything works as expected. If issues arise, you can disable mods one at a time to identify the problem.
Troubleshooting Common Issues
Load Order Problems: If certain mods aren’t working or you’re experiencing crashes, the load order may need adjustment. Tools like LOOT (Load Order Optimization Tool) can automatically sort mods into optimal order for many games.
Dependency Conflicts: Sometimes two mods try to change the same game file in incompatible ways. Check mod descriptions for known conflicts, and when in doubt, disable one of the conflicting mods to see if that resolves the issue.
Missing Assets or Textures: This usually means a required dependency wasn’t installed. Re-read the mod description’s requirements section carefully and install any missing pieces.
Game Won’t Launch: Start by disabling all mods to ensure your base game works. Then enable mods in small groups to identify which one causes the problem.
Where to Get Help: LyncConf’s community forums are excellent resources. Most mods also have comment sections where users share solutions. Reddit communities dedicated to specific games or modding in general (like r/modding) provide helpful troubleshooting support. Many games also have Discord servers where experienced modders answer questions in real-time.
Essential Tools & Platforms for Modding
Beyond mod managers, several specialized tools make the modding experience smoother and more stable.
LOOT (Load Order Optimization Tool) automatically sorts your mods into the optimal load order based on a master list maintained by the modding community. It prevents conflicts and ensures mods load in the correct sequence. Essential for games like Skyrim or Fallout with dozens of mods.
xEdit (also known as SSEEdit, FO4Edit, etc., depending on the game) lets you view and edit game files to resolve conflicts between mods. Advanced users can merge mods, clean dirty edits, and create compatibility patches.
ENB Manager helps you organize and switch between different ENB presets (advanced graphics mods). Instead of manually swapping files, you can change your entire visual setup with a few clicks.
SKSE, F4SE, and Other Script Extenders expand what mods can do by adding new scripting functions. Many advanced mods require these as dependencies. They’re safe community tools that have been thoroughly tested.
BodySlide and Outfit Studio let you customize character body and clothing models. Useful for games where appearance matters and you want everything to work together visually.
BethINI optimizes game INI configuration files for better performance and stability, particularly helpful when running many graphics mods.
These tools might seem excessive at first, but as you get deeper into modding, they become invaluable for creating stable, personalized game experiences.
Community & Collaboration
The modding community represents one of gaming’s most creative and collaborative spaces, and LyncConf serves as a major gathering point for this community.
LyncConf’s forums host thousands of discussions where modders share techniques, troubleshoot issues, and announce new projects. You’ll find guides written by experienced users, feedback threads for mods in development, and showcase areas where creators present their work.
Discord servers connected to LyncConf provide real-time communication. Whether you need quick help with an installation problem or want to chat with others who share your passion for a particular game, these communities offer immediate support and camaraderie.
Reddit threads like r/LyncConfMods (if available) aggregate news, showcase impressive mod combinations, and provide another avenue for discussion. Many individual games also have their own modding subreddits where LyncConf content gets shared and discussed.
For aspiring mod creators, LyncConf offers pathways to recognition and support. The platform lets you submit your own mods for review and publication. Successful creators gain exposure, receive donations from appreciative users, and sometimes even attract attention from professional game studios. Many professional game developers started as hobbyist modders.
The collaborative spirit extends to mod compatibility projects, where creators work together to ensure their mods function well alongside others. Translation teams localize mods for different languages. Testing groups volunteer to find bugs before public release. This cooperative approach benefits everyone in the ecosystem.
Latest Updates from LyncConf (2025)
LyncConf continues evolving with new features that make modding more accessible and reliable.
Automated Conflict Detection now scans your mod list before installation and warns about potential incompatibilities. This AI-powered system checks against a database of known conflicts, saving you from game-breaking combinations.
Smart Install Suggestions recommends complementary mods based on what you’ve already installed. If you download a graphics overhaul, the system might suggest compatible lighting mods or performance optimizers that work well together.
Enhanced Patch Notes now appear directly in the mod manager, showing exactly what changed between versions. This transparency helps you decide whether to update immediately or wait for further stability improvements.
Version Compatibility Guidance automatically checks which mods work with your current game version. When games update, this feature prevents you from installing outdated mods that might cause crashes.
2025 Roadmap Highlights reveal exciting developments coming soon:
Cross-Platform Syncing will let you access your mod profiles across multiple devices. Start modding on your desktop, then continue tweaking your setup from a laptop while traveling.
Console Support Expansion aims to bring more PC mods to console versions where possible, working within console manufacturers’ restrictions. While consoles will never have the freedom of PC modding, LyncConf is pushing to maximize what’s available.
Creator Monetization Tools will help mod developers earn sustainable income through optional supporter subscriptions, similar to Patreon but integrated directly into the platform.
VR Mod Optimization specifically flags and optimizes mods for virtual reality gaming, ensuring compatibility with VR hardware and controllers.
FAQs
Can LyncConf mods be used on consoles?
Limited options exist for consoles. Xbox and PlayStation have built-in mod support for certain games, but these use restricted versions with fewer capabilities than PC mods. LyncConf primarily focuses on PC modding, though they’re working to expand console compatibility where manufacturers allow it. Check individual game pages for console-specific mod availability.
Are these mods safe?
LyncConf implements rigorous safety checks on all hosted mods. Each file undergoes virus scanning, code review for malicious content, and community reporting systems. While no platform can guarantee 100% safety, LyncConf’s verification process makes it one of the safest sources for game modifications. Always download from official LyncConf links rather than third-party mirrors.
How does LyncConf compare with other mod platforms like Nexus Mods or Steam Workshop?
Each platform has strengths. Nexus Mods offers the largest overall library and has been around longest, making it the go-to for certain games. Steam Workshop provides seamless integration with Steam games through one-click installations. LyncConf differentiates itself through superior curation, advanced conflict detection, and a more modern interface. Many experienced modders use multiple platforms—Nexus for variety, Steam Workshop for convenience, and LyncConf for curated quality and safety. They complement rather than compete with each other.
Do mods disable achievements?
This depends on the game. Some games disable achievements when any mods are detected. Others allow mods without penalty. There are also achievement enabler mods for many games that restore achievements even when using modifications. Check your specific game’s policies and look for achievement-related mods on LyncConf if this matters to you.
Will mods break when my game updates?
Sometimes. Major game updates can make certain mods incompatible, especially those that rely on script extenders or modify core game files. LyncConf’s version compatibility system helps prevent these issues by warning you before installing outdated mods. When your game updates, check mod pages for updated versions before launching with your full mod list.
Can I use LyncConf mods alongside mods from other sources?
Yes, but carefully. Mod managers can handle files from multiple sources. However, ensure mods don’t conflict regardless of their origin. Read compatibility notes, check for duplicates, and test your setup thoroughly. The automated conflict detection helps identify issues across all your mods, regardless of source.
Conclusion
LyncConf game mods represent the cutting edge of player-driven gaming innovation. By providing a safe, organized, and community-focused platform, LyncConf makes the world of game modifications accessible to everyone from curious beginners to veteran enthusiasts.
The value proposition is clear: transform your gaming library into something uniquely yours. Fix that one annoying bug developers never addressed. Add hundreds of hours of new content to your favorite game. Make a decade-old title look and play like it launched yesterday. Connect with a passionate community of creators and players who share your interests.
Whether you’re looking to enhance graphics, overhaul gameplay, or simply make your gaming experience more convenient, LyncConf offers curated, verified mods that deliver results without the risks associated with unverified sources.
For gamers in 2025, the question isn’t whether to use mods—it’s which incredible modifications you’ll try first. With LyncConf’s comprehensive catalog, intuitive tools, and supportive community, you’re equipped to dive into the limitless possibilities of modded gaming. Your games will never be the same, and that’s exactly the point.
Guides
Ergonomic and Adjustable IV Chairs: Why They Matter in Outpatient Care

Outpatient care requires comfortable and efficient seating solutions for patients undergoing IV therapy. The right IV chair enhances treatment experiences by providing support, reducing discomfort, and promoting safety. Ergonomic and adjustable designs improve posture, minimize strain, and ensure medical professionals can administer IV therapy with precision. Selecting high-quality IV chairs tailored to patient needs plays a vital role in outpatient care settings.

Enhancing Patient Comfort During Treatment
Extended IV therapy sessions demand seating that prioritizes relaxation and support. Ergonomic IV chairs help maintain proper posture, preventing muscle fatigue and discomfort. Cushioned seats with breathable materials regulate temperature, ensuring patients remain comfortable throughout treatment. Adjustable armrests allow flexibility, ensuring optimal positioning for IV administration while reducing strain on the arms.
Reclining features enhance patient experience by enabling customizable seating positions. Some patients prefer upright support, while others benefit from a slightly reclined posture for improved circulation. Allowing patients to adjust their chair position promotes comfort, reducing stress and anxiety during infusion therapy.
Merax Gaming Chairs Review – Quality Gaming Chairs at a Great Price
Supporting Medical Efficiency and Accessibility
IV therapy requires precision, and adjustable chairs facilitate proper patient positioning. Healthcare professionals benefit from height-adjustable designs that ensure easy access to veins, reducing complications during IV insertion. Chairs with built-in trays allow medical staff to organize supplies efficiently, preventing unnecessary movement during treatment.
Mobility features enhance accessibility, with lockable caster wheels ensuring smooth transport while maintaining stability when stationary. Well-positioned seating prevents patient movement that may interfere with infusion flow, improving treatment consistency and minimizing interruptions.
Ensuring Safety and Stability in Outpatient Settings
Safety plays a crucial role in IV therapy, and ergonomic chairs provide the necessary support to prevent accidental movements. Sturdy frames with reinforced bases ensure stability, allowing patients to remain securely seated throughout the procedure. Non-slip surfaces reduce the risk of sudden shifts, maintaining a controlled environment for medical care.
Side rails offer additional security, preventing unintended movements that may disrupt IV therapy. Patients with mobility challenges benefit from chairs designed with easy access features, ensuring comfortable entry and exit without compromising treatment precision.
Best Console Gaming Chair for Extended Play Sessions (2017)
Adapting to Different Patient Needs
Outpatient facilities accommodate diverse patients, making adjustable chairs essential for personalization. Individuals with varying medical conditions require seating that adapts to their comfort preferences. Chairs with customizable lumbar support enhance relaxation for patients experiencing back pain, while adjustable leg rests improve circulation.
Infusion chairs designed for pediatric patients incorporate softer cushioning and adaptable sizing to accommodate smaller body frames. Elderly patients benefit from seating that minimizes pressure points, ensuring long-term comfort throughout therapy.
Improving Hygiene and Maintenance
Medical environments require easy-to-clean furniture to maintain sanitation standards. Ergonomic IV chairs with fluid-resistant upholstery prevent contamination while ensuring long-term durability. Smooth surfaces allow quick disinfection, supporting infection control measures in outpatient care.
Selecting chairs with high-quality antimicrobial coatings reduces bacterial buildup, ensuring safe treatment spaces for patients and healthcare providers. Maintenance-friendly designs reduce operational burdens for medical facilities, enhancing overall efficiency.
Final Thoughts
Ergonomic and adjustable IV chairs play a vital role in outpatient care, ensuring patient comfort, medical efficiency, and safety. Thoughtful seating solutions enhance treatment experiences, allowing healthcare professionals to administer IV therapy with precision. Investing in high-quality chairs tailored to diverse patient needs improves accessibility while supporting optimal posture and relaxation. Thoughtful design choices create a supportive medical environment, reinforcing the importance of ergonomic seating in modern outpatient care facilities. For top-quality office furniture solutions tailored to your workspace needs, visit corporateofficeint.com.
Guides
Escape From Tarkov Cheats: Premium EFT Hacks, ESP, Aimbot, and more!
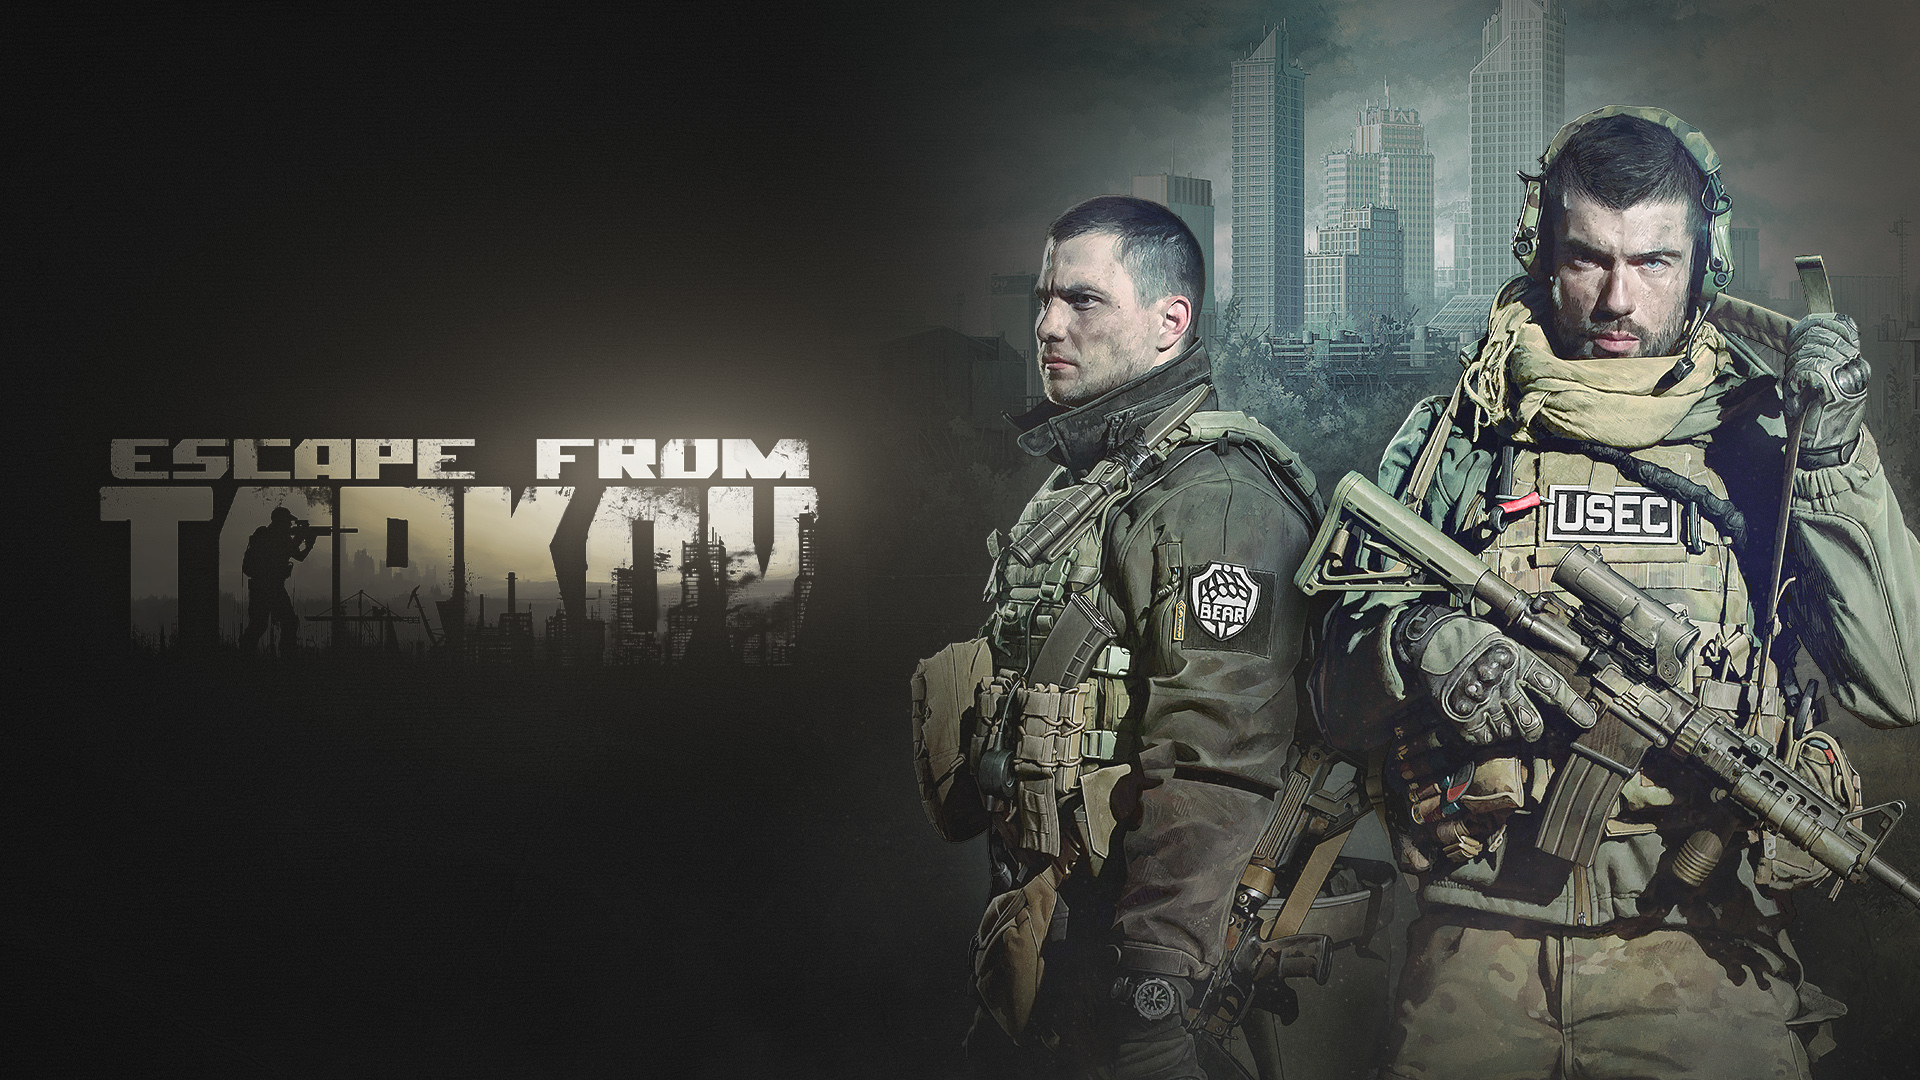
Escape from Tarkov (EFT) is all about high-intensity, complicated, and high-stakes survival gameplay. In each and every single raid, players generally stand to lose valuable gear, and they face foes treated with a hyper-realistic touch of skill. While some spend hours upon hours honing their skills, there are others who turn to Escape from Tarkov cheats and hacks to get the quickest advantage. These include very powerful features such as aimbots with ESP, wallhacks, radar hacks, and even auto-loot systems-with any one of these giving the player the unfair advantage in raids.
At Unigamesity, we have noted the increased interest in EFT hacks. Constantly, players are searching for manual ways to improve their gameplay. This article goes in-depth into the various types of Tarkov cheating methods, explaining how they work and why they have garnered so much popularity within the player base. With multicrystal clarity, these tools equip the user with almost superhuman prowess-from greater aim precision to seeing enemies through walls. So let’s start unraveling the most speculated Escape from Tarkov cheats and what remains practically irresistible to the players.
Understanding Escape From Tarkov Cheats and Hacks
Escape from Tarkov cheats, often referred to as EFT hacks, are third-party tools created to give players a competitive edge. These tools range from simple overlays that reveal item locations to advanced systems capable of controlling recoil, tracking enemies, and automating loot collection.
Some of the most common features include:
- Aimbot – automatic aiming assistance.
- ESP (Extra Sensory Perception) – displays information like player names, health, and distances.
- Wallhack – allows vision through solid objects.
- Radar hacks – show player positions on a minimap-style overlay.
- Auto loot systems – grab valuable items instantly.
These tools are frequently updated to bypass Tarkov’s anti-cheat protections and work seamlessly with the latest patches. At Unigamesity, we’ve noticed how popular these hacks have become due to EFT’s steep learning curve and the punishing nature of raids.
Also Read: League of Legends: All Level Borders Explained
How Escape From Tarkov Aimbot Changes the Game
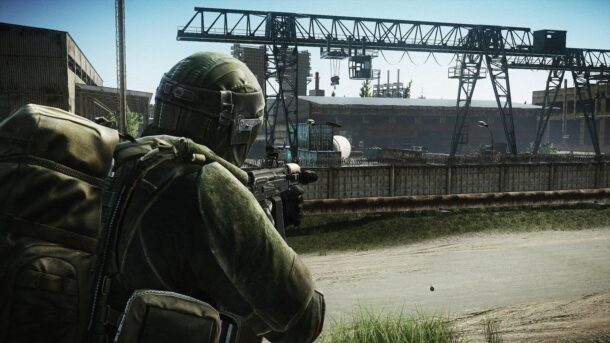
The aimbot is perhaps the most well-known Tarkov cheat. It locks a player’s aim directly onto enemies, making firefights almost unfairly easy.
Key features of EFT aimbots include:
- Bone targeting – choose whether to aim for the head, chest, or legs.
- Recoil control – reduces weapon kickback, making automatic fire far more accurate.
- Field-of-view adjustments – lets players decide how wide the aimbot scans for targets.
- Smooth aim & aim delay – makes the aiming look more natural to avoid suspicion.
In a game where split-second gunfights determine survival, an aimbot offers a massive advantage. For many, it removes the frustration of mastering EFT’s steep recoil system and lets them focus on looting and survival.
The Power of ESP in Tarkov Cheats
ESP, or Extra Sensory Perception, is another fan-favorite hack. With ESP, players can see hidden information layered over their screen, such as:
- Enemy names and health bars.
- Distance markers for enemies and loot.
- Highlighted extraction zones.
- Rare item locations.
This cheat turns Tarkov into a map full of glowing markers, removing the stress of blind exploration. ESP is also highly customizable, allowing players to filter what they want to see—whether that’s only high-value loot or specific player threats. According to Unigamesity, this versatility makes ESP one of the most common cheats in Escape from Tarkov.
Also Read: Valorant Agent Release Order: A Complete Timeline
Wallhacks: Spot Enemies Before They Spot You
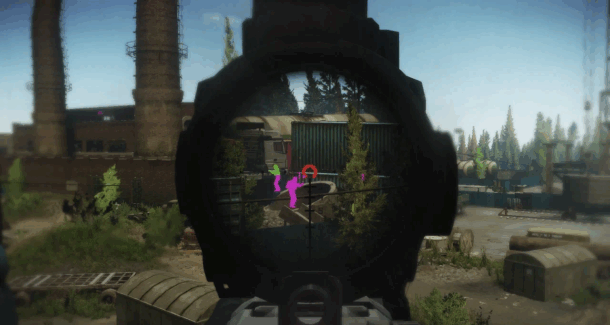
Wallhacks push awareness to the next level by letting players see opponents through solid objects. Whether hiding behind doors, crouching in buildings, or camping stairwells, no enemy remains truly hidden.
Features often included with EFT wallhacks:
- Skeleton outlines of players.
- Glow effects around enemies.
- Real-time tracking of movement through walls.
For those who fear ambushes or surprise attacks, wallhacks virtually eliminate uncertainty. Combined with ESP, wallhacks offer full knowledge of the battlefield before engaging in any fight.
Radar Hacks: Map Awareness at Its Peak
Radar hacks function like a permanent minimap, displaying player positions in real-time. This feature helps players avoid dangerous hotspots, plan ambushes, and track movement across Tarkov’s large maps.
A radar hack is especially powerful in squad-based play, where knowing exact enemy locations makes coordination simple. With this cheat, no opponent can sneak up unnoticed.
Advanced Features: Auto Loot, FOV Control, and Player Identification
Beyond the classic hacks, many premium Escape from Tarkov cheats now include advanced features:
- Auto Loot – automatically collects items based on custom filters. Players can prioritize rare loot while ignoring junk.
- Situational FOV Adjustment – dynamically changes aimbot scanning range depending on the scenario, making cheats appear more natural.
- Player Name Display – shows usernames on screen, even through walls, helping players identify high-value targets or avoid streamers.
These premium features make Tarkov cheats feel more like fully integrated tools rather than simple add-ons.
Also Read: LoL Champions by Release Date: A Complete Timeline
The Risks of Using Escape From Tarkov Cheats
While cheats may sound appealing, they come with significant risks. EFT uses BattlEye anti-cheat software, which is constantly updated to detect hacks. Getting caught can result in permanent bans, lost progress, and wasted money.
Additionally, many so-called “undetectable” cheats may come from shady providers, risking malware infections or account theft. At Unigamesity, we always stress the importance of caution when exploring these tools online.
Why Players Search for EFT Cheats Despite the Risks
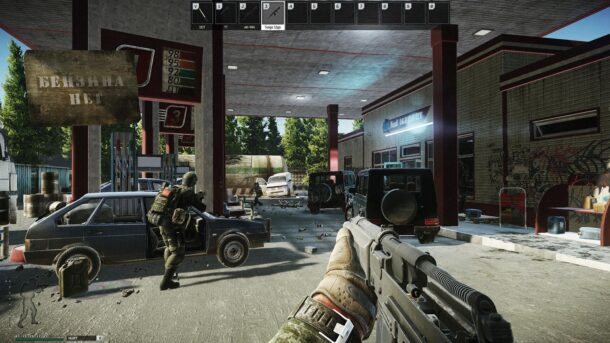
Escape from Tarkov is notoriously punishing. Hours of grinding can be lost in a single raid, and new players often struggle against veterans with better gear and map knowledge. Cheats offer a shortcut, giving less experienced players the ability to compete.
For some, it’s about curiosity. For others, it’s about saving time and resources. Ultimately, EFT cheats remain popular because of how much pressure Tarkov puts on its players.
FAQs
Q1: What is the most popular Escape From Tarkov cheat?
The two most common cheats employed are Aimbot and ESP, which give massive advantages in perfect aim and battlefield awareness.
Q2: Can EFT cheats get you banned?
Yes. BattlEye and other detection systems routinely lay the banhammer on accounts caught in the act of cheating. Most of these bans are permanent.
Q3: Are “undetectable” hacks really safe?
There is no cheapware that can claim to be 100% safe. Even the so-called premium ones sooner or later face detection.
Q4: Why do people use cheats in Escape from Tarkov?
Some players do so in an attempt to compete with veterans, speed up their looting, or just to have fun trying powerful tools.
Q5: Does Unigamesity recommend using EFT cheats?
Unigamesity lists the cheats for informational purposes only, and players should be aware of the risks involved in exploring them.
Also Read: How to Make Plant in Little Alchemy 2: Beginner Guide
Conclusion
A hardcore, high-stakes game where being skillful, alert, and prepared matters much. For the many players who find this steep learning curve too much to bear, EFT cheats such as the aimbot, ESP, wallhacks, and radar offer short dues for survival and domination. They offer easier raiding and greater rewards through better aim, better information, and faster looting.
Here at Unigamesity, we’ve seen these cheats become highly popular in 2025 and why so many players get pulled in by them despite the risks. The temptation of premium hacks might be hard to resist, but it is always recommended to stay aware of the consequences- permanent bans, losing your account, or even a security risk.
-

 Guides6 years ago
6 Proven Ways to Get more Instagram Likes on your Business Account
-
Mainstream11 years ago
BioWare: Mass Effect 4 to Benefit From Dropping Last-Gen, Will Not Share Template With Dragon Age: Inquisition
-

 Mainstream7 years ago
How to Buy Property & Safe Houses in GTA 5 (Grand Theft Auto 5)
-

 Guides2 years ago
Free Fire vs PUBG: Comparing Graphics, Gameplay, and More
-

 Guides1 year ago
50+ Free Fire ID and Passwords Login List (Giveaway) 2025
-

 Casual2 years ago
8 Ways to Fix Over-Extrusion and Under-Extrusion in 3D Printing
-

 Other2 years ago
Ajjubhai UID: Free Fire Details & Earnings
-
 Mainstream13 years ago
Guild Wars 2: The eSports Dream and the sPvP Tragedy
