Video Games
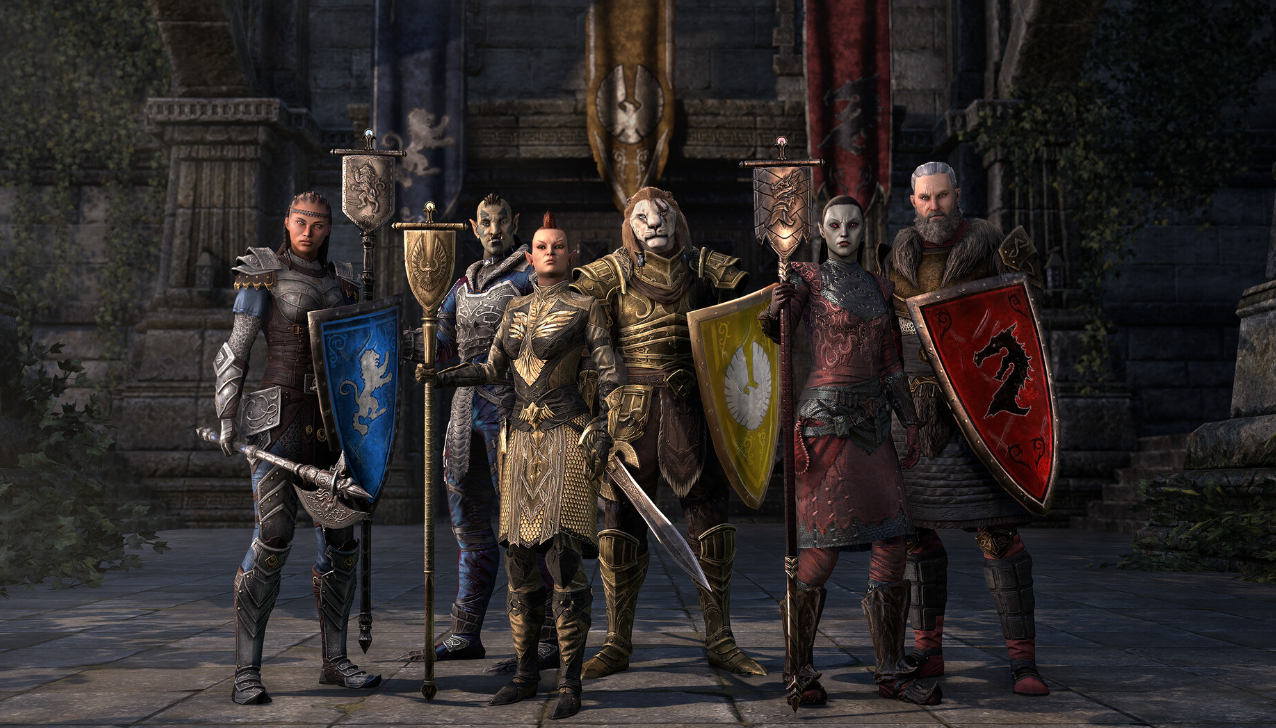
Is The Elder Scrolls Online Cross Platform in 2025?
Key points:
- ESO does not support full cross-platform play, but players can enjoy cross-generational play within the same console family.
- Server differences, gameplay balance, and platform restrictions make implementing crossplay difficult.
- While not confirmed, ESO may introduce crossplay in the future as gaming technology evolves.
Introduction
The Elder Scrolls Online (ESO) is a multiplayer online role-playing game (MMORPG) with millions of players worldwide. Players have wanted to play with friends on many platforms since the game’s launch to improve their gaming experience. In 2025, however, will Elder Scrolls Online be cross-platform? Let’s find out!
A Quick Look at The Elder Scrolls Online
The Elder Scrolls Online is an MMORPG set in the world of Tamriel. It enables gamers to fight with other players, explore, and complete targets. ESO is accessible on various platforms, such as Xbox, PlayStation, and PC.
To keep players interested, the game has undergone multiple expansions throughout the years, adding new regions, narratives, and gameplay elements. It is a favorite among RPG fans because of its broad open-world gameplay and rich lore.
Understanding Cross-Platform Play in ESO

Cross-platform play allows players on various devices to connect and play together in the same game environment. This makes it possible for friends who use different gaming systems like PC, Xbox, or PlayStation to collaborate and play multiplayer games without restrictions.
Many modern games have adopted cross-platform functionality, facilitating player collaboration between devices. In 2025, however, will cross-platform gaming be supported in The Elder Scrolls Online (ESO)? Let’s analyze what’s going on.
Also Read: Solitaire Grand Harvest Free Coins (2025)
Can You Play ESO Across Different Platforms?
The Elder Scrolls Online is still not wholly cross-platform as of 2025. As a result, players on various platforms are unable to collaborate. There are a few exceptions, though:
- PC and Mac players can play together.
- Xbox players can only play with other Xbox users.
- PlayStation players can only play with other PlayStation users.
- PC players cannot play with console players.
The present ESO system restricts the possibility of forming cross-platform teams by keeping various platform players apart. Although some players get around this by making accounts on several other platforms, this isn’t the best option.
Connecting Different Console Generations
ESO permits cross-generational play within the same console family but does not support complete cross-platform play. This implies:
- PS4 and PS5 players can play together.
- Xbox One and Xbox Series X/S players can play together.
Although it still prevents full cross-platform play, this is a step toward a more integrated ESO experience. Many gamers had hoped that full crossplay would be available on newer systems, but technical restrictions still prevent it.
Also Read: Best and Safe ROM Sites to Download ROMs
The Challenges of Making ESO Fully Cross-Platform

Many games have adopted cross-platform play, but ESO faces several challenges that make it difficult to implement:
- Server Structure and Capacity Issues
ESO maintains distinct servers for each platform. Combining all in-theme systems would require infrastructure modifications and cause serious server load problems.
- Gameplay Balance Between PC and Consoles
Console gamers use controllers, whereas PC players use a keyboard and mouse. This may result in balance problems, particularly in competitive gaming. PC gamers have an advantage because some actions are simpler to complete with a mouse and keyboard.
- Technical Difficulties in Syncing Data
Synchronization can be challenging because ESO patches, updates, and content releases can not always line up across platforms. Updates for consoles frequently need Microsoft and Sony’s permission, which slows them.
- Sony and Microsoft Policies
Restrictions imposed by console manufacturers occasionally prohibit cross-platform play. Sony has hesitated to allow crossplay for some games, but Microsoft has been more flexible recently.
What the Developers Say About ESO Crossplay
ESO’s creators, ZeniMax Online Studios, have talked about cross-platform play. Although they acknowledge the need, they have said that implementing it is difficult. Technical constraints, balancing problems, and server management are their top concerns.
ZeniMax has not yet disclosed any intentions to incorporate full crossplay into ESO. However, they are still working to improve the game in other ways, with a priority on performance optimization and content expansion.
Also Read: How Long Does it Take to Download Fortnite on PC
What Are the Current Priorities for ESO?
Instead of focusing on cross-platform play, ZeniMax has been working on:
- New Expansions and Content – ESO continues to receive major updates, including new regions, quests, and events. The game world also continues to expand, giving players more adventures to explore.
- Game Performance Enhancements – The creators are improving graphics, load times, and gameplay stability to improve the player experience on all platforms.
- Improving Cross-Progression Features – While full crossplay is not available, players can still access their progress across PC and Mac, reducing restrictions for some players.
- Combat System Refinements – Balancing classes and abilities remains a key focus for keeping PvP and PvE gameplay fair and engaging.
- Community Events and Seasonal Content – Regular events keep players engaged and provide new rewards and incentives to continue playing.
Is Cross Progression Available in ESO?

Cross-progression allows players to continue their game on another platform. Here’s how it works in ESO:
- PC and Mac players can switch between these platforms easily.
- Console players cannot transfer progress between Xbox and PlayStation.
- PC to Console Transfers are not allowed at this time.
It cannot be enjoyable for gamers who wish to switch platforms without cross-progression. If they switch from console to PC or vice versa, they will have to start over.
Also Read: How Many GB is Valorant: Storage Guide
Why Do Players Want Cross-Platform Play?
There are many reasons why ESO players want cross-platform features:
- Playing with Friends – Gamers wish to team up with their friends, even if they are on different platforms.
- More Active Servers – Crossplay would increase the number of active players, reducing wait times for dungeons and PvP.
- Unified ESO Community – It would remove the barriers between platforms and create a single, large ESO community.
- Future-Proofing the Game – As more games move toward cross-platform play, ESO risks being left behind if it does not adopt this feature.
Potential Solutions for Cross-Platform Play
If ZeniMax decides to implement crossplay in ESO, they may take a few different approaches:
- Server Merging – Instead of separate servers for each platform, they could create a unified server system.
- Optional Crossplay Settings – Players can turn cross-platform play on or off.
- Balanced Gameplay Features – The developers could add features that balance PC and console gameplay, such as aim assist for controllers.
- Phased Rollout – ESO could introduce crossplay in phases, starting with specific game modes before full implementation.
Alternatives for Playing with Friends
If you want to play ESO with friends on different platforms, here are some options:
- Use the Same Platform – Playing on the same system as your friends is the easiest solution.
- Try Cloud Gaming Services – Some cloud gaming services may allow cross-platform access in the future.
- Stay Updated on ESO News – Keep an eye on official announcements in case cross-platform play gets added later.
- Join Platform-Specific Communities – Find friends and guilds on your platform to improve your ESO experience.
Also Read: How Big is Fortnite? System Requirements [Complete Size Guide]
Will ESO Become Cross Platform in the Future?
While ZeniMax has not confirmed cross-platform plans, there is still hope for the future. ESO might someday implement crossplay when gaming technology develops, and it becomes the norm.
However, ESO gamers must remain within their platform’s ecosystem for the time being. If Crossplay were to become available, it would revolutionize the community.
Conclusion
As of 2025, The Elder Scrolls Online is not completely cross-platform. Players from various platforms cannot join the same game, even though cross-generational play is possible. Though a highly desired feature, crossplay is challenging to implement due to technological and policy issues.
For now, ESO users who wish to play with their friends must select the same platform. However, there is always hope that ESO will eventually provide this capability as the gaming industry shifts toward more excellent cross-platform compatibility.
Do you want ESO to work on all platforms? Let us know your thoughts!

Addiction recovery isn’t a straight line and treatment and healthy routines that keep people on track can come in many different forms. Particularly, when it comes to the newfound time that was once spent drinking or taking drugs.
While traditional approaches such as counselling and support from addiction and alcohol rehabilitation centres remain key to any help with addiction, there is also a growing recognition that healthy hobbies can also play a valuable role.
Interestingly, that can also include gaming when approached mindfully and in moderation. It can provide surprising benefits during recovery and a real sense of progress. And here’s exactly why…
It Provides Structure and Routine
Early recovery can leave large stretches of unstructured time. Hours that were once spent drinking or using substances suddenly feel empty, which can increase cravings and restlessness.
Gaming can introduce a sense of routine. Whether it’s logging in for an hour in the evening or completing a daily challenge, it creates a predictable activity to look forward to. Many games reward consistency, offering incremental progress that mirrors the steady effort required in recovery.
This structure can be particularly helpful during vulnerable times of day, such as evenings or weekends, when triggers might be strongest.
It Offers a Healthy Dopamine Boost
Addictive substances often hijack the brain’s reward system, creating intense spikes of dopamine. In recovery, people can experience a temporary “dopamine deficit”, leading to low motivation or reduced pleasure in everyday activities.
Gaming provides achievable goals, clear feedback and a sense of accomplishment, all of which stimulate dopamine in a more balanced way. Completing a level, solving a puzzle or mastering a new skill can produce a genuine sense of satisfaction.
While it’s important not to replace one compulsive behaviour with another, moderate gaming can serve as a bridge while the brain recalibrates and natural rewards become enjoyable again.
It Encourages Problem-Solving and Focus
Many games require strategic thinking, planning and concentration. Engaging in these cognitive processes can help sharpen focus and improve mental resilience, areas that may have been affected by prolonged substance use.
Puzzle games, role-playing games and even certain action titles demand decision-making under pressure, adaptability and persistence. These are skills that translate well into recovery, where managing triggers and setbacks often requires calm, deliberate thinking.
Gaming can also act as a form of mindfulness. When fully immersed in a task, intrusive thoughts and cravings may temporarily subside, giving the mind space to reset.
It Facilitates Social Connection
Isolation is a common challenge in addiction. Recovery frequently involves distancing oneself from social circles linked to substance use, which can initially feel lonely.
Online multiplayer games, co-operative missions or gaming communities can provide a sense of belonging. Shared objectives and teamwork foster communication and camaraderie without the pressure of alcohol-centred environments.
For some individuals, gaming offers a low-stakes way to rebuild social confidence. Speaking through a headset or participating in online forums can feel less intimidating than face-to-face interaction, particularly in the early stages of recovery.
That said, balance remains key. Gaming should complement, not replace, real-world support networks and meaningful relationships.
It Creates a Sense of Progress and Achievement
Recovery is built on small, consistent wins. Gaming mirrors this principle through levelling systems, unlocked achievements and visible progress bars.
Seeing tangible evidence of advancement, even in a virtual world, can reinforce the idea that effort leads to reward. This mindset can strengthen perseverance in recovery, where progress may sometimes feel slow or intangible.
Moreover, gaming can remind individuals that enjoyment and excitement are still possible without substances. Rediscovering fun is an essential part of building a fulfilling sober life.

Sports fans love staying updated, but not everyone wants ten different apps fighting for attention on their phone. The iOS App eTrueSports provides users with a simple solution which successfully attracts new users. The product establishes its value through basic functions which deliver essential sports information. The application provides users with essential sports information through its efficient delivery of live game results and upcoming match times and player information and instant sports updates.
The app has built a reputation for being lightweight, fast, and easy to use, which is a big deal when many sports platforms feel cluttered and slow. The application allows users to quickly check current events through its simple operation, which requires no complex navigation. The app has gained more users because its basic functions provide users with practical benefits that work seamlessly with their daily routines.
What Is the iOS App eTrueSports?
The iOS App eTrueSports is a sports tracking and update application designed specifically for iPhone users. The application unifies live score updates and match schedule details and player statistics and brief news bulletins into a single accessible platform. The application shares similarities with other sports applications but its unique feature lies in its complete presentation of all content. The interface of the application displays information in a well-organized manner that users can easily comprehend while they monitor scores and perform other tasks.
The system presents users with essential information through simplified access points which serve as its main operational component. The application operates with minimal impact on device resources which enables users to maintain their phone’s performance while using the app. More sports fans choose to use the application because it maintains an ideal balance between straightforward design and practical functionality.
Why eTrueSports Is Gaining Attention

The rise of eTrueSports did not come from a massive marketing push. The user base expanded naturally because customers discovered that the system operated better than competing solutions. The platform provides fast updates as its main advantage. Users receive immediate access to new scores and match updates because the system does not require them to manually update their display.
The system enables first-time users to navigate it effectively because users can access its main functions without needing to learn advanced features. The application enables users to access multiple sports leagues and events through its extensive sports coverage which eliminates the need for additional software installations. Users continue to use the application because it maintains stable performance during peak match hours while requiring minimal system resources and needing few app permissions. The application achieves success through its effective execution of essential sports tracking functions instead of attempting to transform the complete user experience.
At the same time, it’s worth being aware of topics like Why Zixyurevay Harmful: Understanding the Risks, which highlights important considerations around digital safety and awareness.
Live Score Tracking
The application uses live score tracking as its main feature. Users can follow matches in real time and see score changes as they happen. The updates deliver sufficient speed for fans to maintain their viewing pace because they can watch the game without television access. This feature is especially useful for people who need to work or commute or manage their everyday responsibilities yet want to watch their favorite teams play. The display presents essential match information which people need to see during a live match.
Match Timelines
The match timeline feature helps users catch up if they join a game late or miss key moments. Users can review essential events through the chronological list which displays significant occurrences. The match development becomes clear through the sequential display of goals and cards and other major actions. The content maintains its educational value while the audience receives complete information about the statistics.
Team and Player Statistics

The app offers team and player statistics for fans who want to explore more content. Users can view performance numbers, past match history, and upcoming schedules with just a few taps. The information presents itself through a straightforward design which prevents users from experiencing a complex analytics platform. The design serves to educate users while it protects them from feeling overwhelmed.
Notification Controls
One of the most appreciated features is notification control. Instead of sending constant alerts about every minor update, the app allows users to choose exactly what they want to be notified about. This can include goals, match starts, or other key events. That level of control prevents notification fatigue while still keeping fans informed about what matters most to them.
Sports News and Headlines
The app provides a sports news section which operates independently of its live data features. The updates present brief information about news stories and player movements and match outcome forecasts. Users can browse the format because it lets them keep track of current events during their briefest available times. The feature works together with live functions but does not create extra load for the primary display.
How to Download and Set Up
The first step to begin using eTrueSports requires no complicated procedures. Users can find the app in the App Store because it appears there within a short time frame. The installation process requires only a brief time because of the small file size. Users can explore the app before creating an account which they can do after opening the application. Users need to choose their preferred sports during the initial setup process because this selection determines their personalized home screen content. Users can establish their notification settings during this procedure although this step remains optional. The app provides a user-friendly onboarding process which enables new users to start using the application without facing any challenges.
Daily User Experience
The application provides users with a smooth daily experience which feels natural. The home screen usually displays live matches together with upcoming matches and brief news updates. Users can complete all their essential tasks within one minute because the layout provides them with quick access to information. Most users can navigate the system without difficulties because they need only a few system uses to learn its functions.
The system provides notifications at suitable intervals while preventing excessive notification dispatch for identical events. Users who like to analyze statistics will find the information presented in a structured format which enables easy comprehension. The app integrates into users’ everyday activities while maintaining their focus on essential tasks.
Security concerns are always worth noting, as highlighted in Is Fidzholikohixy Safe? A Comprehensive Analysis, which breaks down key aspects of platform safety and risk factors.
Who Will Enjoy eTrueSports
The application attracts various sports enthusiasts who follow different athletic competitions. The application provides score updates through its straightforward interface which enables users to access information fast. Multiple league followers can manage their entire watching experience from one central system. Fantasy sports players may also find the fast access to stats helpful when making decisions. People who prefer straightforward apps without complex settings or heavy resource use will likely find this one especially appealing.
Tips for a Better Experience
Users can enhance their experience with a few simple adjustments. Customizing the homepage to show preferred sports reduces unnecessary scrolling. Users can choose which notifications they want to receive which helps them stay informed without having their flow of work interrupted. Sports fans can navigate between their bookmarked teams and players to various sports events throughout the day. The match timeline shows all important events which helps users create a fast summary of the game without needing to see any live footage.
Safety and Privacy
Many sports apps raise concerns about excessive data collection, but eTrueSports keeps things more contained. The application does not request users to provide their personal data and it will not send them to any unsafe external websites. The login system feels standard, and most activity stays within the app itself. While no online platform can promise perfect security, the app’s approach feels cautious and reasonable for everyday use.
Common Issues and Quick Fixes
eTrueSports functions like other mobile applications because it experiences tiny operational problems. Users of old iPhones will experience longer loading times, but they can improve their performance through background app termination. The device will experience notification delays because it operates under Low Power Mode.
The match list sometimes experiences freezing problems, but users can solve this issue by refreshing through the pull-down action. The two problems which exist in this application are common problems which all mobile applications experience.
For a deeper look into evolving concepts and analytical perspectives, Dynamics of zaqrutcadty7: Implications and Interpretations presents a structured exploration of complex ideas and their broader significance.
Conclusion
The iOS application eTrueSports demonstrates that sports applications can attract dedicated users through basic functionality without needing extravagant features. The platform provides exactly what most fans desire through its quick live score updates and user-friendly interface and essential functionality.
The system enables users to monitor sports events through efficient methods which maintain their focus while using minimal device power. Users find it useful because they can manage their alerts while tracking multiple sports and accessing brief news summaries from a single location. The application achieves differentiation through its simple design and streamlined user experience which sets it apart from competing platforms that use complicated features.
The application provides a seamless user experience because it accommodates both casual game watchers and people who actively monitor multiple leagues. The sports application eTrueSports enables users to follow sports content with speed and simplicity through its dependable features which safeguard them against unnecessary interruptions.

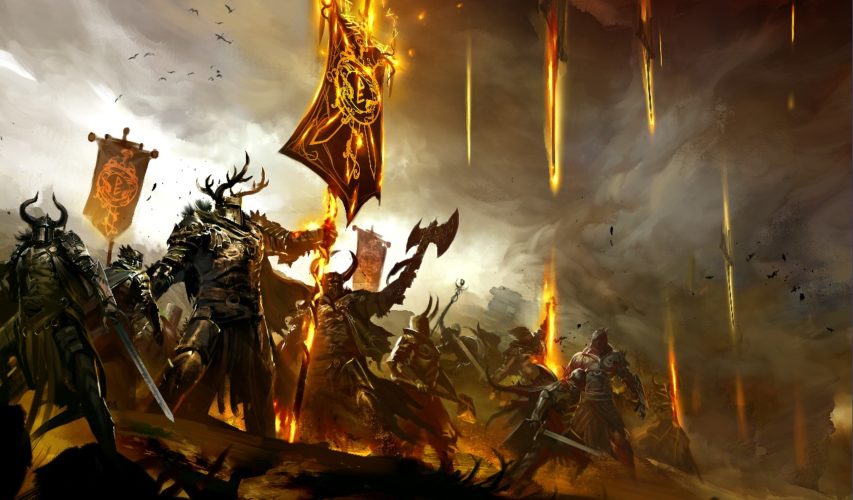
Gaming’s next chapter is almost here, with 2026 shaping up to be a landmark year for new releases. From cinematic adventures to competitive online titles, the games on the horizon promise innovation and excitement.
“The number of video game firms in Canada more than doubled in a decade, rising from 775 in 2013 to 1,628 in 2022. This increase was driven by Canadian-owned firms, primarily engaged in video game design and small firms with fewer than five employees. Revenue in the video game industry rose from $2 billion to $7 billion from 2013 to 2022″ (statcan.gc.ca, 2025).
As the gaming world looks ahead to 2026, anticipation is building for titles that could redefine gameplay, storytelling and player engagement. Developers are pushing boundaries with immersive worlds, refined mechanics and cross-platform play that connects millions. Whether you’re into narrative-driven epics or competitive online experiences, 2026 is shaping up to be one of the most thrilling years in recent memory.
Next-Generation Franchises Poised to Shape 2026
Some of the most anticipated titles of 2026 come from established franchises or franchises evolving into new directions. Games like Primary, a fast-paced platformer with intense puzzle elements, as seen in Unigamesity coverage, demonstrate how indie charm can still break through in a world filled with high-budget titles.
Another standout is Battle Arena, a competitive multiplayer experience that fosters social engagement and strategic collaboration. Such titles promise to blend classical mechanics with innovative design, appealing to long-time gamers and newcomers alike. Next-gen franchises will likely combine deep narrative arcs with engaging multiplayer components, making them integral to the gaming landscape of 2026.
Fans are watching how studios will expand universes and bring fresh energy to beloved characters, ensuring a wide variety of experiences across genres.
Technological Breakthroughs Driving Gameplay Evolution
2026 promises major technological leaps that could transform player interaction. Advances in AI, procedural world generation and adaptive difficulty will make games feel more alive and responsive. Streaming technologies are also set to improve, reducing load times and increasing accessibility across devices.
For example, browser and online experiences are increasingly seamless, with Unigamesity highlighting that many games now load instantly without downloads, a trend that could extend to larger titles by 2026. Enhanced physics engines, real-time ray tracing and haptic feedback integration are also expected to push immersion to new heights. These innovations mean worlds will feel more dynamic, battles more visceral and stories more impactful.
Narrative-Focused Titles Redefining Player Expectations
Storytelling remains a core strength of video games and 2026 is expected to deliver several powerful narrative experiences. Games like Ancient Quest, noted for transporting players through mythic landscapes with rich world-building, show how interactive storytelling can emotionally resonate with players.
Similarly, Island Explorer combines survival elements within a narrative framework that rewards exploration and player choice. These kinds of titles often blur the line between interactive fiction and traditional gaming, encouraging deep emotional engagement and replayability.
Expect developers to experiment with branching narratives, moral choice systems, and characters that grow with players, not just plot devices to move the action forward. Narrative evolution will be a hallmark of games that define 2026.
How Live-Service and Cross-Platform Games Will Dominate
Live-service models and cross-platform play are now staples in modern gaming and they show no signs of slowing down. Competitive online experiences like Team Fortress, which emphasise coordination among distinct roles and cooperative gameplay, are a great example of how multiplayer titles build vibrant communities.
These games constantly evolve through seasonal content, community challenges and ongoing updates, keeping players engaged long after the initial release. Cross-platform play also ensures friends can connect regardless of their device, lowering barriers and uniting communities worldwide.
Games like Crystal Connect, with its engaging jewel-matching puzzles and complex patterns, show that even simple mechanics can be elevated through innovative design and artistic flair. Meanwhile, Empire Builder, a strategic civilisation game, demonstrates how thoughtful gameplay can offer depth and long-term replay value.
In 2026, commentators expect more titles to embrace this model, building environments that reward long-term play, encourage social interaction and regularly introduce fresh content to keep fans invested.
The Broader Digital Economy
2026 is not just about the games themselves; it’s about the ecosystem surrounding them. Gaming continues to intersect with other digital entertainment sectors and even licensed platforms like top rated Canadian online casinos illustrate how interactive content spans beyond traditional games into online wagering and skill-based challenges. Independent reviewers have tested and evaluated hundreds of Canadian online casinos to bring you the best expert insights, exclusive bonuses and top real money games, offering players a broader view of digital play and entertainment.
This cross-industry influence means improvements in payment systems, security, social connectivity and streaming tech benefit gamers and online entertainment consumers alike. The growing synergy between gaming, esports and digital platforms points to a richer ecosystem in 2026.
2026 is shaping up to be a landmark year in gaming history. From narrative-driven epics to innovative multiplayer worlds, the titles on the horizon promise to reshape expectations and broaden what games can be. Technological leaps, creative storytelling, and cross-platform engagement will define the year, making it an exciting time for gamers of all types.
Whether you’re drawn to strategic conquests, cooperative arenas, or immersive single-player journeys, the games emerging in 2026 will offer something unforgettable. As developers push boundaries and players embrace new experiences, this year will likely stand out as one of the most influential in modern gaming.
-
 Guides6 years ago
6 Proven Ways to Get more Instagram Likes on your Business Account
-
Mainstream11 years ago
BioWare: Mass Effect 4 to Benefit From Dropping Last-Gen, Will Not Share Template With Dragon Age: Inquisition
-
 Mainstream7 years ago
How to Buy Property & Safe Houses in GTA 5 (Grand Theft Auto 5)
-

 Guides2 years ago
Free Fire vs PUBG: Comparing Graphics, Gameplay, and More
-

 Guides1 year ago
50+ Free Fire ID and Passwords Login List (Giveaway) 2025
-
 Casual2 years ago
8 Ways to Fix Over-Extrusion and Under-Extrusion in 3D Printing
-

 Other2 years ago
Ajjubhai UID: Free Fire Details & Earnings
-
 Mainstream13 years ago
Guild Wars 2: The eSports Dream and the sPvP Tragedy